VMware PowerCLI Integrated Authentication Issues

Recently we have been having an issue with VMware PowerCLI not passing through the users credentials when running Connect-viserver to connect to our vCenter servers.

This has been causing problems when trying to use scheduled task to automated reports and run remediation task like removing old snapshots or reporting on VMware Tools versions as it is prompting for credentials.

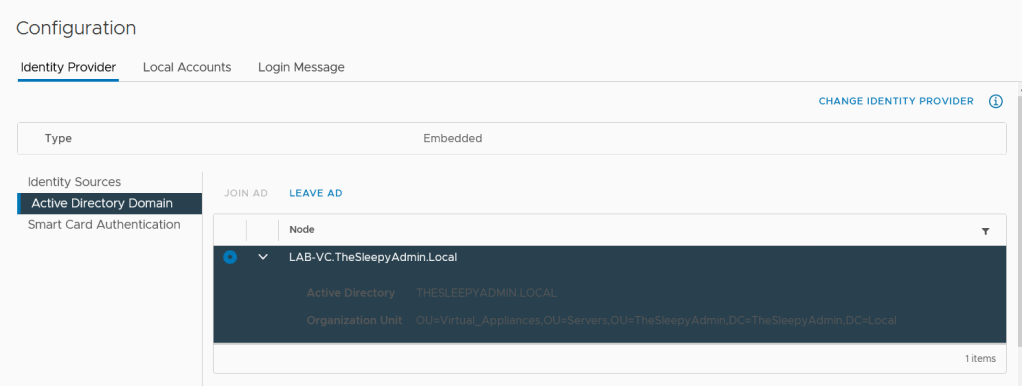
For integrated authentication to work, the vCenter servers needs to be setup to allow single sign on for the domain that you will be connecting from, so confirm that your Active Directory Identity source is added and that SSO works from the web client. If not, complete this first before trying to use PowerCLI with integrated authentication.

I have SSO configured and tested so this wasn’t my issue.

When using the older version of PowerCli version 6.5 and below we had no issue with integrated authentication and would connecting to vCenter server without prompting me for credentials.

We could continue to use the old version of PowerCLI but we would be missing out on improvement and new commandlets so I wanted to try and get the newer version working for automated task.

First we install the VMware.PowerCLI module using Install-Module VMware.PowerCLI, the current version is 12.1

When I tried to connect using this version of PowerCLI I get prompted for a user name and password and this is what is stopping my automated task from running.

There are a few ways to workaround the prompt and this can also be used to confirm if SSO is working correctly. One way would be to add credential store item that can be used for connecting.

To add this use the VICredentialstore commandlet.

New-VICredentialStoreItem -User domain\username -Password Password -Host vc.domain.local -File C:\Temp\vicreds.xml

This outputs the credential to an xml file that can then be imported and called using Connect-VIserver.

$logon = Get-ViCredentialStoreItem -File C:\Temp\vicreds.xml
Connect-VIServer -Server $logon.Host -User $logon.User -Password $logon.Passwor

This works but I don’t really want to have a xml file that has information saved to it and someone might remove the folder or file by mistake.

The other way would be similar but using a txt file with the converted to a secure string password but again this relies on a file which is not ideal and not really all that secure.

The last option and one that I wouldn’t recommend at all is to hard code a username and password in the script.

So now that we have gone through some work arounds I decided to have a look at the actually problem .

The above proves that authenticating against AD is working so I knew it wasn’t an account or SSO issue so it had to be an issue with PowerCLI itself.

I connect using a my user name and passwords and it connect without issue.

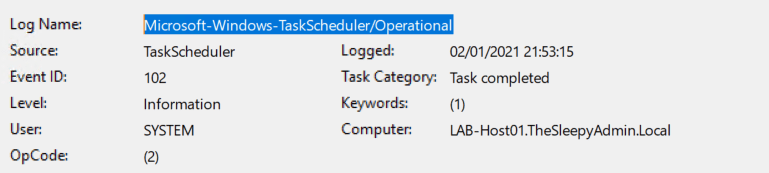
I then check the VPX log under /storage/log/vmware/vpxd to see if there are an issue but I didn’t see any issues.

Next I tried to use the -verbose parameter to return more information on what exactly connect-viserver was doing,

This then returned an error for TLS.

I next checked the settings on PowerCLI configuration settings.

To check the PowerCLI configuration use

Get-PowerCLIConfiguration

When checking the configuration the Invalidcerificaeaction was set to unset.

I changed this setting to warn instead of unset

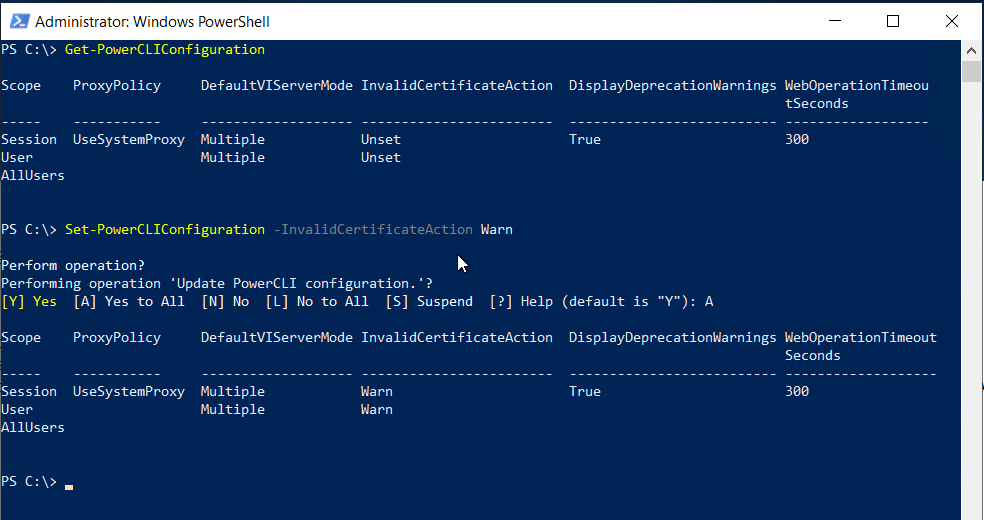
Once this setting was changed I can now connect to PowerCLI with integrated authentication, I do get a long warning message though I could set this to ignore and this returns no warning or error.

There are two ways around this instead of changing the above setting. One is to install the the certificate as a trusted root certificate so that the cert is trusted.

Or if you have an internal certificate authority you to replace the default VMware cert with an internal cert.

Once this is done the connection work without requiring manual intervention and my automated scripts can be run using scheduled tasks again with the latest version of PowerCLI. Hopefully this will be helpful to anyone else having this issue.

Microsoft Graph API Result Size Limit

Recently we have been running some Microsoft Graph API queries and were not getting back all the results expected.

Microsoft Graph seems to have a limit of 1000 results for signin logs, when the limit is reached graph will then start paging the result and adding them to @odata.nextLink property.

There is a Microsoft doc on paging in Graph.

Paging Microsoft Graph data in your app – Microsoft Graph | Microsoft Docs

There are different limits depending on the API.

Below is an extract from the paging doc.

Paging behavior varies across different Microsoft Graph APIs. Consider the following when working with paged data:

  • Different APIs might have different default and maximum page sizes.
  • Different APIs might behave differently if you specify a page size (via the $top query parameter) that exceeds the maximum page size for that API. Depending on the API, the requested page size might be ignored, it might default to the maximum page size for that API, or Microsoft Graph might return an error.
  • Not all resources or relationships support paging. For example, queries against directoryRoles do not support paging. This includes reading role objects themselves as well as role members.

The @odata.nextLink then needs to be called to get the addtional results.

When we run a query and the results are under the limit there will be two objects returned

@odata.context and value

If we run a query that goes over the max results limit of 1000 the value object is changed to @odata.nextLink

If we use count on the $Results variable it returns 996 items.

To query the addtional results we need to loop through each page to extract the results.

To loop through the results we can create a new variable with the @odata.nextLink and use while loop to go through the variable to get results from the pages.

When we do this the $results count go up to 1142

Below is the full script to get the addtional results.

$ApplicationID = ""
$TenatDomainName = ""
$AccessSecret = Read-Host "Enter Secret"


$Body = @{    
Grant_Type    = "client_credentials"
Scope         = "https://graph.microsoft.com/.default"
client_Id     = $ApplicationID
Client_Secret = $AccessSecret
} 

$ConnectGraph = Invoke-RestMethod -Uri "https://login.microsoftonline.com/$TenatDomainName/oauth2/v2.0/token" `
-Method POST -Body $Body

$token = $ConnectGraph.access_token

$LoginUrl = "https://graph.microsoft.com/v1.0/auditLogs/signIns"
$LoginResults = Invoke-RestMethod -Headers @{Authorization = "Bearer $($Token)" } -Uri $LoginUrl -Method Get

$Results = @()
$Results += $LoginResults.value

$Pages = $LoginResults.'@odata.nextLink'
while($null -ne $Pages) {

Write-Warning "Checking Next page"
$Addtional = Invoke-RestMethod -Headers @{Authorization = "Bearer $($Token)" } -Uri $Pages -Method Get

if ($Pages){
$Pages = $Addtional."@odata.nextLink"
}
$Results += $Addtional.value
}

If using the Microsoft Graph SDK the process is much simpler.

Once connect to using Connect-Mgraph we can then run

Get-MgAuditLogSignIn | 
Select-Object UserDisplayName,UserPrincipalName,IPAddress,AppDisplayName,ResourceDisplayName,ClientAppUsed,CreatedDateTime

The $signins results variable returns the same 996 results as we got with the above invoke-restmethod graph api query.

To get all the addtional results all we need to do is add the -All parameter and this should then return all results.

This shows the two different method to get the larger results from GraphAPI queries.

Upgrading ESXI Host From 6.7 to 7.0 Using vSphere Lifecycle Manager

In this post we will go through using vSphere Lifecycle Manager VLM to upgrade an ESXI host from 6.7 to 7.0. Lifecycle Manager replaces vSphere Update Manager in vCenter server 7.0 the process is pretty much the same as in VUM.

Before upgrading to a new version of ESXI first step should be to check VMware compatibility, this can be done by either checking the VMware compatibility matrix.

VMware Compatibility Guide – System Search

Or in VLM we can now use Hardware compatibility, This syncs a list of compatible hardware and this can then be checked directly on the host to verify if the ESXI host hardware is supported.

To check using VLM, Open the vSphere web client > Menu > Lifecycle Manager

We then need to sync the hardware compatibility list. Click Actions > Sync HCL

Once synced we can run a compatibility check from the Host > Updates > Hardware Compatibility

After the compatibility is all confirmed and no issues are found, we can go ahead with the upgrade.

Next we need to download the ISO image for ESXI 7.0 that will be imported to VLM and used in the upgrade baseline.

Download VMware vSphere – My VMware

To import the ISO go back to VLM > Imported ISOs > Import ISO

Click browse and select the ESXI ISO that was downloaded earlier.

The ISO will then start to import.

The ISO should now show under Imported ISOs

Next we need to create a new upgrade baseline, this can either be done under baseline or by selecting the image and clicking on New Baseline.

Give the baseline a name

Select the ISO to be used

Click next and finsh off the baseline

Check baselines to confirm the creation has completed.

The baseline can be assigned to the host individually or the cluster. I am going to apply to the cluster. Go to the Cluster and select Updates > Attach.

Select the upgrade baseline.

We can check the compliance for the baseline for all host in the cluster.

To remediate you can either do this from the cluster or on the individual host. I will remediate from the host itself.

Go to the host, Select Updates > Baseline > Upgrade Baseline > Remediate

Accept the end user agreement.

The upgrade will do a remediation pre check before allowing the upgrade.

Once you click Remediate, the upgrade task will start

The host should now reboot and start the upgrade.

When we check the baseline the host should now show as compliant and running ESXI 7.0.

Upgrading a host using VLM is a straight forward process and makes it easy to keep your ESXI host at the latest release version.

Windows Query Remote Group Membership Using PowerShell

We needed to do an audit on privileged group membership on workstations. There are many way to do this but using PowerShell to query WMI remotely was the method that we choose as we had to do a few thousand and I wanted to do the checks in groups. .

I decided to write a script that will take the list of devices to be checked from a txt file and then use parameter for the export path and groups to be search.

In this script we will use the class Win32_Group below is a link to the Microsoft Docs

Win32_Group class – Win32 apps | Microsoft Docs

When querying WMI we can use filters to limit the results. If you run query without filtering the command will return all groups even those in AD. See below command and the returned results.

Get-WmiObject  -Class Win32_GroupUser | Select-Object GroupComponent,PartComponent,PSComputerName

If we use a filter we can then reduce these by using domain which will be the local machine name and the local group name.

Get-WmiObject -Class Win32_GroupUser -Filter "GroupComponent=""Win32_Group.Domain='LAB-Host01',Name='Administrators'""" | Select-Object GroupComponent,PartComponent,PSComputerName

Now that we have a filter we can use variables to specific the host name from the text file with computer names and group names.

In the script these will be set using the complist and groups variables.

Below are two examples of how the script can be run against one group or multiple groups

.\Get-RemoteGroupMembers -CompList c:\Temp\Comps.txt c:\Temp\Results -groups “Administrators”

For multiple groups just add a , between the names and double or single quotes if there are spaces in the group name.

.\Get-RemoteGroupMembers -CompList .\Comps.txt -exportPath .\ -groups “Administrators”,”Remote Desktop Users”

The full script is on my github page. As always any scripts should be tested before run in production.

Scripts/Get-RemoteGroupMembers at master · TheSleepyAdmin/Scripts (github.com)

How to Update vCenter 7.0 Virtual Appliance

The process of patching vCenter server appliance has become a lot easier in recent years. Keeping vCenter fully up to date is important for stability and security.

In this post we will go through the process of patching for vCenter 7.0 to the latest version using the GUI connecting to the internet. You can also update using command line or by downloading and mounting the ISO image.

First we need to logon to the admin management console.

https://vcenter.domain.local:5480

Use the root logon that was configure when setting up the appliance.

First steps is to confirm there is a valid backup of the appliance.

Click backup now.

There is an issue with vCenter 6.7U2 and above where it fails on SMB with SMB location is invalid if SMBv1 is disabled. So if you get that error you can just enabled SMBv1 temporarily or enabled OpenSSH on Windows to allow SSH connection which is what I would do in production.

Once completed the backup should kick off.

I also usually take a snapshot as that is the quickest recover option.

Once we have a back up, we can now continue with the updating the appliance. The current version of the appliance is 7.0.0.10100.

Go to Update and click check updates

Once the check is completed select the latest patch. Select either stage only or stage and install if you want the update to be installed straight away. The version we will be updating to is 7.0.1.00200.

Accept the end user agreement.

This will run a pre-check on vCenter before the upgrade will continue. Once no issue are found put in the administrator’s password.

Tick the box to confirm that a backup has been completed.

The install will now start and can take a hour or so to complete.

During the upgrade there will be outages to vCenter while services restart.

a

vCenter should now be update to the latest version.

VMware vRealize Log Insight Adding Windows Servers

In the last post we went through querying logs using the different filter options and how to create a dashboard using the queries in vRealize Log Insight (vRLI).

Part 1: VMware vRealize Log Insight Install and Configure – TheSleepyAdmins

Part 2: VMware vRealize Log Insight AD Authentication and Role Based Access – TheSleepyAdmins

Part 3: VMware vRealize Log Insight Query Logs and Creating Dashboards – TheSleepyAdmins

In this post we will go through adding a Windows server agent and adding the content pack

To add a server we need to download the agent by logging on to vRLI > Administration > Agents and click on download log insight agent.

Select the required agent to be downloaded.

Once downloaded copy the installer to the server and run.

Enter in the FQDN or IP address for the vRLI server is not already there and click install.

To install the agent using command line the below can be used just need to update the path and msi file name.

Path to msi\VMware-Log-Insight-Agent-8.2.0-16776561_*.msi /quiet

You can also add some command line switches to change the default install

Path to msi\VMware-Log-Insight-Agent-8.2.0-16776561_*.msi SERVERHOST=LAB-vRLI.thesleepyadmin.local LIAGENT_AUTOUPDATE=yes /quiet /lxv* vRLI_Agent_install.log

Command-line Options for vRealize Log Insight Agent Installation on Linux (vmware.com)

Once installed, the agent should now show under the agent tab in vRLI.

Next we need to add the Windows content pack to vRLI, Go to Content Packs and search for Microsoft Windows

Click on the content pack and install

Now that the content pack is added, we can copy the Microsoft – Windows to a new group so that its assigned to Windows agents.

Select copy template

Give the Agent group a name and description

Once copied you can change the settings if required or turn off some events if there not required, in this we will be leaving them as default.

Add a filter so that the Windows servers are added to the agent group. This can be done by Hostname, IP, OS or version.

Click save new group to finish.

It can take a little while for the agent configuration to update and for events to start being sent.

Once they do start to send events you should see the counters update.

We can now go to Interactive Analytics and query the events logs.

If there are different application specific events logs that need to be added they can be added to the existing group or a different agent group can be created.

To add addtional event logs to the existing agent group, go back to the agent group.

Go to build and on Windows Event Log click new.

Give the Windows Event Log a name

Copy the event log name from Windows event viewer and put this under Windows Event Log Channel in vRLI.

Click save agent group.

Now once a task is run the events should now show in vRLI.

This concluded the series on vRealize Log Insight, going through this shows that log insight is a good tool for centrally managing and monitoring system logs and events and can be used for VMware, Windows and Linux servers. Hope that this series of post have been helpful.