In this post we will be going through the steps required to create and use group managed services account (gMSA) with a scheduled task.
gMSA are a managed domain account that provides automatic password management. These accounts provide a single identity to use on multiple servers.
By using a gMSA account, we can configure services / scheduled tasks with the gMSA principal and Active Directory handles the password management.
gMSAs where introduced since Windows Server 2012.
There are pre-requests to use gMSA that most domain should already meet, this is AD Schema of 52 (2012) and at least one 2012 DC.
Once we meet the minimum scheme the second part is that we have to create the Key Distribution Services Root Key.
This involves running a command in PowerShell, we can the below command to confirm that a kds root key doesn’t exist already.
Get-KdsRootKey

To create the KDS run
Add-KdsRootKey –EffectiveImmediately

Now when we check KDS again we can see the root key.

Now that we have the KDS root key we can create the gMSA
We can add the host either individually or using a security group, we will be using a group in this post as it will be easier to mange and just need to add any additional servers to the group to allow access.
I have create a group called tskgmsa_access to use and added some server computer accounts.
The below command is used to create the gMSA account (The DNS is required by the command but not needed for running scheduled task so you can use whatever name as it doesn’t need to be resolvable)
New-ADServiceAccount -name gMSAName -DNSHostName DNSName -PrincipalsAllowedToRetrieveManagedPassword "Group or Hosts"
If you receive the below error New-ADServiceAccount : Key does not exist
this is probable due to the KDS key not be being actives yet and you will have to wait around 10 hours before trying to create the gMSA.
There is a way to force this using the below command but I didn’t want to force it and just left the server over night.
Add-KdsRootKey –EffectiveTime ((get-date).addhours(-10))

Once we wait the 10 hours the command should now run without the error.

The accounts are create under the Managed Services Accounts OU.

Note: To add additional accounts or groups to gMSA account you need to append the existing group or the command will remove the existing account
If running the below the new object will be added and remove the existing objects.
Set-ADServiceAccount -Identity gMSA_Account -PrincipalsAllowedToRetrieveManagedPassword "NewAccount$"
Instead we need to run this command to add the new object and kept existing object.
Set-ADServiceAccount -Identity gMSA_Account -PrincipalsAllowedToRetrieveManagedPassword "ExistingAccount$", "NewAccount$"
If we need to get a list of the existing object we can use.
Set-ADServiceAccount -Identity gMSA_Account -Property PrincipalsAllowedToRetrieveManagedPassword
We can add the account to a security group to give more rights, this could be used if the account needs admin right to do a specific tasks.

The Microsoft documentation says that you need to install RSAT tools and run Install-ADServiceAccount but I didn’t have to do this for scheduled task to run.
To allow the account to run a script we need to add the account to the logon as a batch job under user rights assignment. This can either be done using group policy or using secpol.msc.
I used secpol as i only have two servers to configure.

To test we will create a scheduled task that will out put text to a log file.
Below is the script file that will be run.

To use the gMSA account we will create the task using either PowerShell (Run as administrator as this required elevated privilege’s) or the task scheduler GUI. In this example we will use PowerShell.
Below is the command I used.
$arg = "-ExecutionPolicy Bypass -NoProfile -File C:\scriptpath\script.ps1"

$ta = New-ScheduledTaskAction -Execute C:\Windows\System32\WindowsPowerShell\v1.0\powershell.exe  -Argument $arg

$tt = New-ScheduledTaskTrigger -At "Time to Run"

$ap = New-ScheduledTaskPrincipal -UserID Domain\gMSA_AccountName -LogonType Password

Register-ScheduledTask gMSA_Test_Task –Action $ta –Trigger $tt –Principal $ap
If you get incorrect users or password and only recently added the computer account to the security group, the server will need a reboot to pickup the membership.


If creating in the GUI you will probable get an error while searching for the gMSA account.
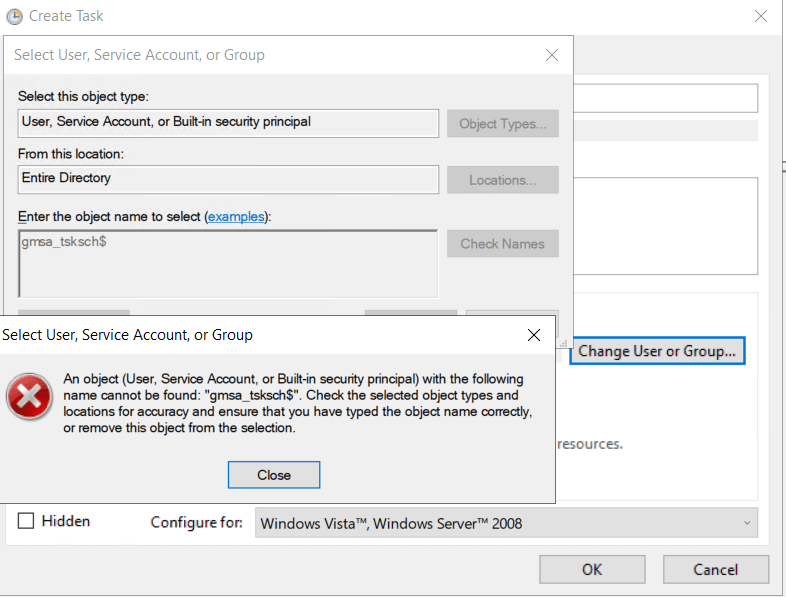
To get the search to work correctly we need to remove user and built-in-security principals from the search object types and leaving just service accounts.

Next we can search for the gMSA account.

Next we need to run the task and confirm data is written to the log. From the task events we can see the account used is gmsa_tsksch$.

We can also see the authentication on the domain controller.

When we check the logs folders we can see the text files are created.

This has been a overview of creating and using a Group Managed Service Account for running scheduled tasks.


 Copy the code and click on the enter code hyperlink and enter the code


 We can also now connect to the VM using integrated RDP console in WAC

 Accept the terms.


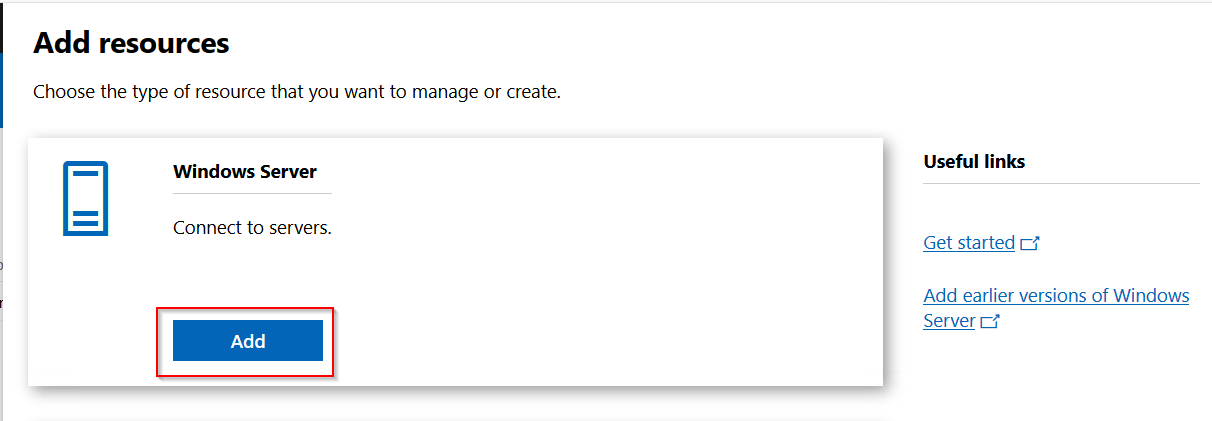
 To add a server click Add.
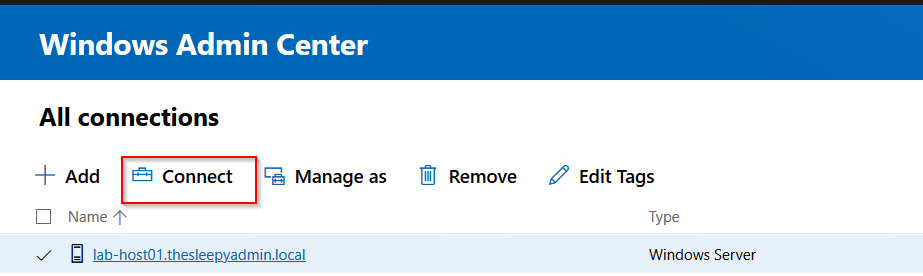
 Click search active directory and put in the server name.
 When connecting to servers, to allow single sign on there is an additional command that need’s to be run. If this is not done you will see the below warning when connecting.
 The above command adds the admin server to the below attribute.
