
With some of the recent critical vulnerability’s for both VMware and Log4j vulnerability this is has shown again that having vCenter open on the internet is not a good idea as it leave a big target for hackers to try exploit.
There are several ways to avoid having vCenter directly available on the internet, in this post we will be going through publishing using the Microsoft Azure Application Proxy. This will be using Azure AD as an authentication source and we can add addtional security like MFA.
First before we can use the Azure Application Proxy we need to make sure we have an Azure subscription and the appropriate license types. The application proxy is available for users that have either a Azure AD P1 or P2 license.
Once all the pre requisite are meet we can install the Azure Application Proxy, we will be using a Windows Server 2019 VM.
For Windows Server 2019 we need to disable http2 protocol, to disable run the below command from PowerShell.
Set-ItemProperty 'HKLM:\SOFTWARE\Microsoft\Windows\CurrentVersion\Internet Settings\WinHttp\' -Name EnableDefaultHTTP2 -Value 0
To download the installer, logon to the Azure portal > Azure Active Directory > Application proxy.
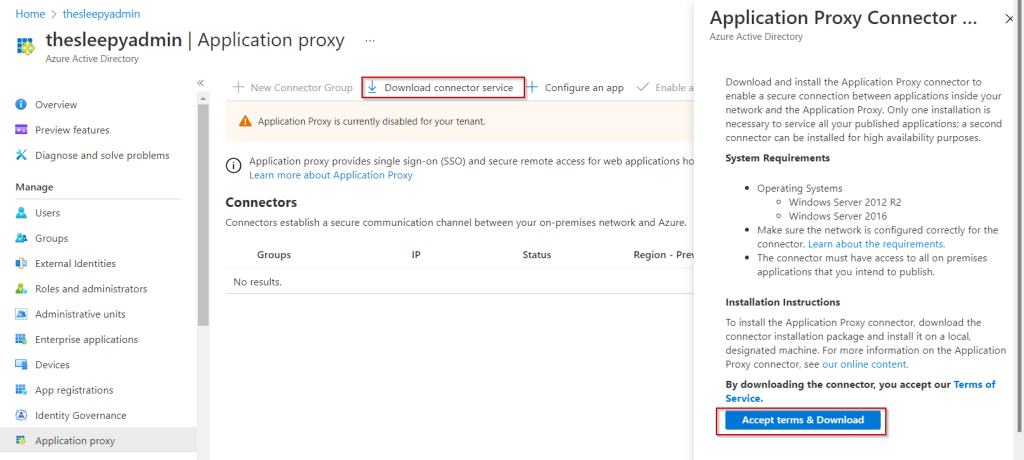
Once downloaded run the installer on the server that will be used for the app proxy. To register the connector the minimum rights is to be part of the application administrator role in Azure.
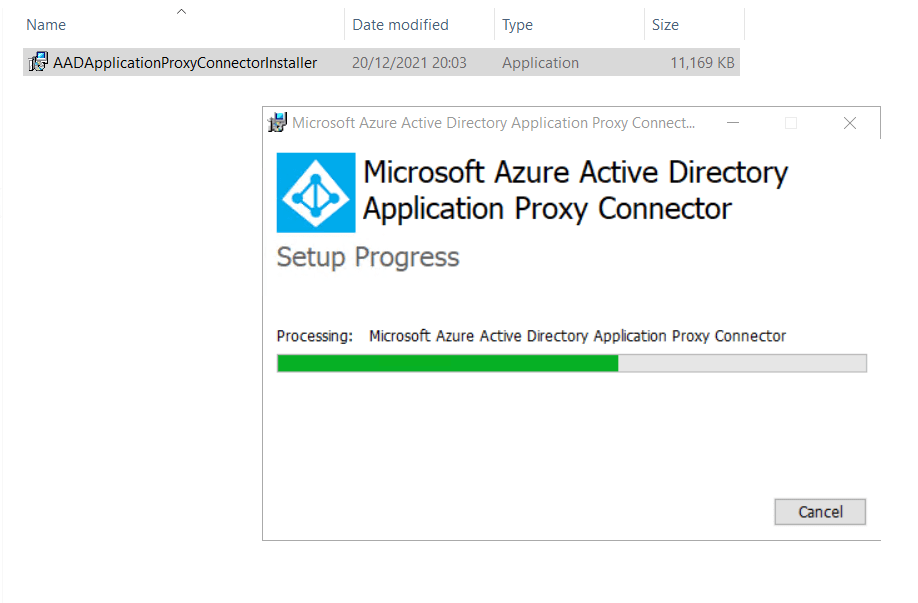
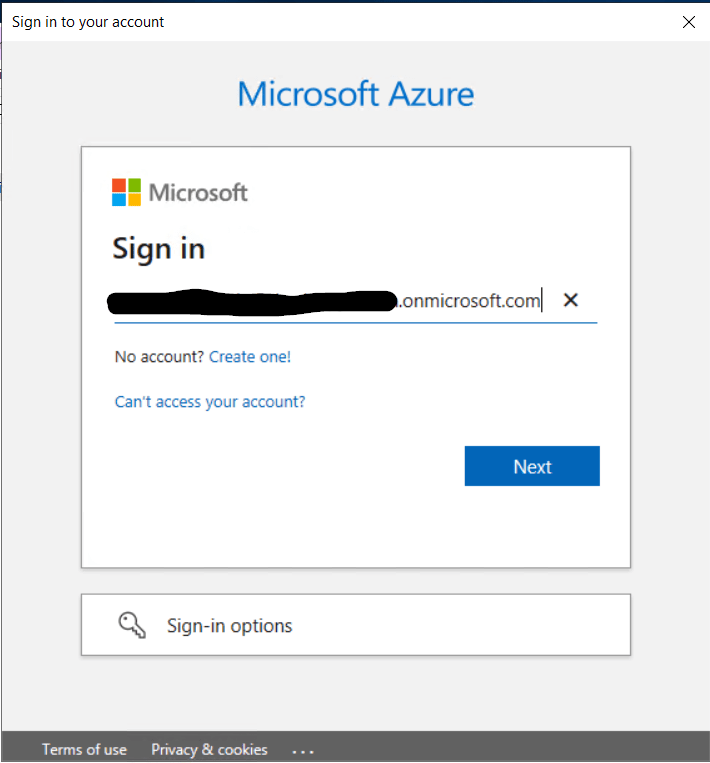
During the install we will be prompted to enter details for an account that has the correct permissions.
The install can take a minute or two to finish.

Once the install has completed the Azure Application proxy connector should show in Azure.

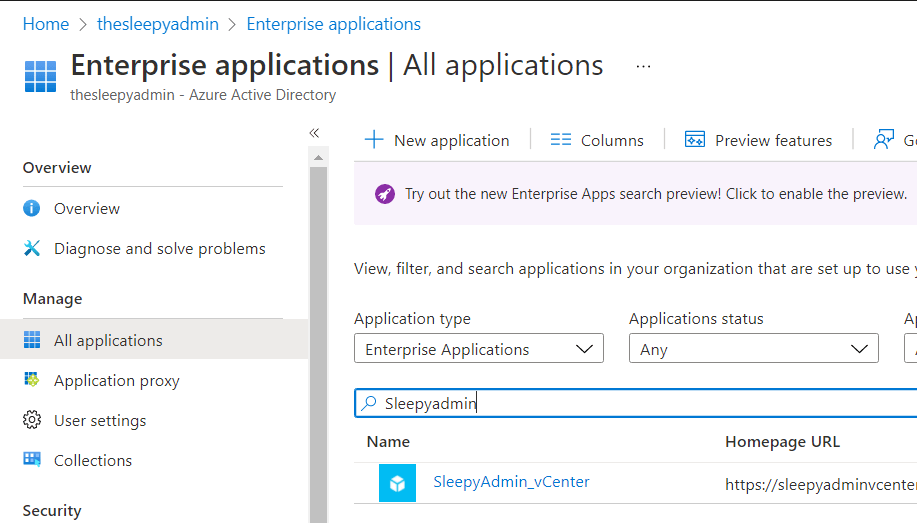
Now that we have the proxy connected to Azure, we will need to register the enterprise application.
Go to Azure AD > Enterprise applications > create your own application
Give the application a name and click create.

Next
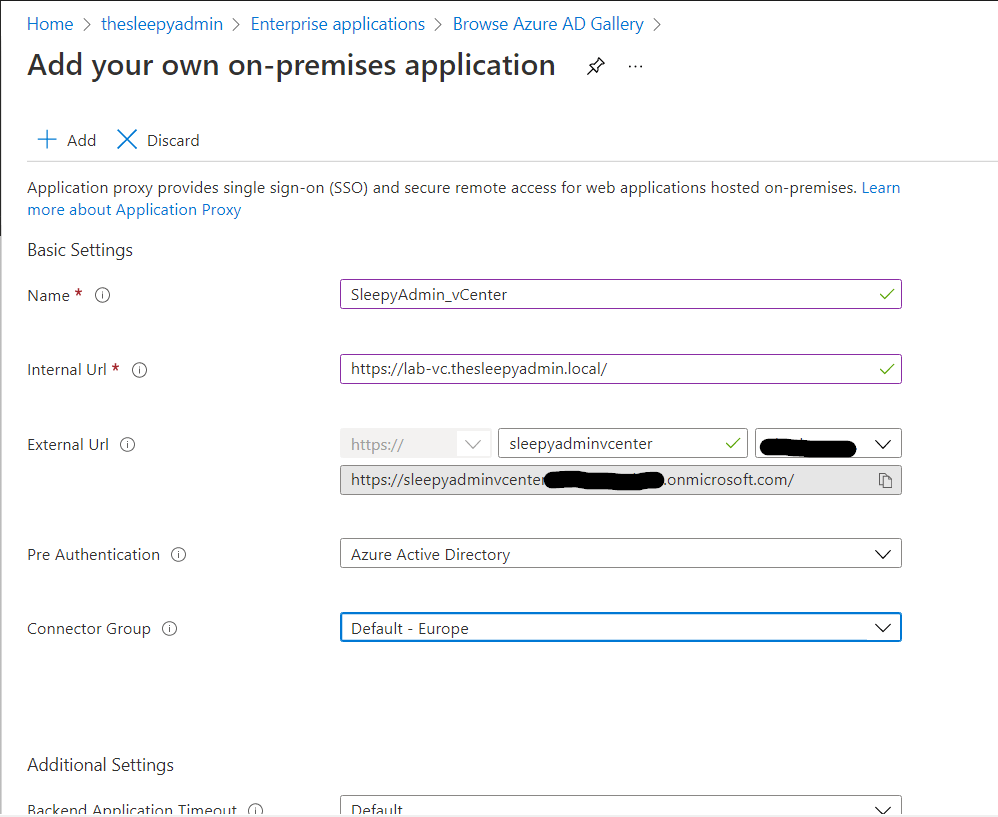
- Give the app a name
- Add in the internal URL for vCenter
- Set external URL this can either be an msappproxy.net address or custom domain named
- Set the pre authentication to either Azure AD or passthrough (to use MFA or conditional access policy set to Azure AD)
- Set the connector group
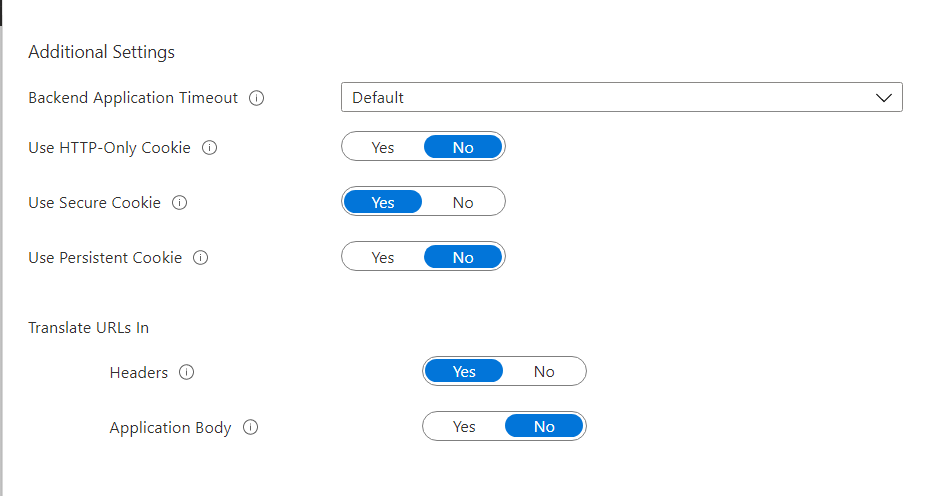
I left the addtional settings as the defaults. If the internal and external URL are different (its recommend from Microsoft to use the same DNS address), then to allow the redirect set the translate URLs in > Application Body to yes so allow link translation from the external to internal URL.
Click create, the app can take a few minutes provision.
We can restrict access to the app by using security groups or induvial users access.
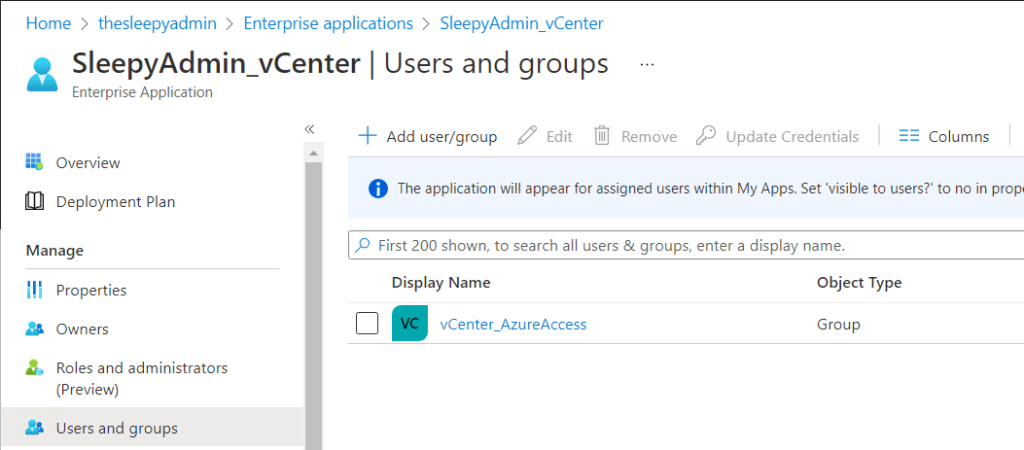
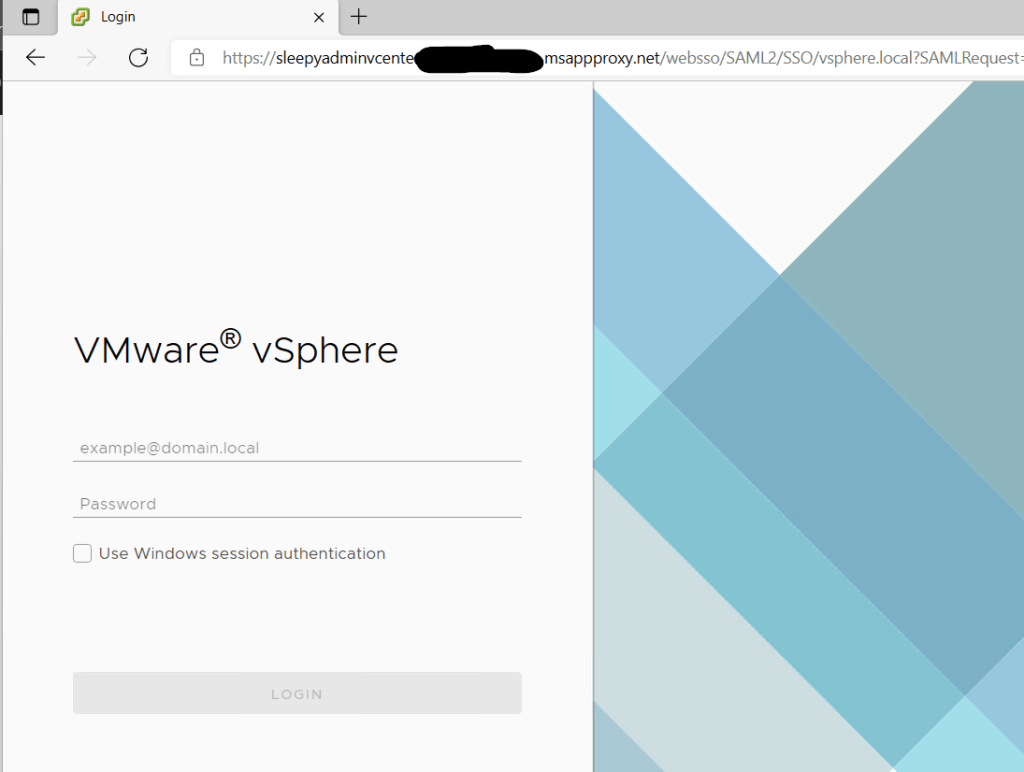
Once we have setup the access group we can now connect to the external URL.
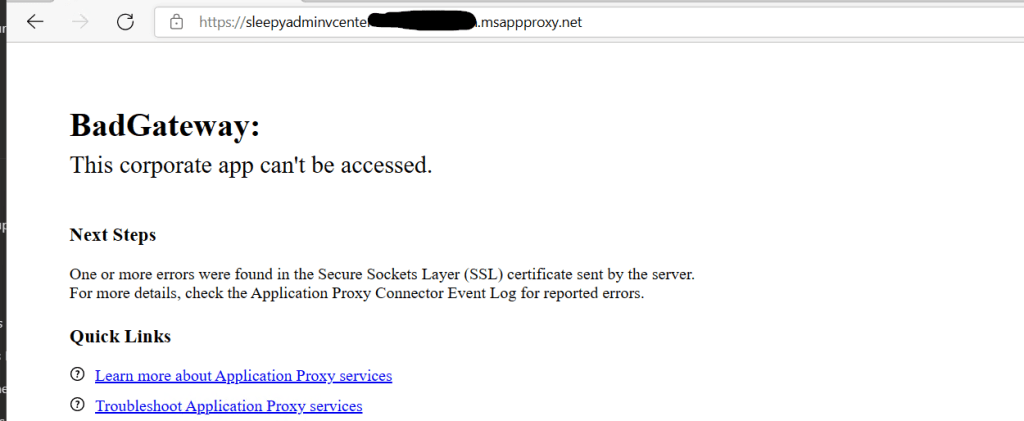
If the internal application is using an self singed cert or un trusted certificate authority, then the cert will need to be add to the trusted root cert store on the application proxy server.
This is the TLS error:
There should also be event log 13001 log under Applications and Services Logs/Microsoft- AAD Application Proxy Connector/Admin.
Download the root CA cert from vCenter and install to the trusted root on the server that has the Azure Application Proxy connector installed.

The second option is to use a custom SSL cert for vCenter, I have done a previous post on how to install a custom cert.
Set Custom SSL Certificate on VMware vCenter 6.7 Appliance using Windows CA
After this has been completed the page should now load without issue using the external Azure msapproxy address.
If the application proxy is set to use pre authentication then users will be redirected to the sign in page for Azure and be subject to any conditional access policies.
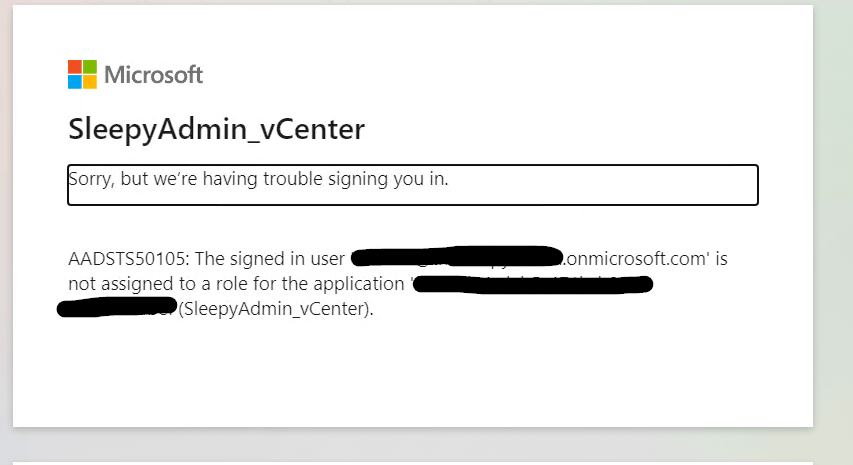
When connecting from an account that has not been give access rights they will not be able to connect.
The VMware remote console does not work using the Azure Application proxy as it requires both port 443 and 902, the application proxy can’t connect on 902 so the connection fails.
