Windows Server 2022 RDS HA Broker: Privilege not held

I have been building and setting up some new Windows Server 2022 RDS farms recently and ran in to an issue when adding a second RDS connect broker after configuring High Availability.

The server would install the broker role and then fail to configure. This would return the below error.

The list of joined nodes could not be retrieved on servername. Privilege not held.

RDS Broker Error

I was also getting EventID 32814 and 4119 in the Microsoft-Windows-Rdms-UI/Admin event logs.

I enabled the debug logging also but this only returned the same error as where showing in the event logs.

https://learn.microsoft.com/en-us/troubleshoot/windows-server/remote/log-files-to-troubleshoot-rds-issues

To fix the issue I had to logon to the server I was trying to add as a secondary broker and remove the below registry value.

Make sure to backup the registry key before deleting any values.

HKEY_LOCAL_MACHINE\SYSTEM\CurrentControlSet\Services\Tssdis\Parameters\DBConnString

Tssdis Service Registry Key

After deleting, I had to remove the RDS broker roles from the server that failed to install and reboot.

Then I tried the install again and this time it completed without issue.

This seems to be a bug in Windows Server 2022.

Remove RDS Profile from AD PowerShell

I was having a issue with slow logon times and temporary profile when users where logging on to an Windows RDS 2012 farm. I had a look at the issue and it was down to the RDS profile path in AD being set to use an old decommissioned server.RDS1

Once I found the issue, I need to figure out how many users where affected so the easiest way I could do this was to use PowerShell.

Below is the report script that I used.  The distinguished name used in Get-ADUser -searchbase will need to be update and the export path.  (Test before running any script and also check the quotes and doubles quotes when copying) 

## Get list of Users
$RDUsers = Get-aduser -SearchBase “OU=TestUsers,OU=Users,DC=Domain,DC=Local” -Filter *

## Set Results Array
$Results = @()

foreach ($user in $RDUsers){
$RD = [ADSI]”LDAP://$($user.DistinguishedName)”
if ($RD.Properties.Contains(“userParameters”)){

$profilepath = $RD.psbase.Invokeget(“terminalservicesprofilepath”)
$profileHome = $RD.psbase.Invokeget(“terminalServicesHomeDirectory”)
$props = @{
UserName = $user.SamAccountName
RDSProfile = $profilepath
RDSHome = $profileHome
DistinguishedName = $user.DistinguishedName
}

$Results += New-Object psobject -Property $props
}

else {
Write-Host “No UserParameters set on” $user.SamAccountName -ForegroundColor Green
}
}
$Results | Export-Csv C:\Temp\Logs\RDSProfile.csv -NoTypeInformation

RDS2

Once the script has completed the results will be export to a CSV with all user and there profile pathsRDS3Once we have the list we can either remove manually or the better option use the CSV and remove the profiles using the invokeset method.

Below is the script I used. The script could be run against all AD users but I prefer to limit the amount of object I have to run against. (This will replace values on users so should be fully tested before apply to large amount of users.)

$RDProfile = Import-Csv -Path C:\Temp\Logs\RDSProfile.csv
foreach ($RDU in $RDProfile){
Write-Warning “Removing Profile from $($RDU.UserName)”
$RD = [ADSI]”LDAP://$($RDU.DistinguishedName)”
$RD.psbase.Invokeset(“terminalservicesprofilepath”,”$null”)
$RD.psbase.Invokeset(“TerminalServicesHomeDirectory”,”$null”)
$RD.setinfo()
}

RDS4

After the script has run the profiles should now be cleared.RDS5

Remote Desktop Services 2012 R2 Deployment Part 3

In the last post we setup the RD connection broker HA to add additional resilience to the RDS deployment. In this post we are going to create and configure RDS collection.

To create a collection go to

Server Manager > Remote Desktop Services > Collections

Click on tasks and Create Session Collectionrdsc3

rdsc2

Give the collection and Namerdsc4

Select the required session hosts that will be used for this collectionrdsc5

Add user group that will have access I have left as domain users but this can be change to any security group to restrict accessrdsc6

In this setup we wont be using server profile disk but if this is required just enable and select a network location to save the VHDX user disks for the users profilesrdsc7

Click next and confirm all setting are correct continue with the deploymentrdsc8

Once this is completed we can now see the collection

Next step is to configure the session collection settings.

Select the collection and go to task Edit Propertiesrdsc16

First tab is just for changing the Name, adding a description and showing the session collection in RD web accessrdsc17

Second tab is for user / groups that will have access to the specific collectionrdsc18

Security allow you to change the security layer and encryption level. The default is negotiate (This will use the most secure layer that is supported by the client. ) and client compatible (This encrypt’s to the max strength that the client supports.)

rdsc19

To change session time out go to session. I am going to end disconnected sessions after 3 hours, never disconnect active sessions and set idle session limit to 3 hoursrdsc9

Load Balancing can be changed to session limits or prioritize one server over another by change Relative weight value or Session Limit value. In this case we will leave the defaultsrdsc10

Allow or deny redirction of local resource to the RDS session host ie Audio devices, local disk, printer .etcrdsc20

The last tab is to enable or disable user profile disk and specify network location and setting to be save to the profile disk. rdsc21

Once the collection is created and all setting are configured, we should now see the collection show in the RD web page.

RDSc12.png

click on the collection to launch the session and you should see the connection broker HA DNS address show as the connection address on the RDP session

rdsc13

In part 4, we will look at customizing the RDS web page and deploying the RDS licencing role.


Remote Desktop Services 2012 R2 Deployment Part 2

In the last post we setup the two RDS server that will be used for RD web access, connection broker and sessions hosts. In this post we will go through setting up RD connection broker HA to give more resilience to the RDS deployment.

To add connection broker HA we need to have server with SQL 2008 R2 or above and have a load balancer or DNS round robin to redirect traffic. I am using SQL 2014 with just the database engine and management tools selected. I have used a separate SQL server / RDS licensing for this as I don’t want the database on either of the current RDS servers.

I am going to use DNS round robin for redirecting traffic to both brokers as I don’t have a load balancer setup so I setup the below 4 DNS records on my internal DNS serverrdsbrokerha12

Once the database server is setup we need to create a security group and add the two RDS server that will be used as connection brokers. rdsbrokerha20

Once this group has been created we can set up the SQL permissions. Open SQL management studio on the database server and create a new login for the group

rdsbrokerhardsbrokerha1

Give dbcreator access as this will be required when setting up the HA deploymentrdsbrokerha2

To connect to the database SQL Server Native client is require on both the RD connection brokers. The latest version of this client is from SQL 2012 and can be downloaded from Microsoft : https://www.microsoft.com/en-us/download/details.aspx?id=50402

Once the client is installed go to Control Panel\All Control Panel Items\Administrative Tools and go to ODBC Data Sources (64-bit). Click Add and select SQL Server Native Client 11.0rdsbrokerha3

Enter in a Name, Description and SQL server that the permission where setup for the security group aboverdsbrokerha4

Leave as integrated windows authenticationrdsbrokerha5

Make sure that the application intent is readwrite the rest of the setting can be left as defaultrdsbrokerha6rdsbrokerha7

Once completed run a test to make sure that the database can be accessedrdsbrokerha8rdsbrokerha9

Once this is completed on both RD connection brokers we can start to set up the HA deployment.

Go back to the RDS deployment page and right-click on RD connection broker and click Configure High Availabilityrdsbrokerha10

Database connection string: (We need to put in SQL server name & the database name that will be created during the deployment.)

DRIVER=SQL Server Native Client 11.0;SERVER=<name of SQL server>;Trusted_Connection=Yes;APP=Remote Desktop Services Connection Broker;DATABASE=<name of database>

Folder to store database files: (I used the default SQL location)

Add in DNS Name: HARDSBroker.Lab.local

rdsbrokerha13

Next page is just to confirm all the settings are correctrdsbrokerha14rdsbrokerha15

Once HA has been configure we can now add the additional connection broker. Right click on RD connection broker and click Add RD Connection Broker Serverrdsbrokerha16

Select the required serverrdsbrokerha17

Click Add rdsbrokerha18

Once completed both server should now show the RD Connection Broker role as installed.rdsbrokerha19

In part 3, we will go over creating  and configure RDS collections


Remote Desktop Services 2012 R2 Deployment Part 1

I recently had a request to build a new Windows Server 2012 R2 RDS farm as the existing single Windows server 2012 RDS deployment as it was crashing and users where getting a bit angry. So I decided to build out the deployment on my test domain to make sure it would work out as expected.

I will be using three servers for this deployment as I want to co-locate some roles as to keep the number of servers to a minimum as this is a small 20 users setup.

I have two servers that will be RDS session host, connection brokers and RDS web access and one that will be used later as the licensing and SQL server for RDS broker HA setup.

To start we need add all servers to server manager on one of the RDS servers. rds1rds3

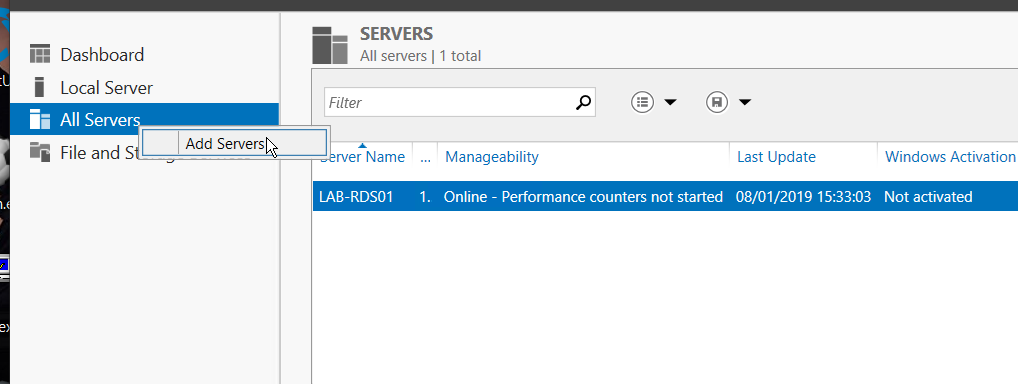
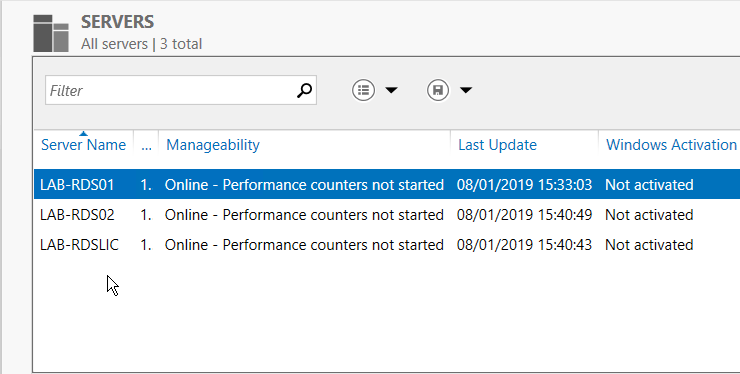
Once all servers are added to server manager and showing as online we can start to install the RDS roles.

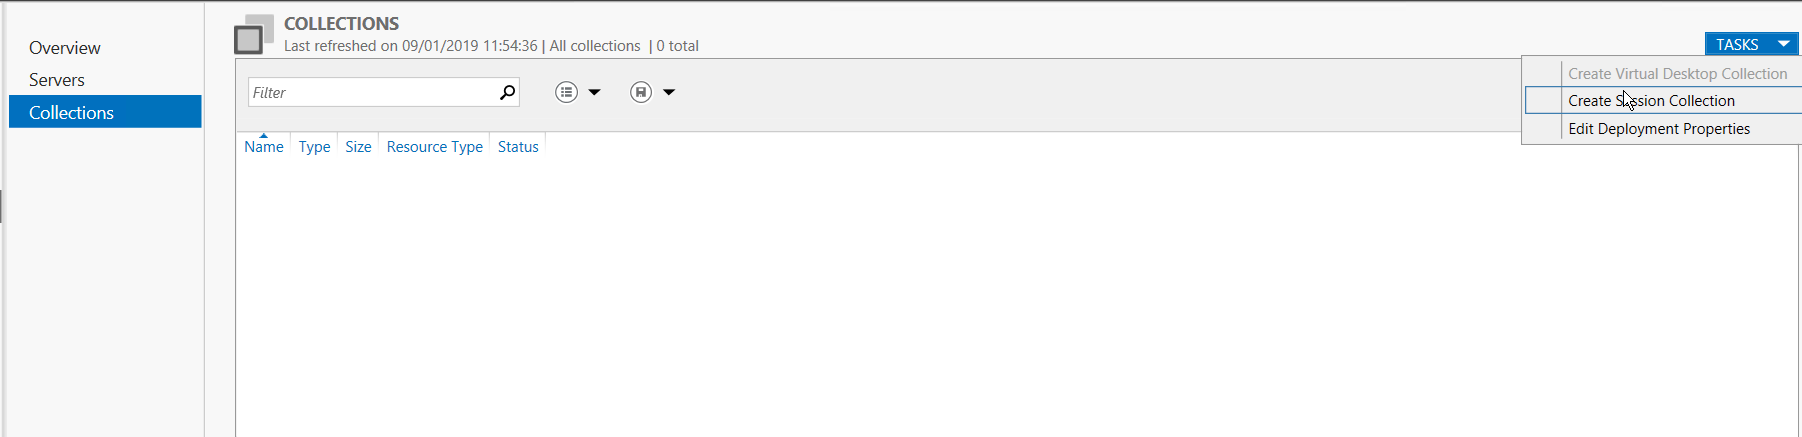
Go to mange on the top right of server manager and click add roles and features

On the Installation type select Remote Desktops Services installation. rds4

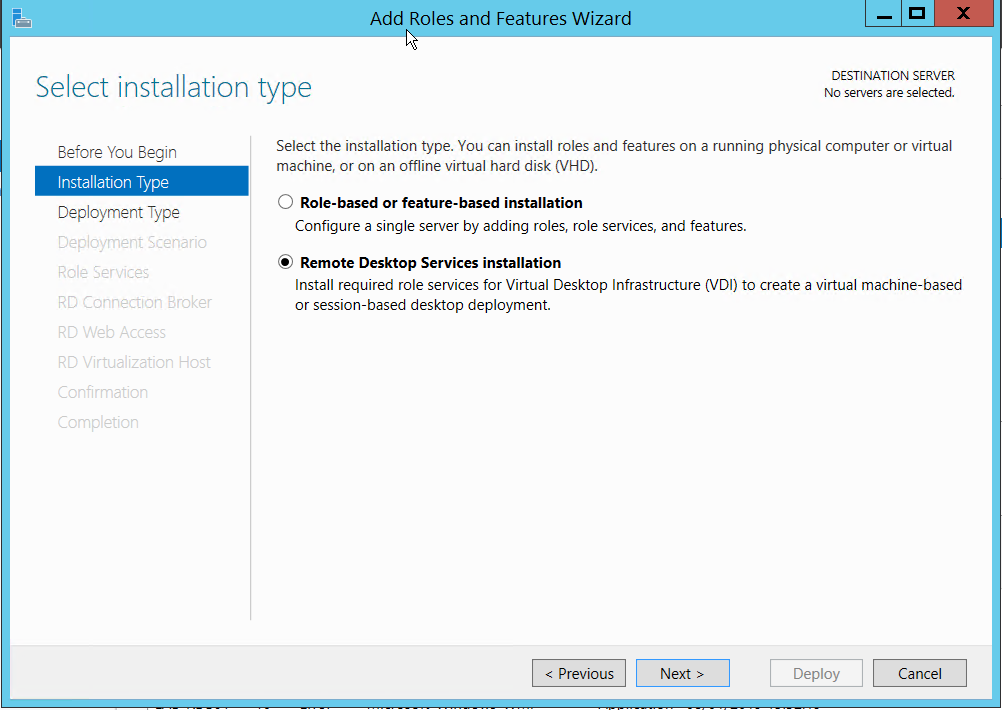
Next select standard deployment rds5

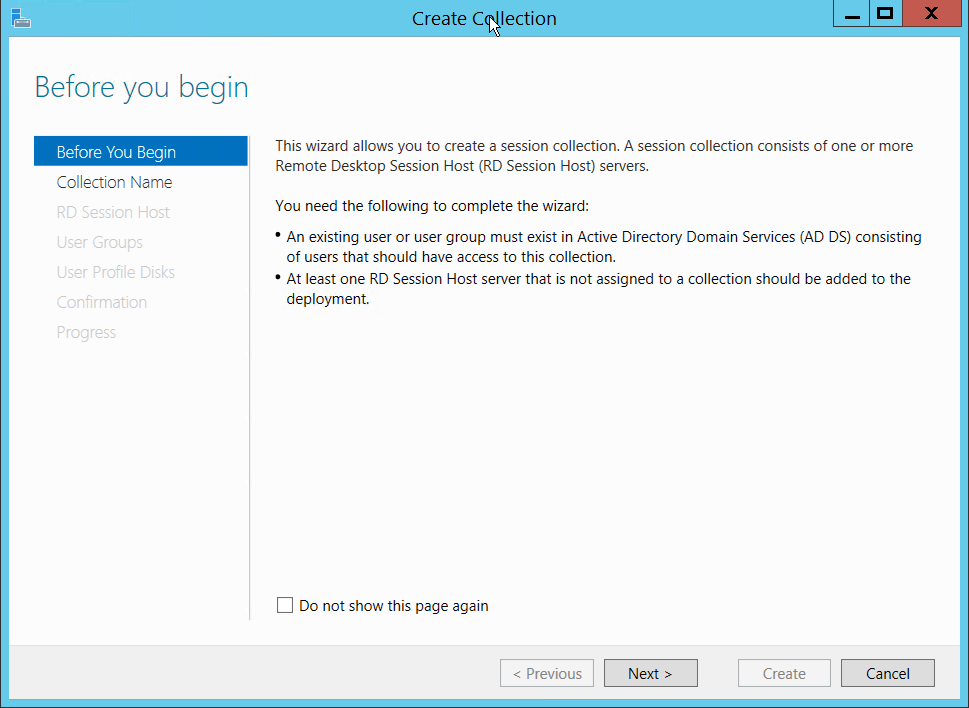
Select session-based desktop deploymentrds6

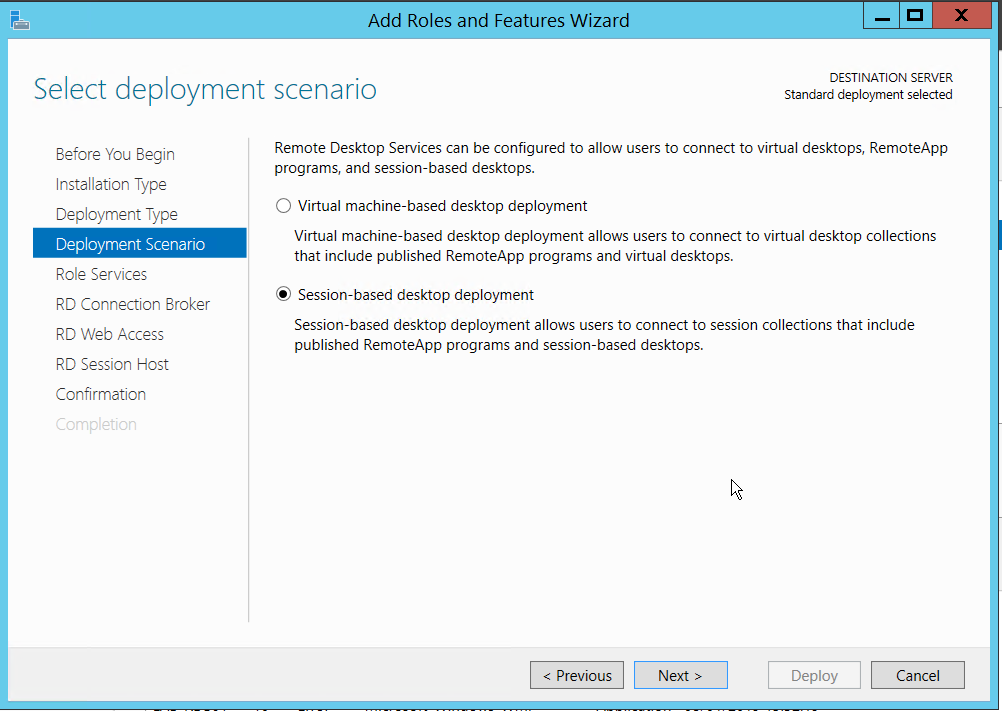
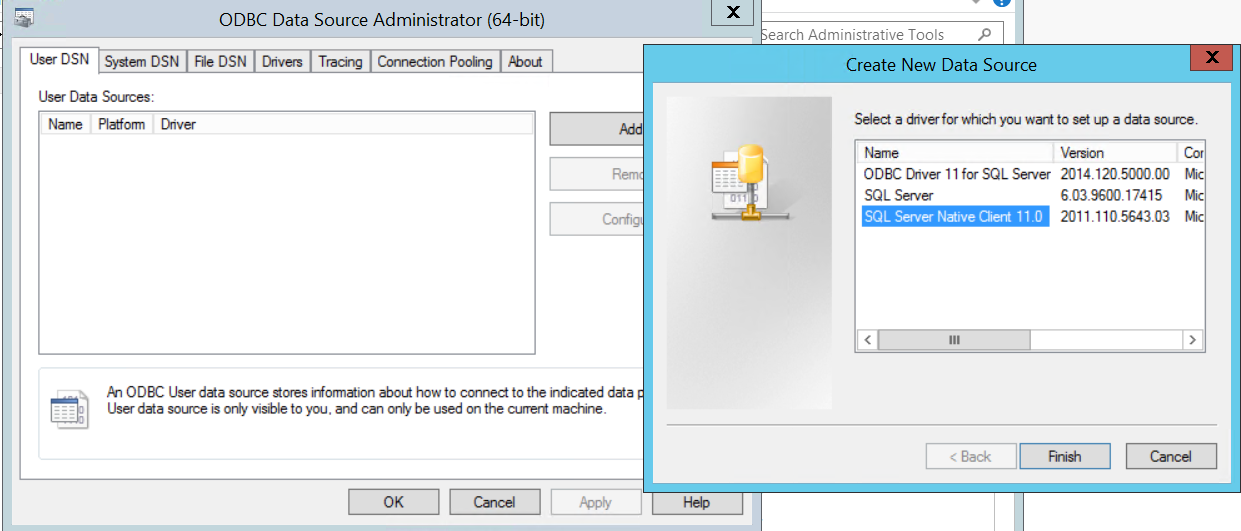
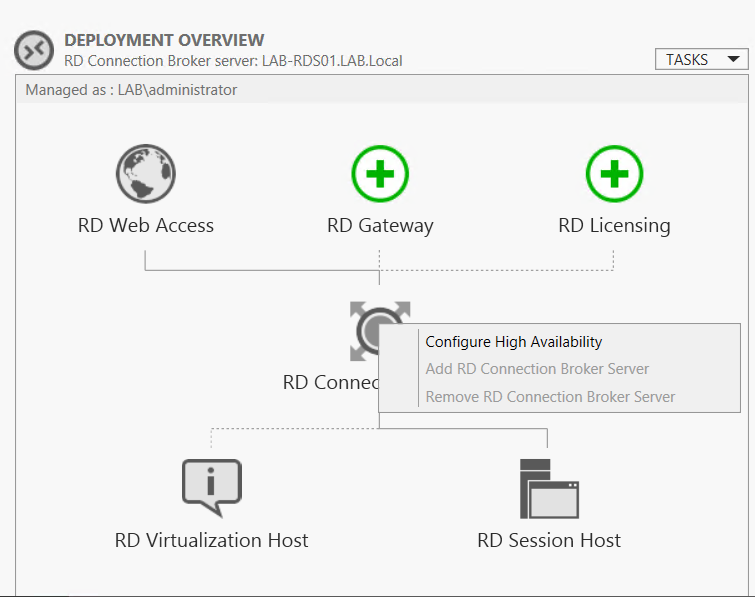
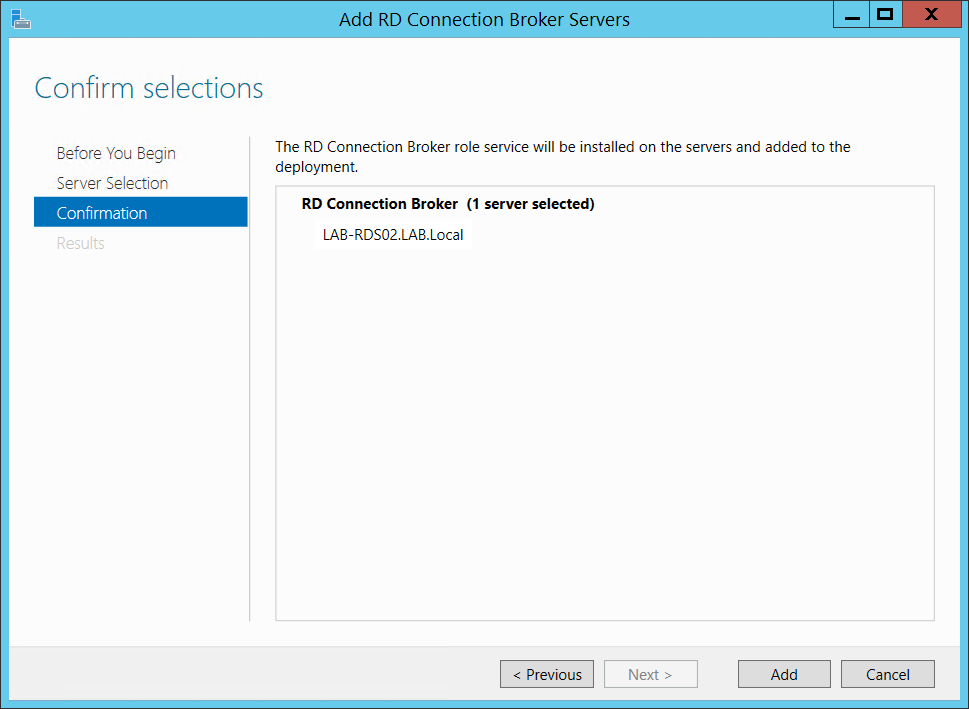
Only one RD connection broker can be select during initial setup HA will be setup after intial setuprds7

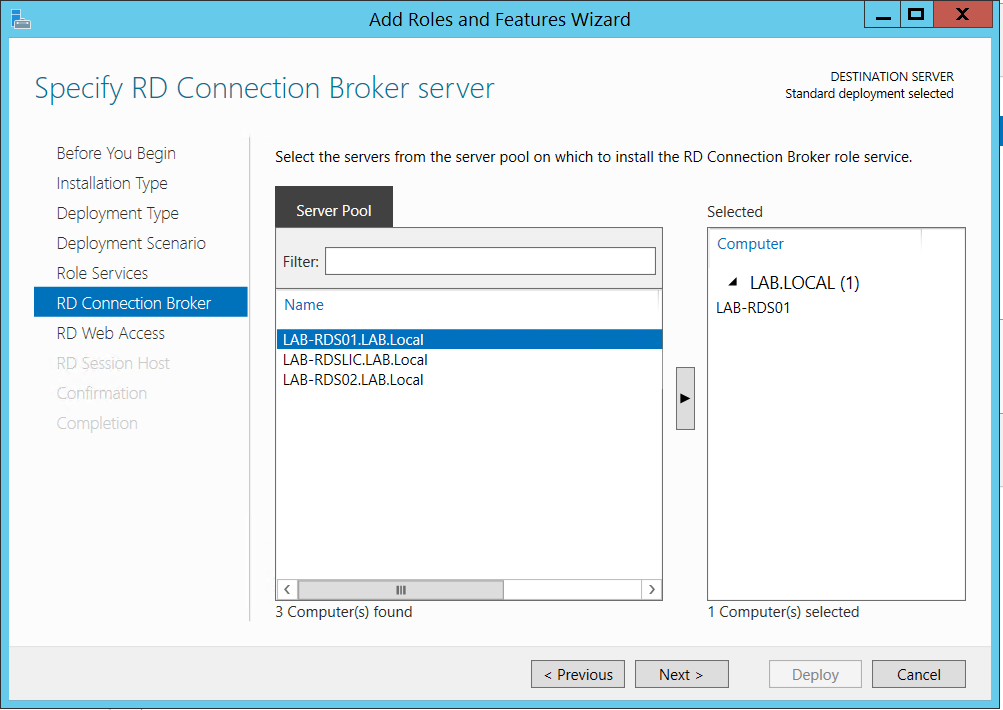
Select Install the RD web access role on RD connection broker. We can add the RD web access to the second server afterrds8

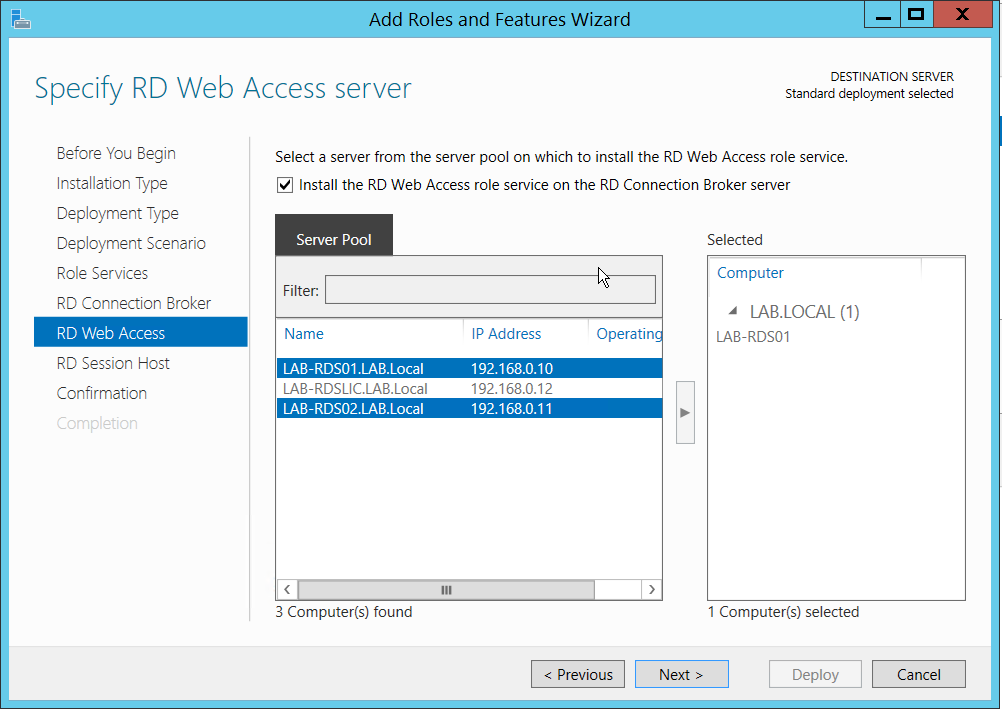
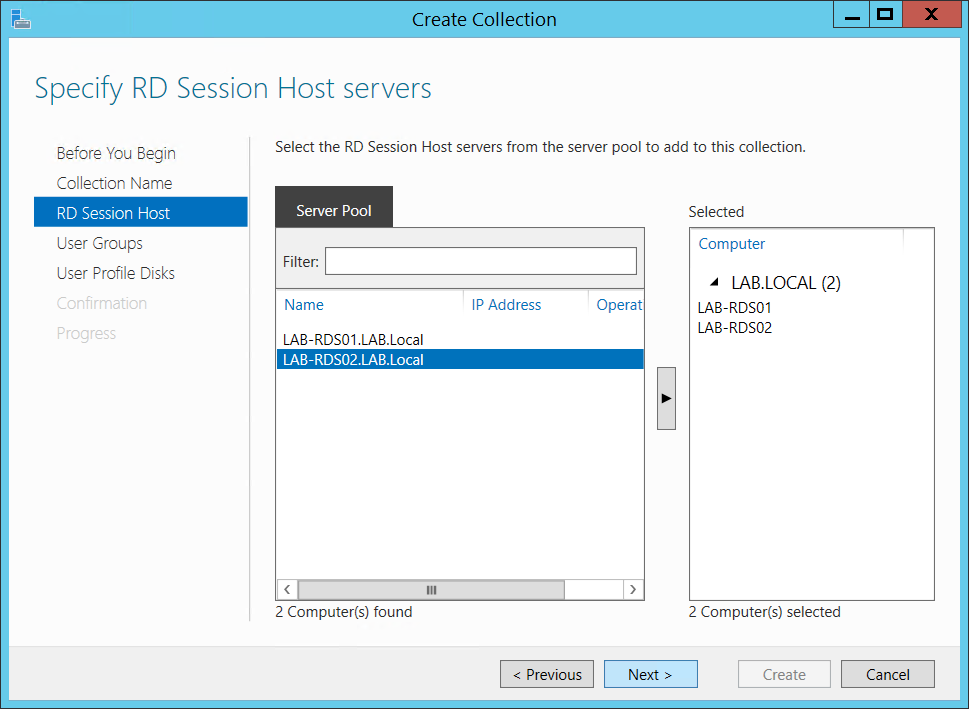
Select both servers that will be used for sessions hosts. rds9

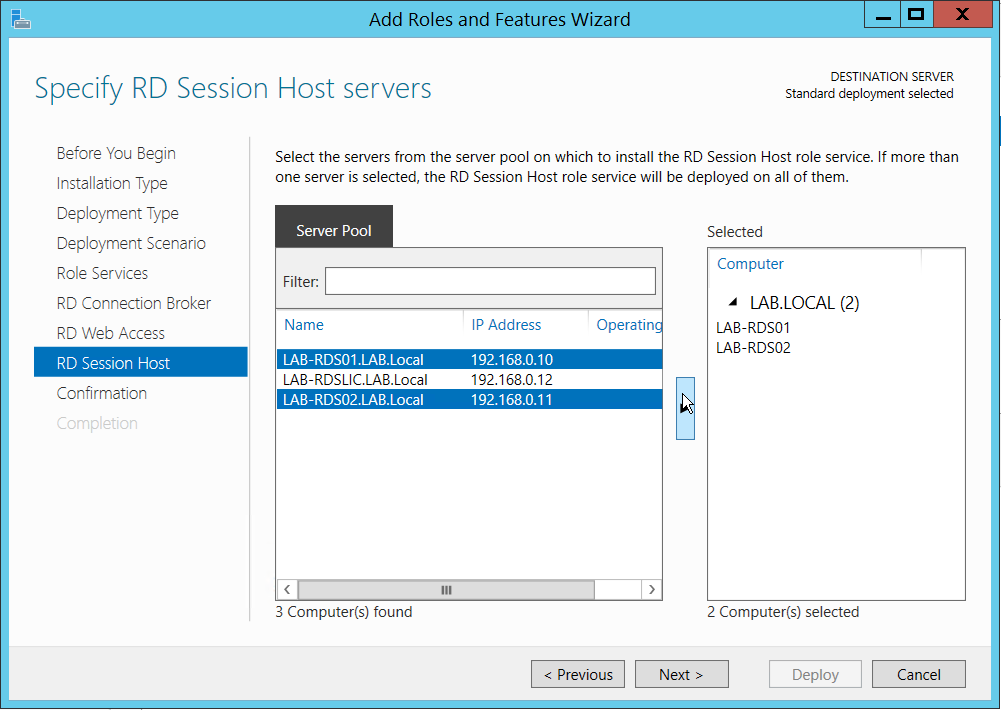
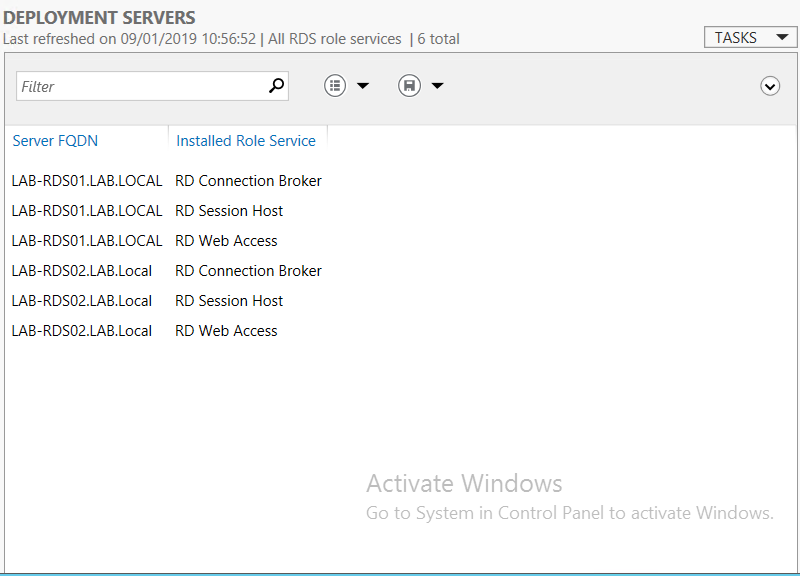
Next confirm if all servers have been selected for the correct roles and deployrds10

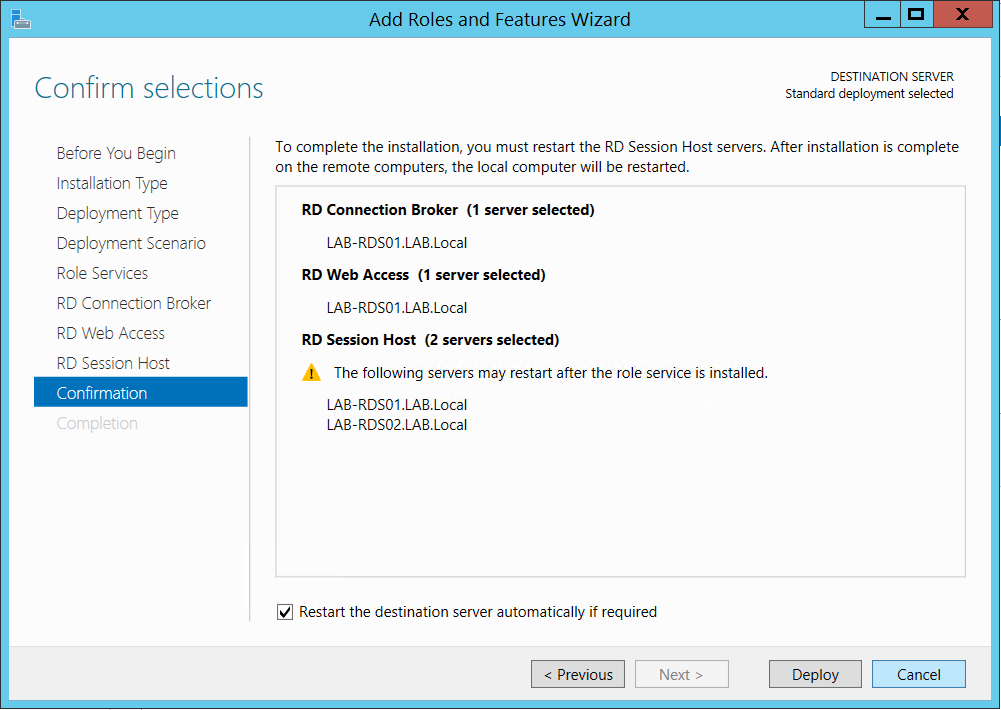
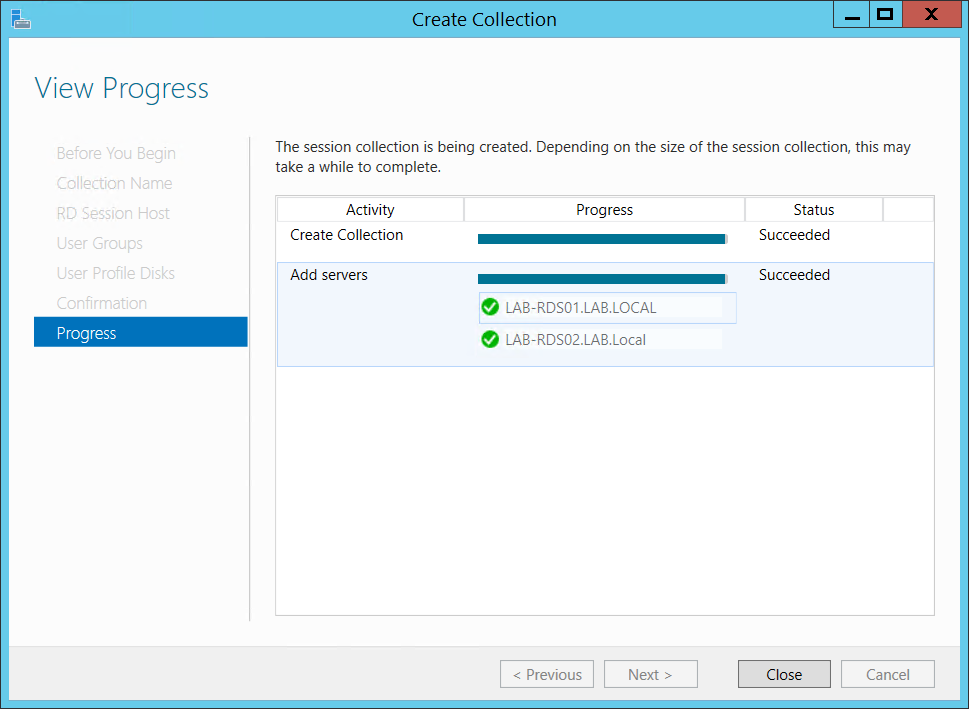
The deployment progress screen should then show it can take a while for this to complete rds13

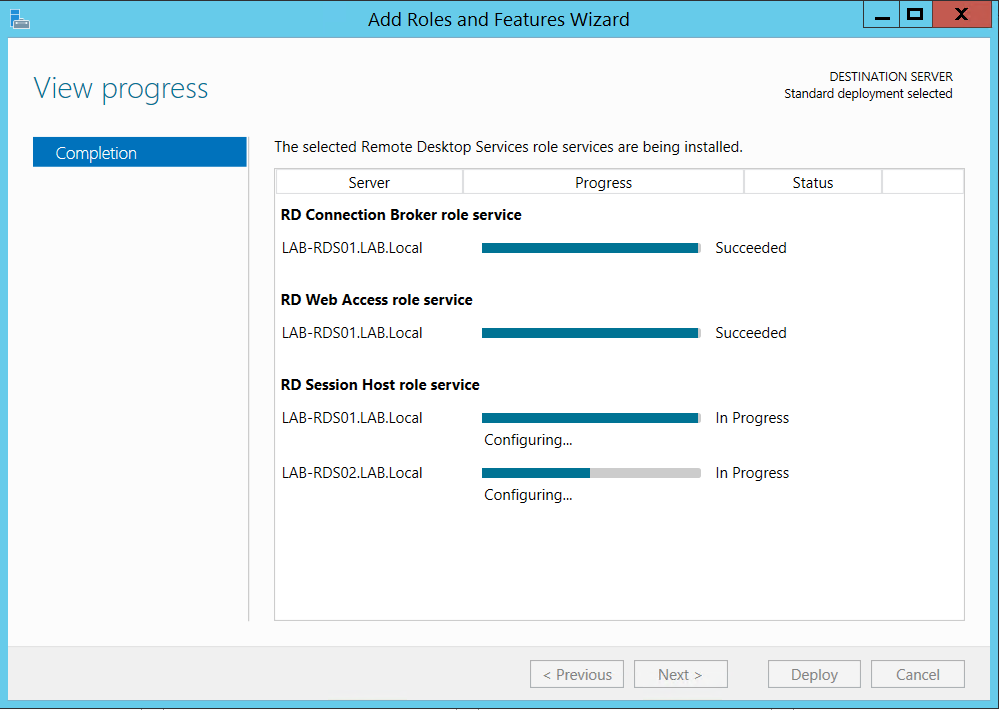
Once the deployment has completed there will be the RDS icon on server manager. All servers need to be added to server manager or you be able to mange the deploymentrds14

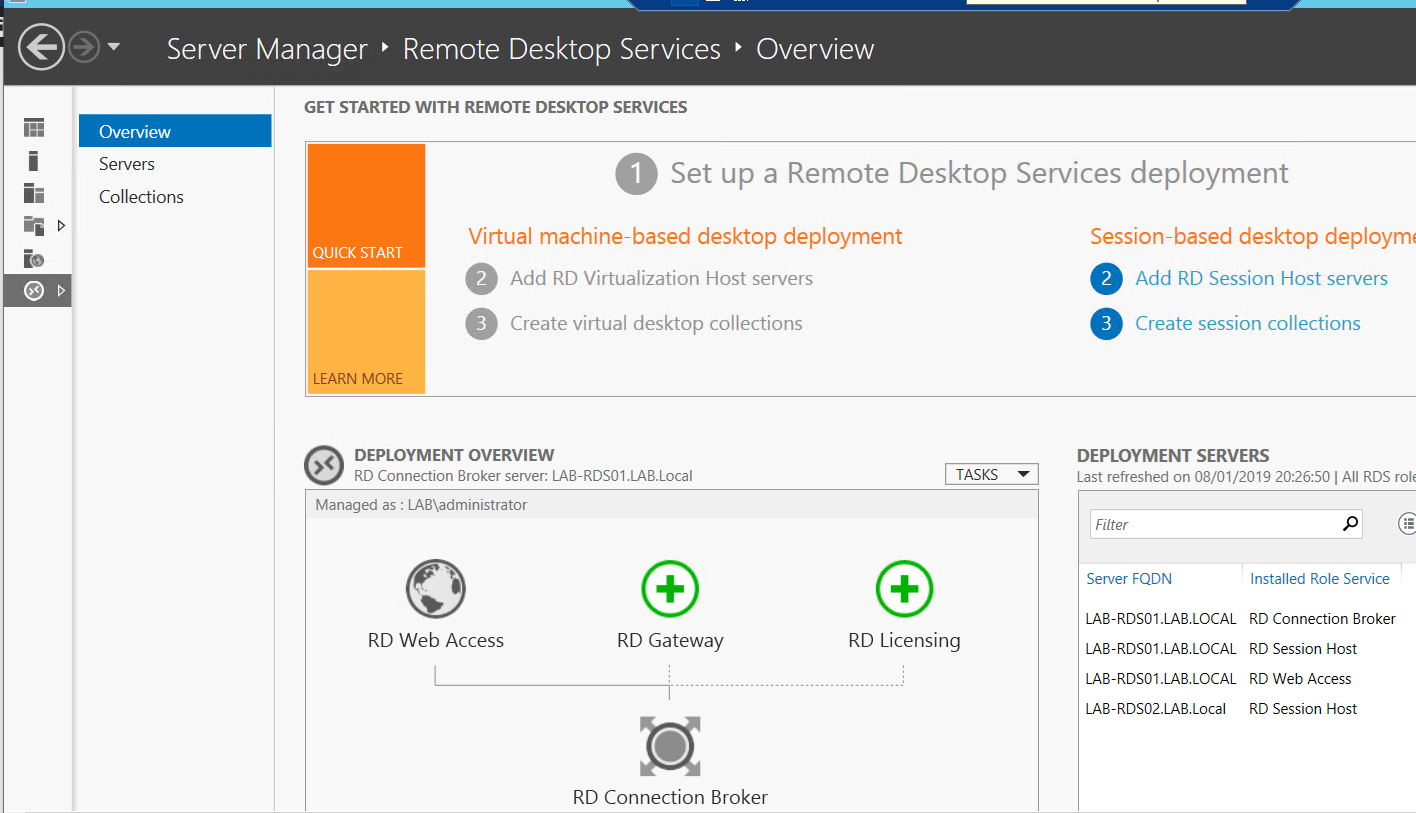
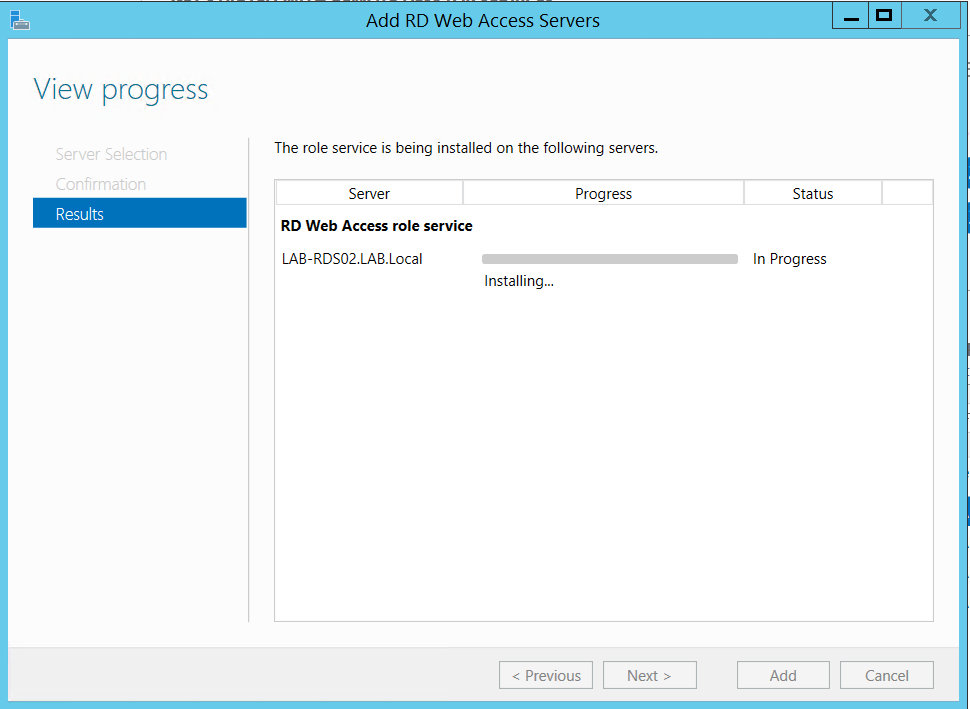
To finish the current deployment I will add the second RD web access server to do this click on task above deployment servers and add RD Web Access Servers and select second server that will have the role addedrds18rdsc19

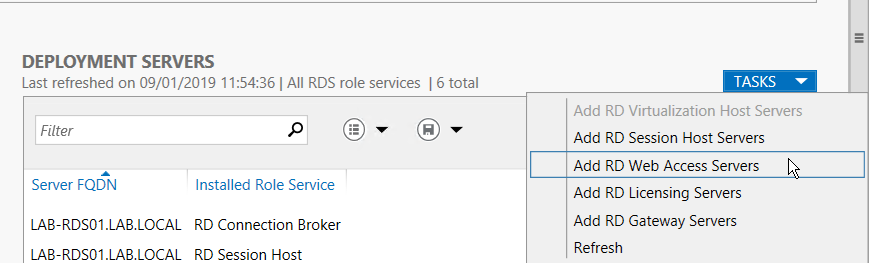
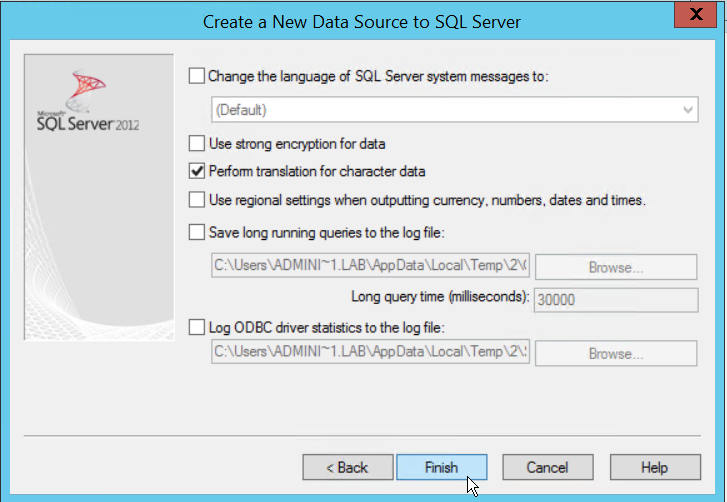
Last step I want to do was to use a wild card cert that I have from my internal CA so that I don’t get any cert errors when access the RD web access URL.

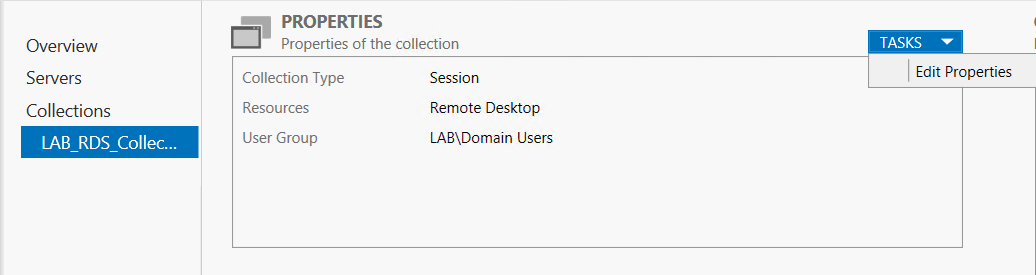
I wont go through generating the cert here but once you have the cert you can go to Deployment overview and click on edit deployment properties. rds15

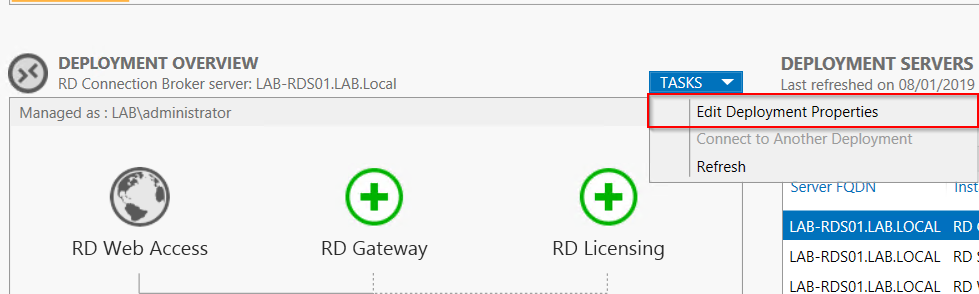
Go to certificates. Select the roles you want to assign the cert to in my case it was the two RD connection broker and RD web access. click select existing certificate and select the cert that will be used. You can also create a new certificate on this windows aswell. rds16

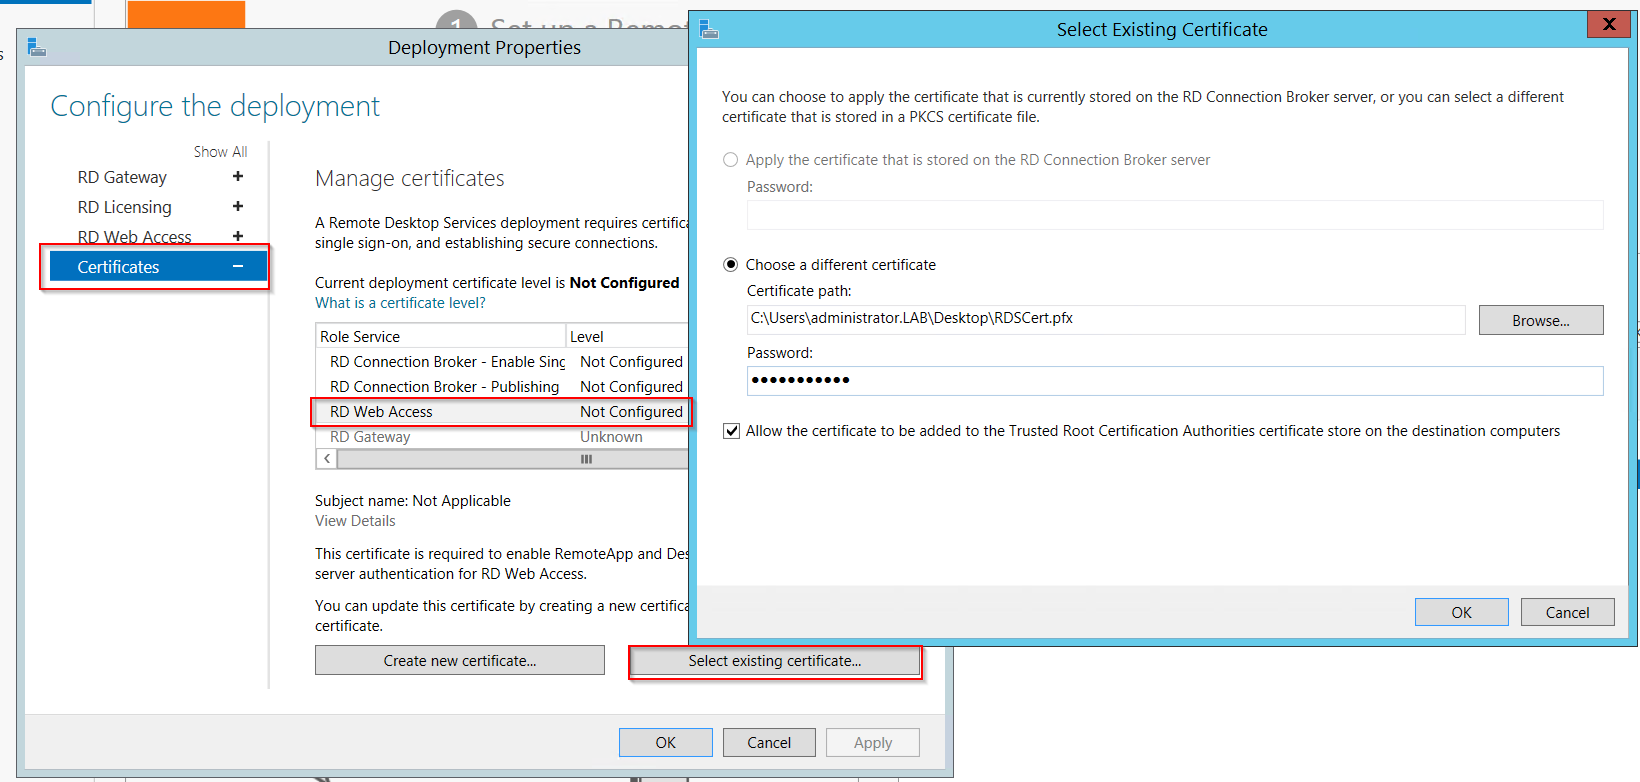
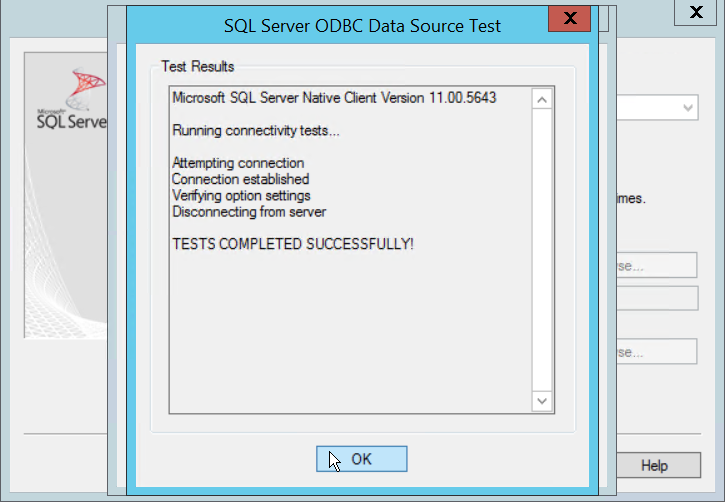
Once cert is applied and all status say ok you should no longer get a cert error when access the RD web access URLrds17

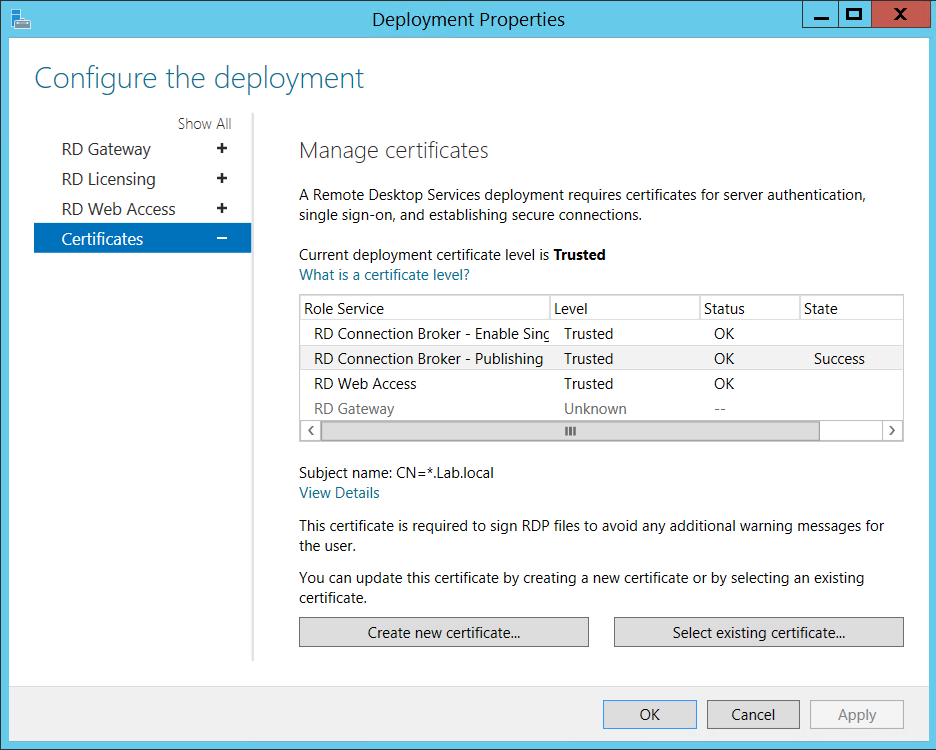
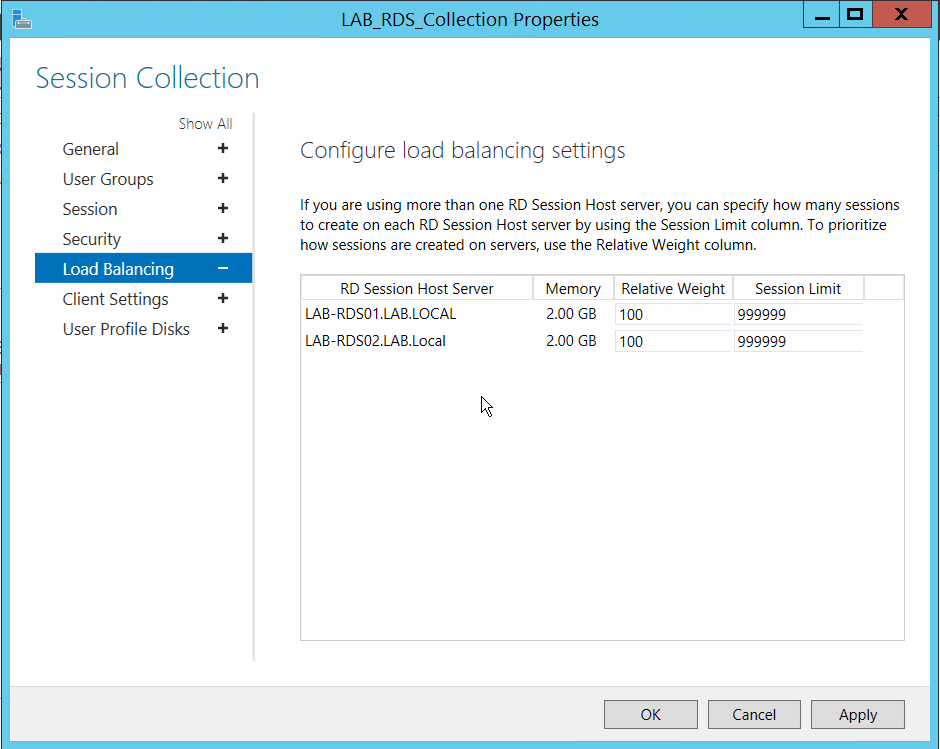
We will use DNS round robin to load balance between the two RD web access servers and this will create a single URL for users to access.

rds19

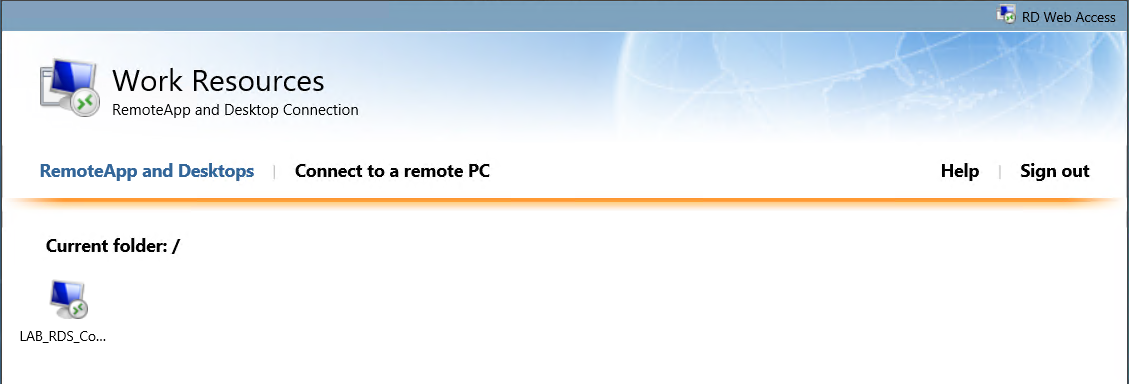
We can now access the RDS web page using: HTTPS://RDS.Lab.Local/RDWeb

Instead of having to go to each individual serversrdsc11

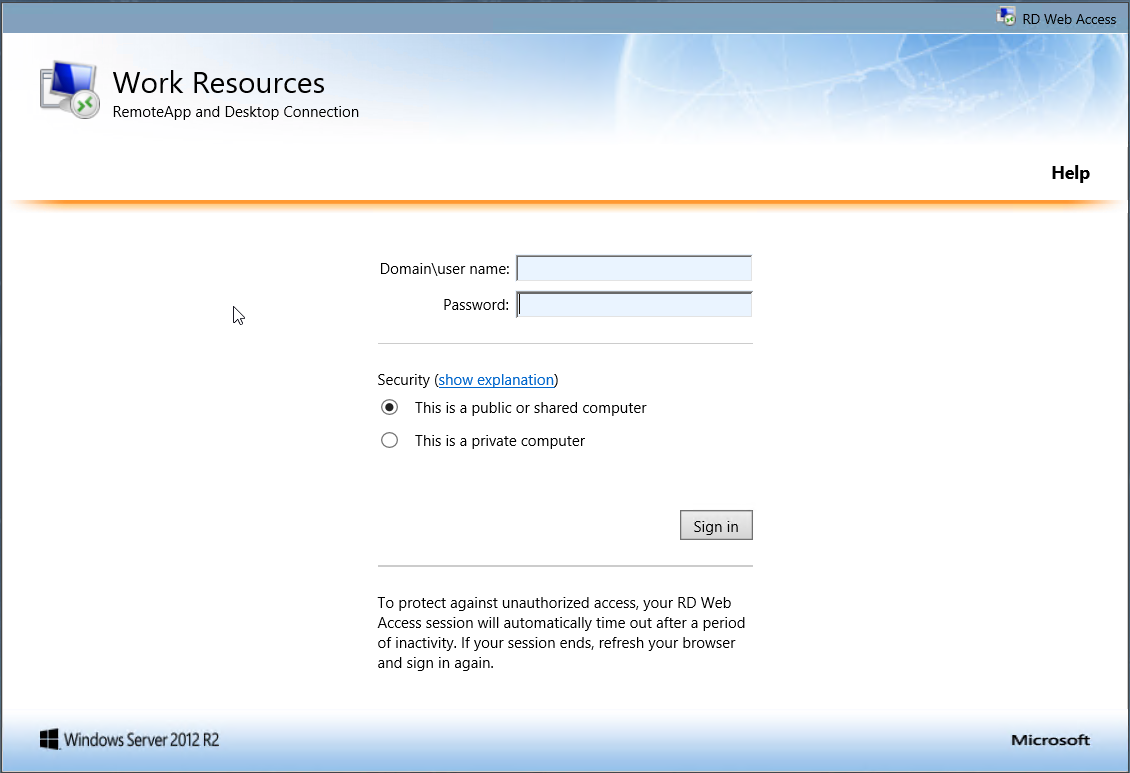
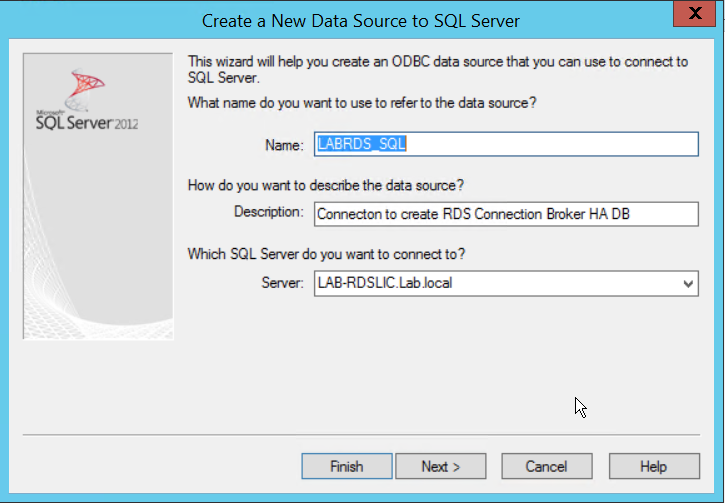
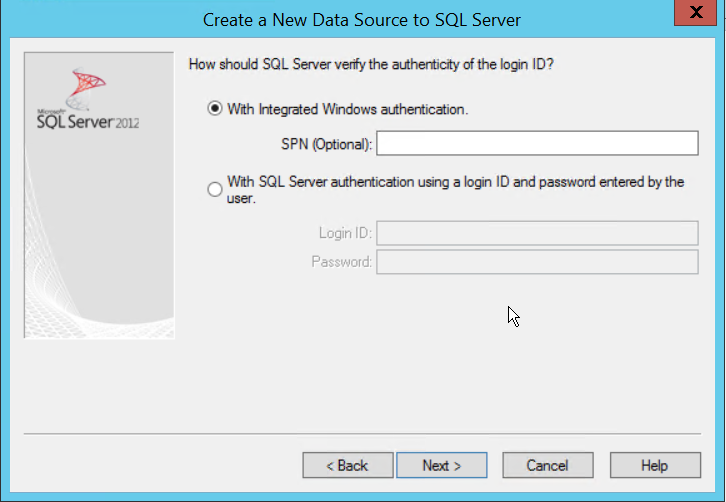
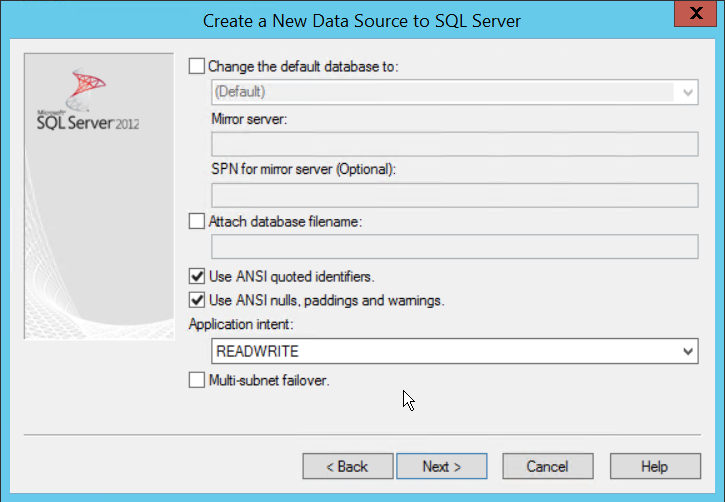
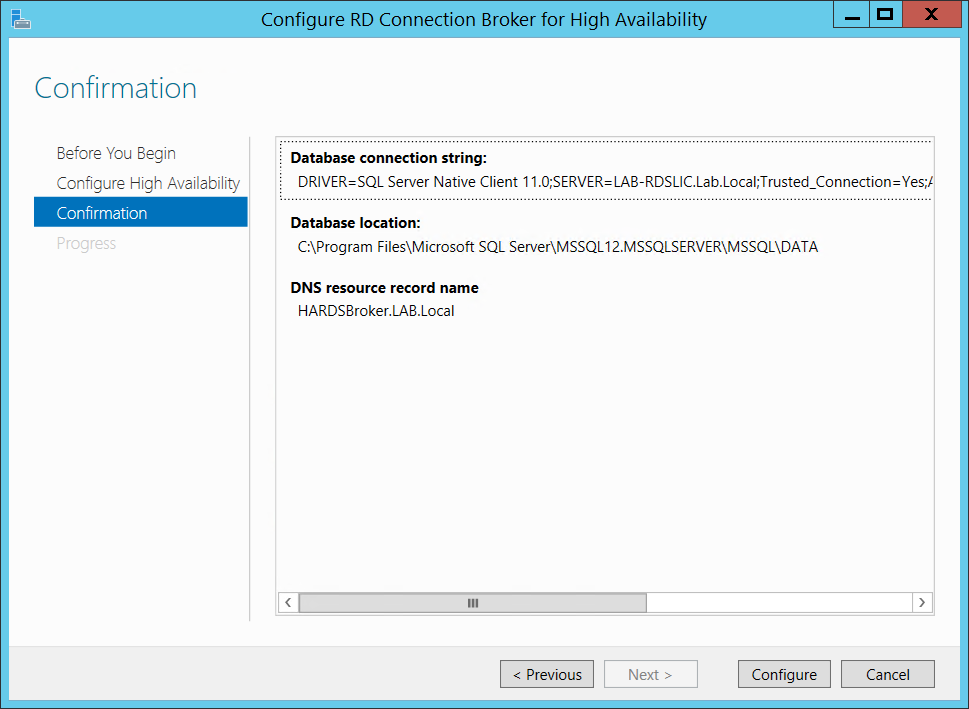
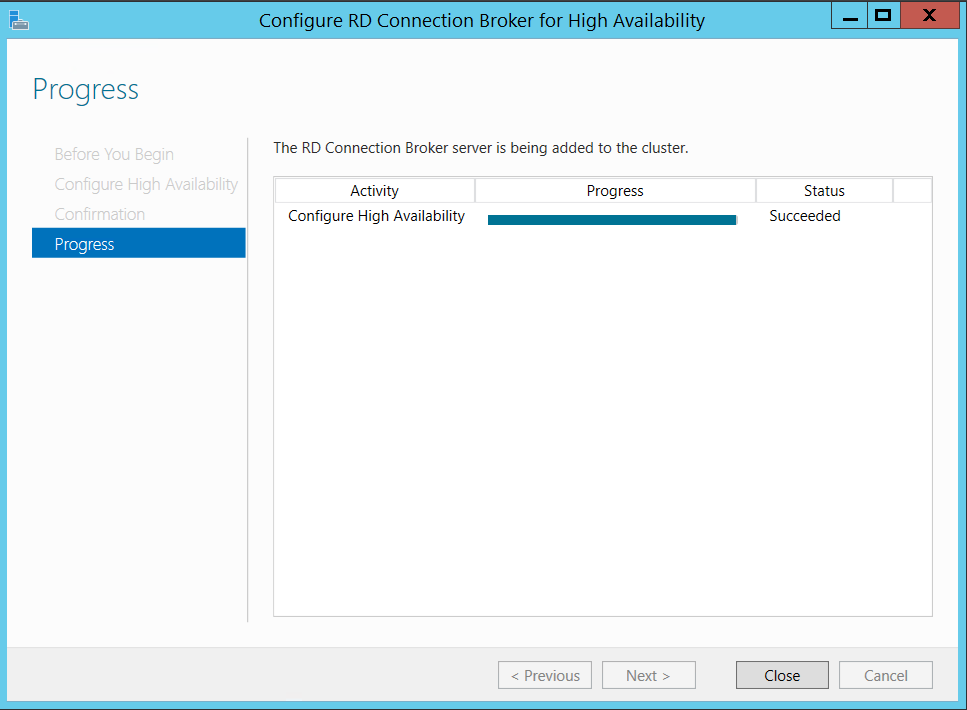
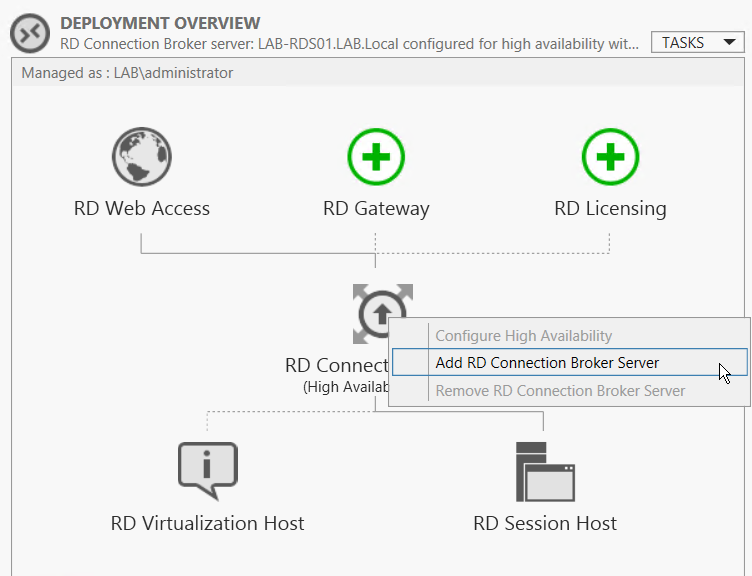
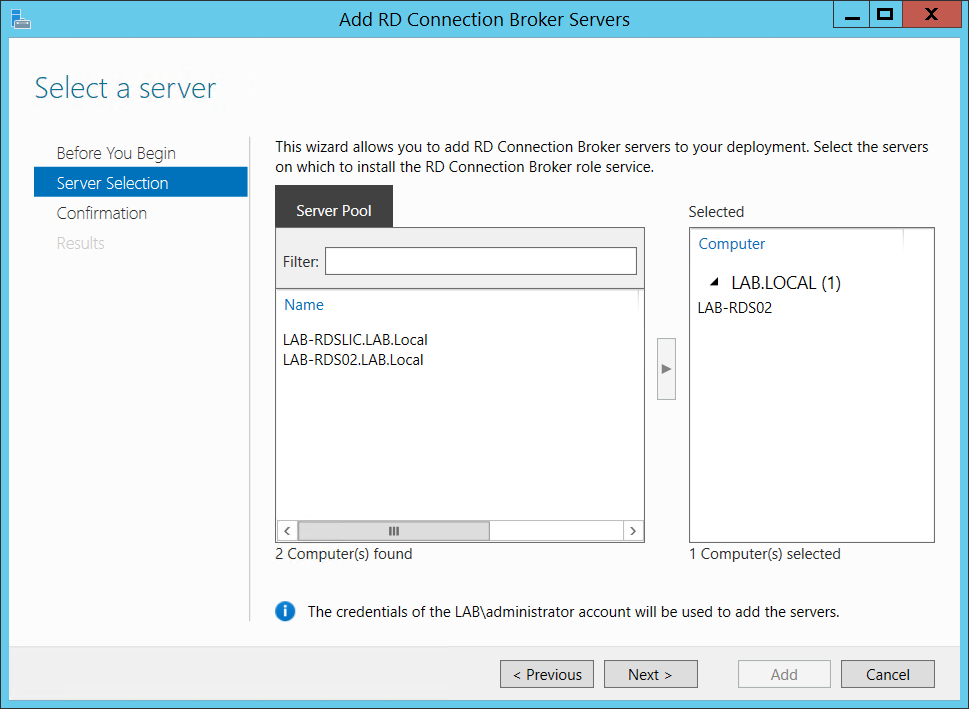
In part 2, we will go through setting up a second connection broker for high availability deployment.
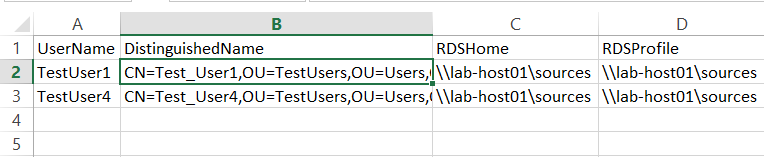