I have been looking at setting up MECM cloud management gateway (CMG) for a while but haven’t been able to, due to the need for PKI or Azure AD joined.
With the recent release of MECM 2002 this has added a new feature, that allows token based authentication. I decided to do a test deployment in my lab to see how this would work before deploying to our production environment.
With a CMG we can manage clients that don’t regularly connect back to the cooperate network which has become more of a priority recently.
There is a cost for running the VM’s in Azure that will be used as the CMG and for outbound data transfers. Johan Arwidmark has done a good real world cost estimates for a CMG.
https://deploymentresearch.com/real-world-costs-for-using-a-cloud-management-gateway-cmg-with-configmgr/
First step should be to have a read of the docs for planning a CMG
https://docs.microsoft.com/en-us/mem/configmgr/core/clients/manage/cmg/plan-cloud-management-gateway
To use token base authentication require MECM 2002, so that is a pre-requisites for deploying a CMG in this way.
https://docs.microsoft.com/en-us/mem/configmgr/core/clients/deploy/deploy-clients-cmg-token
There will be some required permission in Azure also for deploying the CMG.
- Account that has Global Admin and Subscription Owner roles.
- Content filter rules to allow outbound access (If there is a proxy or Firewall filtering traffic)
There will also be a requirement for a cert to be applied to the CMG, it is recommend to have a third party cert as it should automatically trusted by clients.
From looking through the documents below are the required URL https://docs.microsoft.com/en-us/mem/configmgr/core/plan-design/network/internet-endpoints#cmg-connection-point
*.cloudapp.net
*.blob.core.windows.net
login.microsoftonline.com
Once all pre-requisites have been confirmed we can start to configure the CMG. We will need to pick a unique cloud service name as this will be required later, easiest way to check if the name you have select is unique is to logon to Azure go to cloud services (classic)

Once the cloud service has been checked, then we need to configure the Azure services.
Logon to the MECM console and go to Administration > Cloud services > Azure services.
Click configure Azure services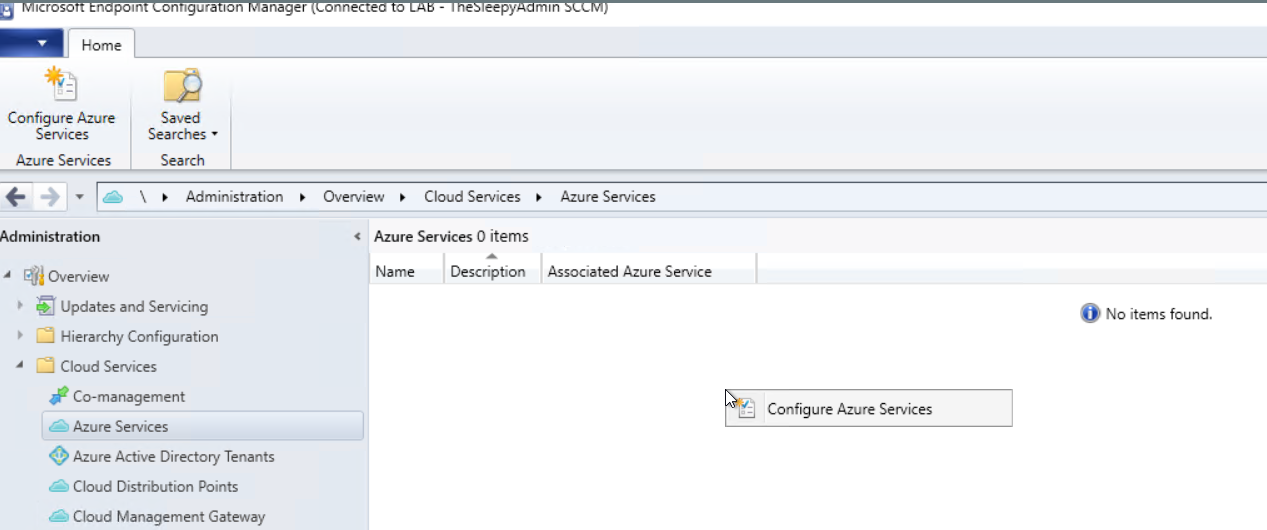
Give the service a name and select cloud management 
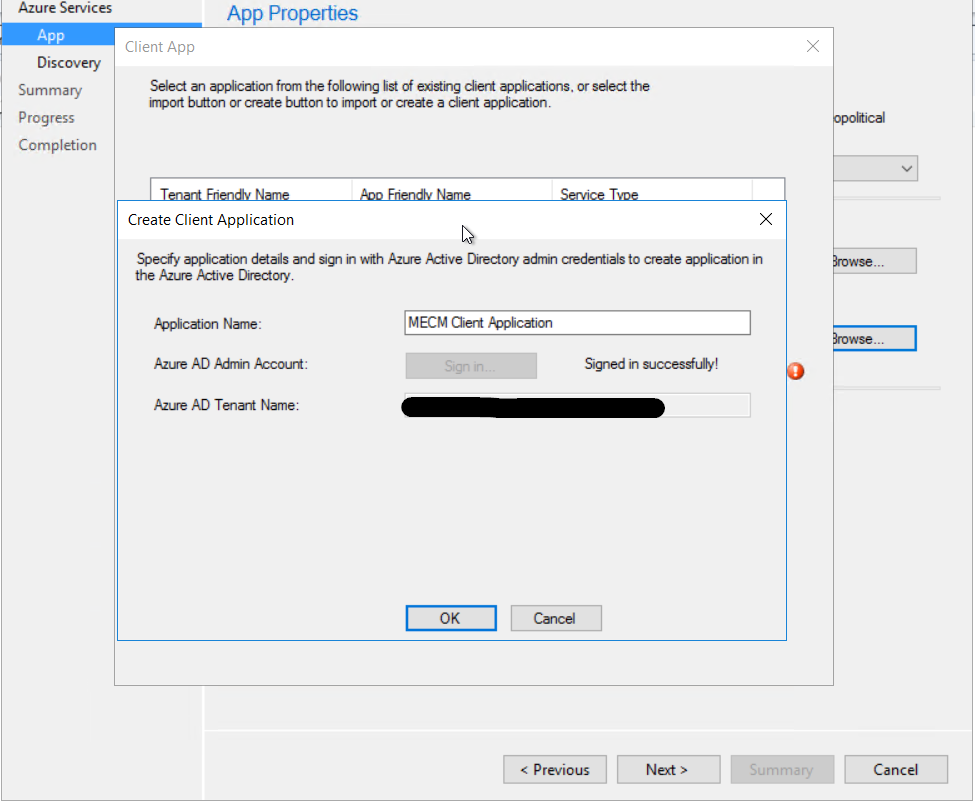
We need to configure a server and client applications 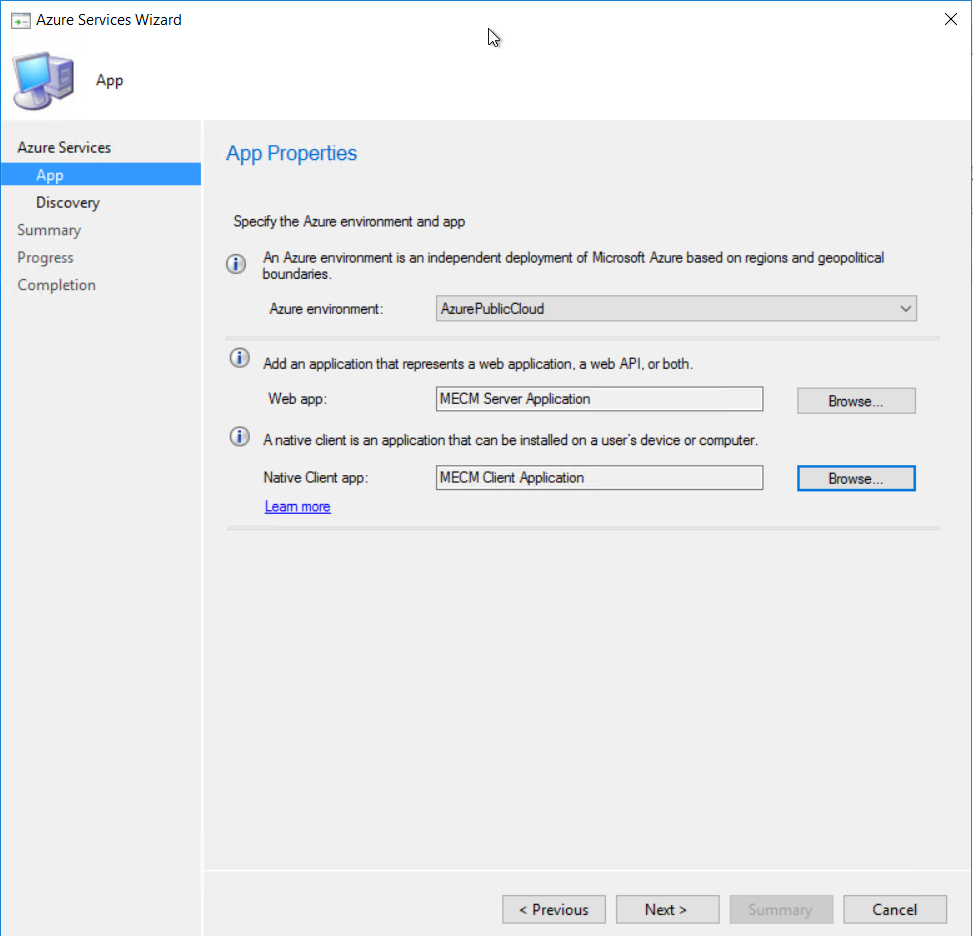 Give the applications a name and sign in to Azure using a account with the required permission
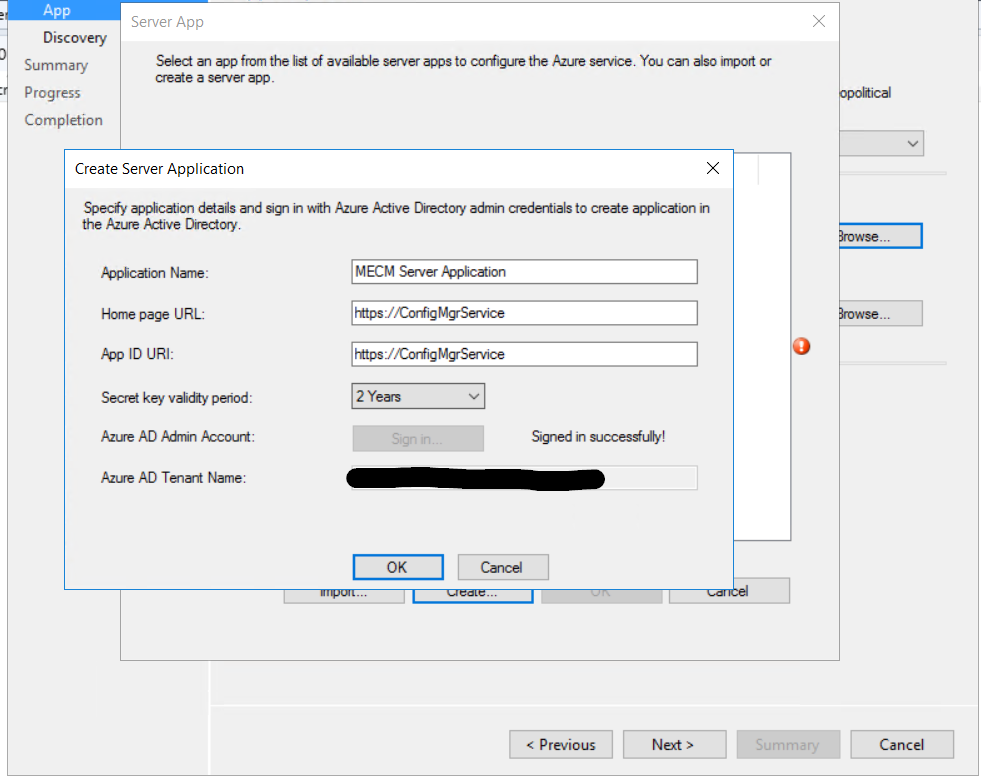
 I just left user discovery enabled.
  Click next to finish configuring the Azure services.
 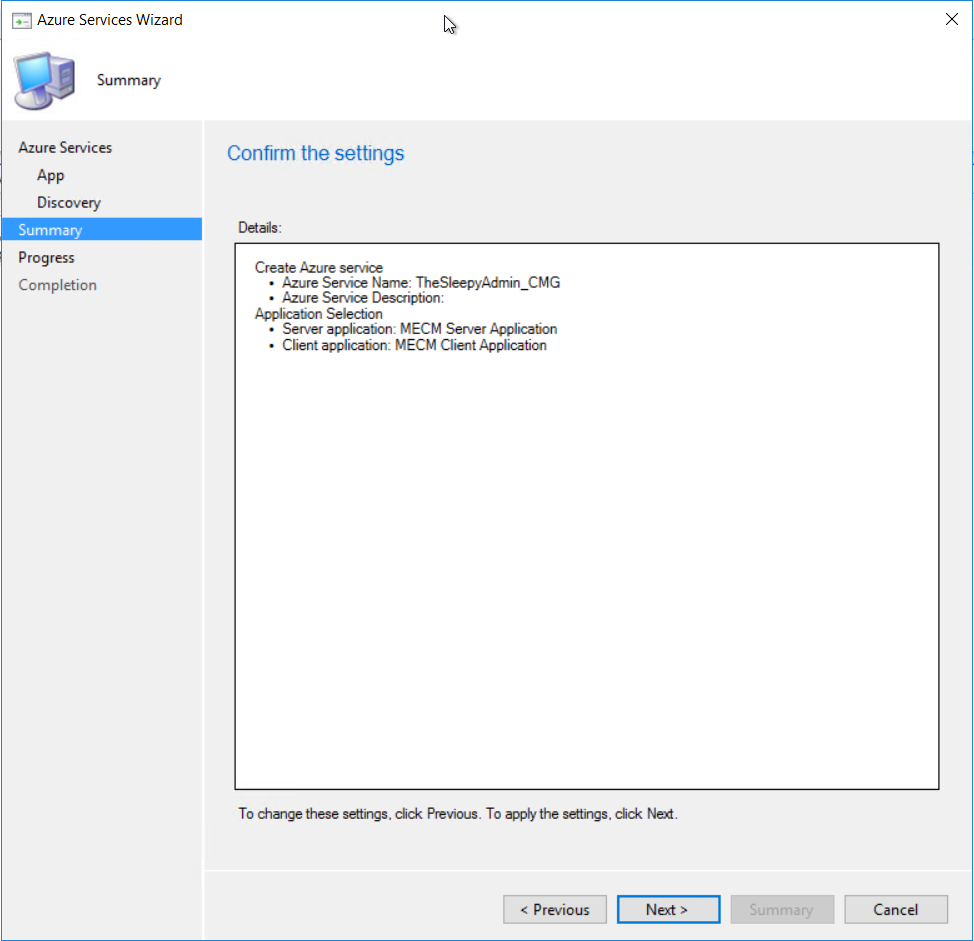 Once finished the Azure service should now be showing
  The Azure AD tenant should also show with both application we just created.
Once this has all been configured we can now start to setup the CMG.
To start the configuration go to Administration > Cloud services > Cloud Management Gateway
Click Create Cloud Management Gateway
Select AzurePublicCloud and sign in. (If the subscription ID doesn’t show it might be the account you are using is not an owner of the subscription.)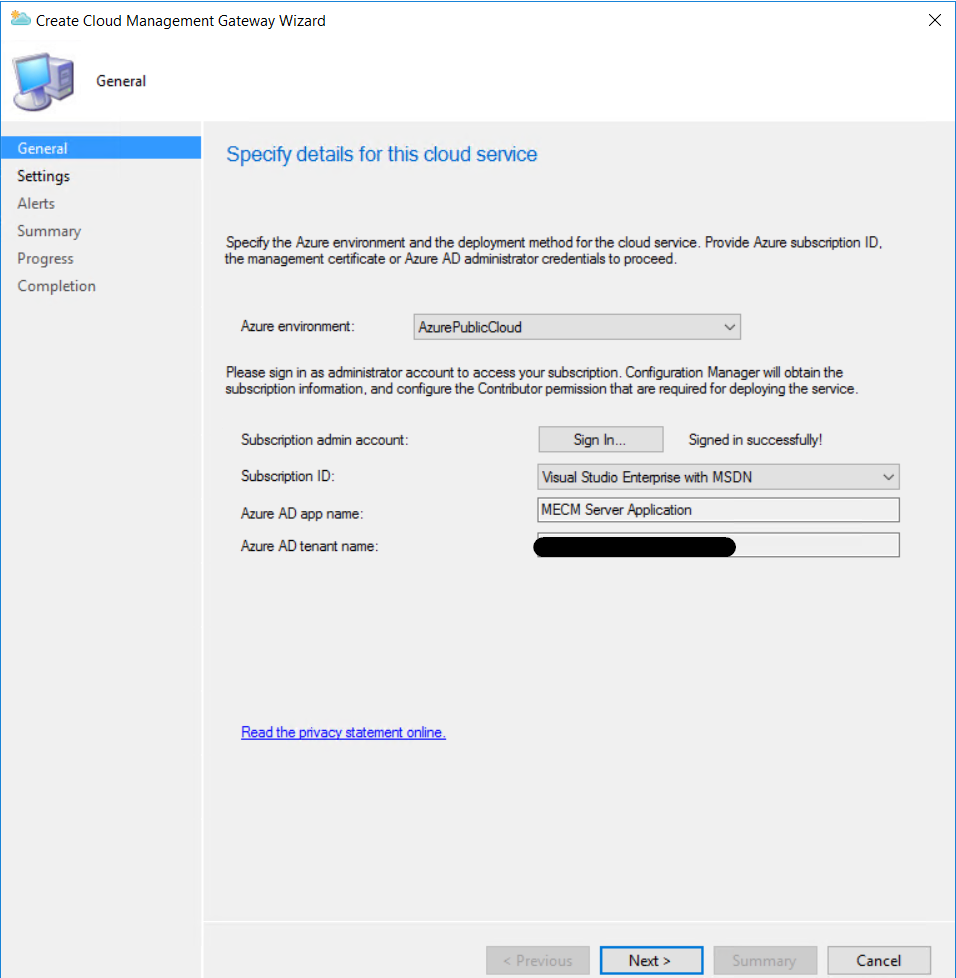
Now we need to configure the cloud services, this is where we will use the name we checked earlier.
- Select the cert file, this needs to be a PFX with the private key (I am using one created on my internal CA but in production I will be using a third party CA like digicert or godaddy)
- The cert name will be automatically set the deployment services name so this is why we should confirm the name before hand so we can generate the cert with the same name.
- Select the region the CMG will be configured in
- Either select a existing or create a new resource group (I chose new one to keep the CMG separate from my other Azure resources)
- Select the required amount of VM’s this can go up to 16 (for high availability it recommend to configure 2 VM’s at least)
- Tick the required security authentication I just ticked Enforce TLS 1.2
- I also ticked using CMG and cloud distribution point
 I left the alerting as default
  Just follow the wizard to complete.
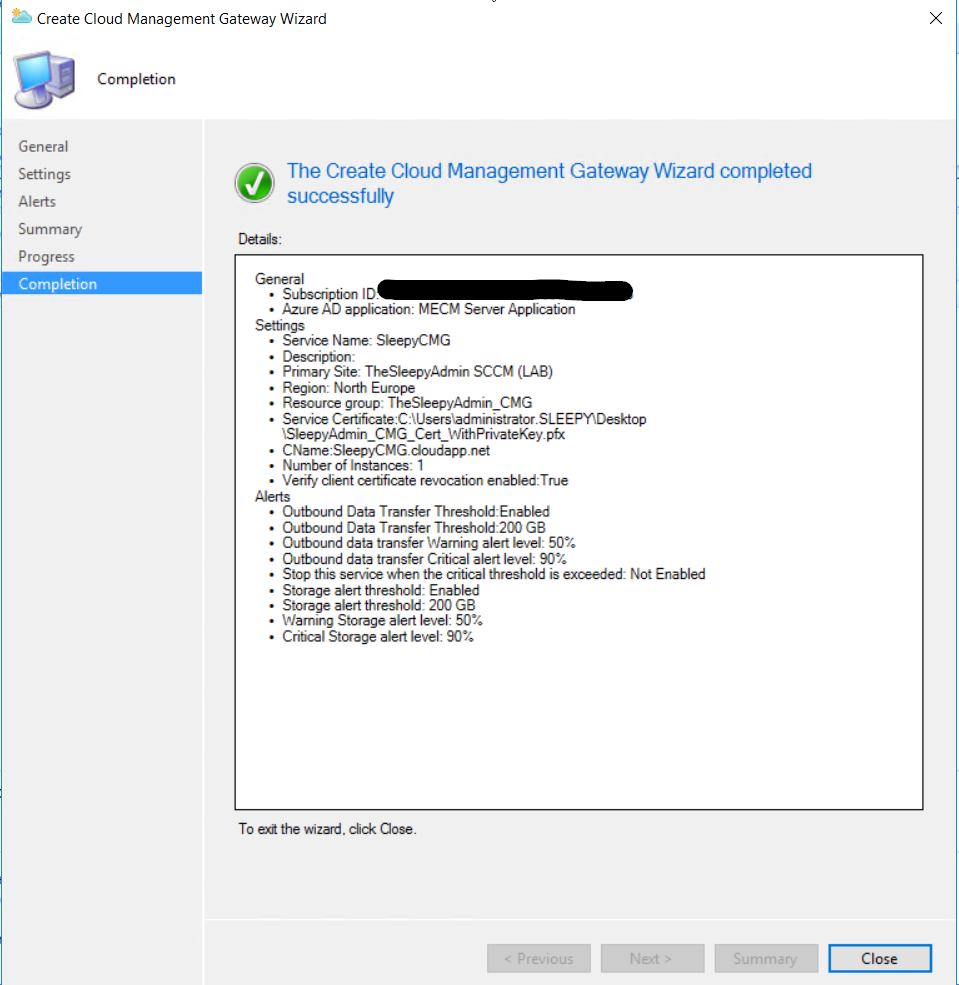
Once completed the CMG should show as provisioning started
This slideshow requires JavaScript.
We can also logon to Azure to verify the cloud service has been created. 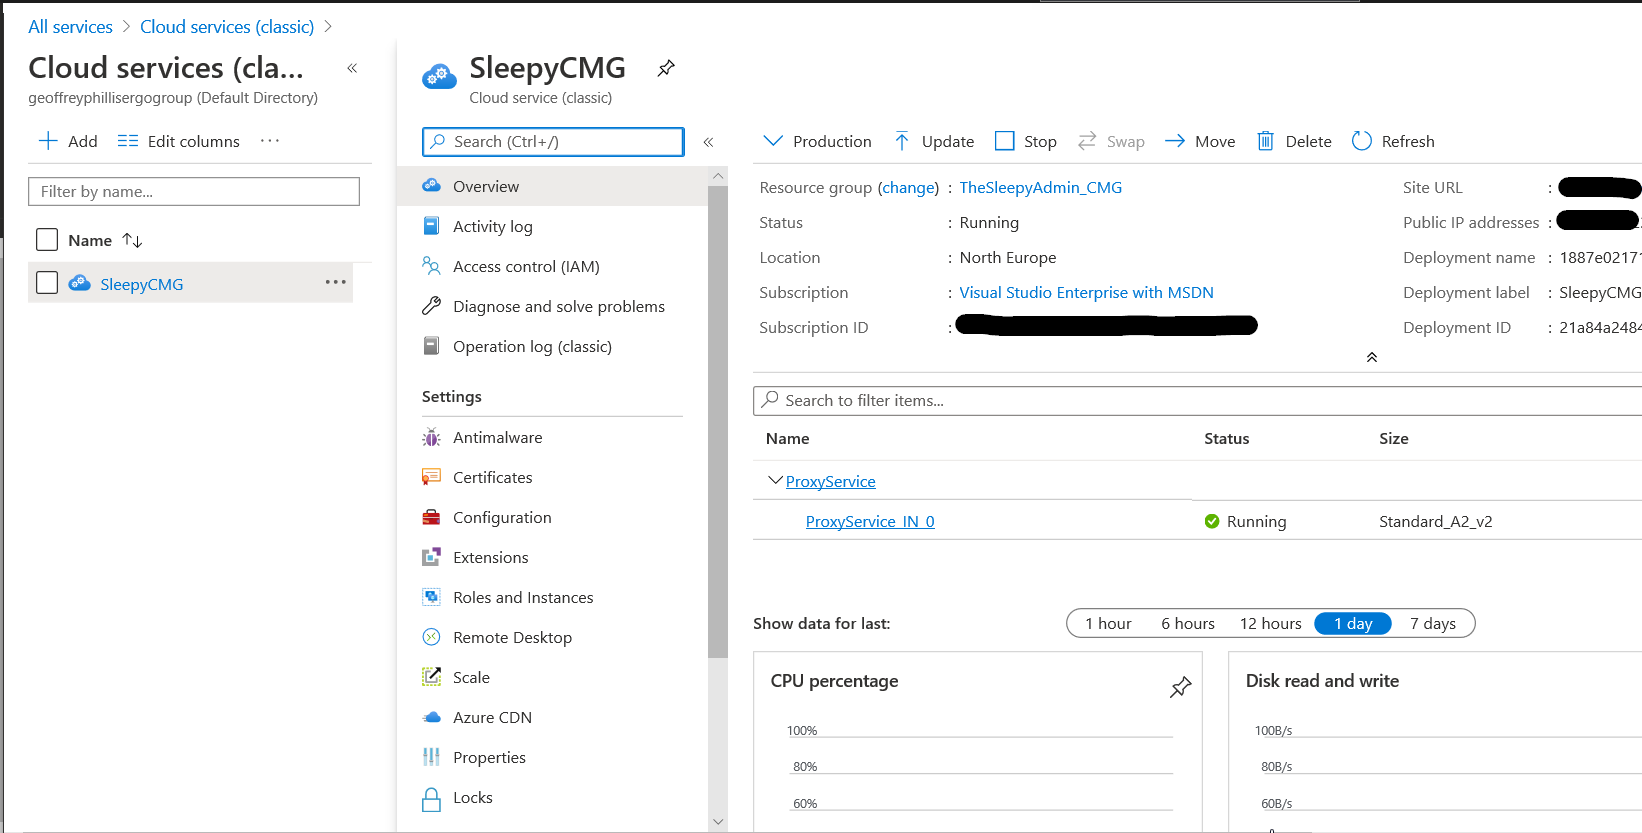
After the CMG has been configured we then need to install the Cloud management connection point to connect MECM to the CMG.
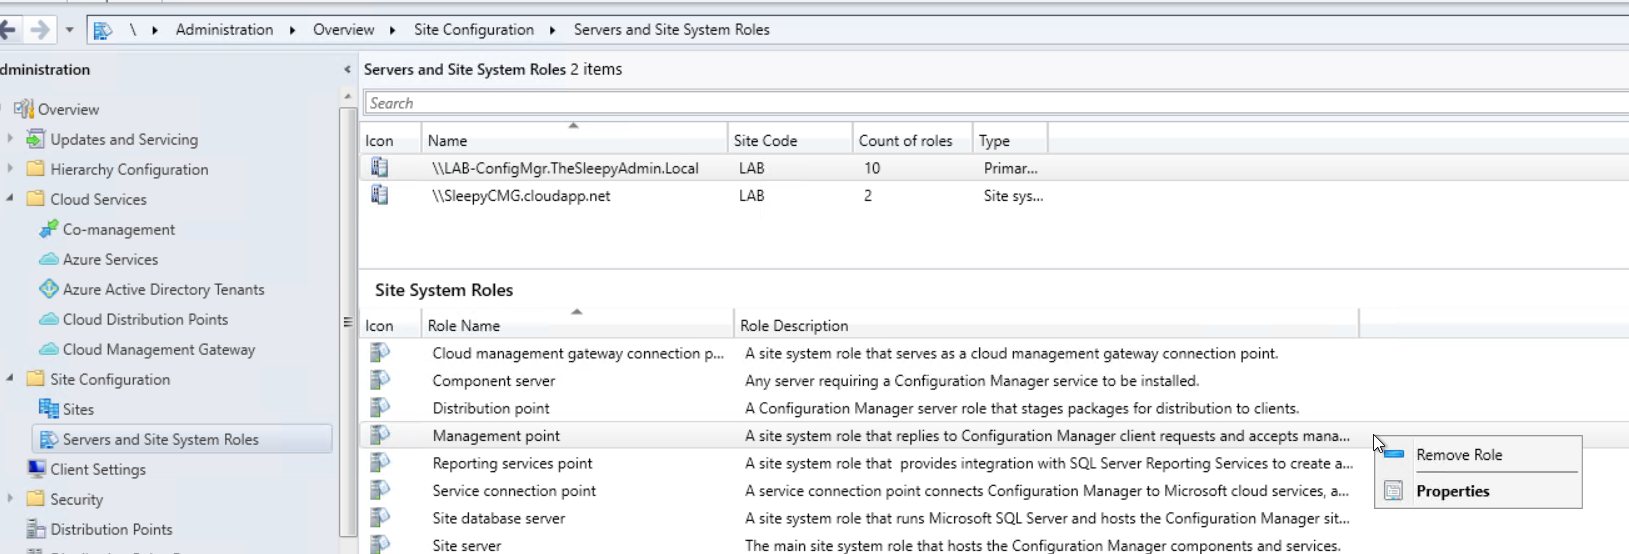
Go to Administration > site configuration > servers and site system roles, Add the Cloud management gateway connection point to the primary site server in MECM
This slideshow requires JavaScript.
After the role has been configured we need to configure a few steps on the site server, management point and software update point (if installed and configured)
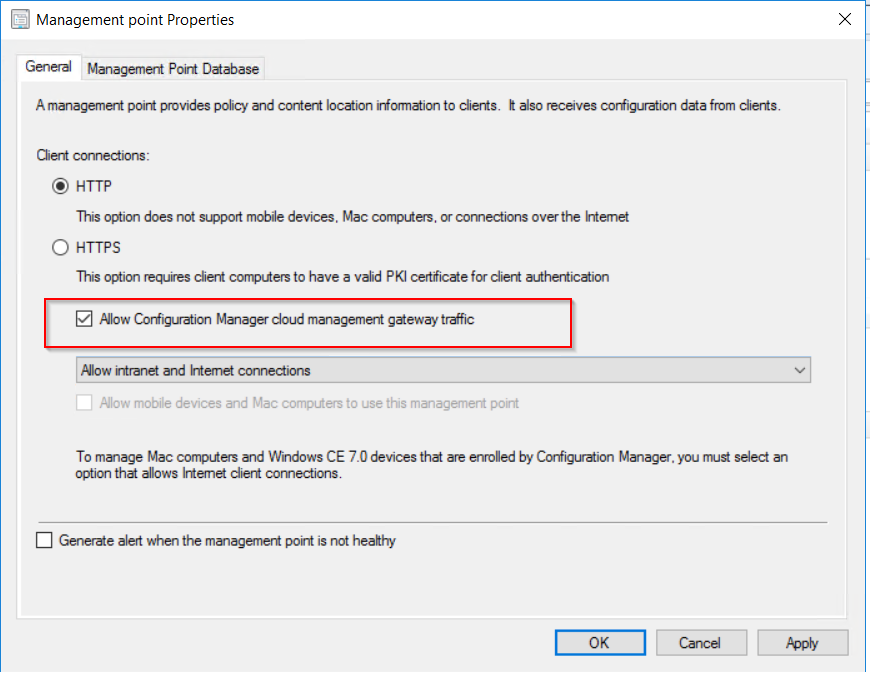
Open the management point properties and tick the allow configuration manager cloud management gateway traffic. (If the tick box for is greyed out there is an additional step required.)
Go to Administration > site configuration > sites, then configure the primary site to use configuration manager generated certificate in communication security. Once this is done go back to the management point and the tick box should now be available.

 To allow the software update point to communicate with the CMG, tick the allow configuration manager cloud management gateway traffic.
 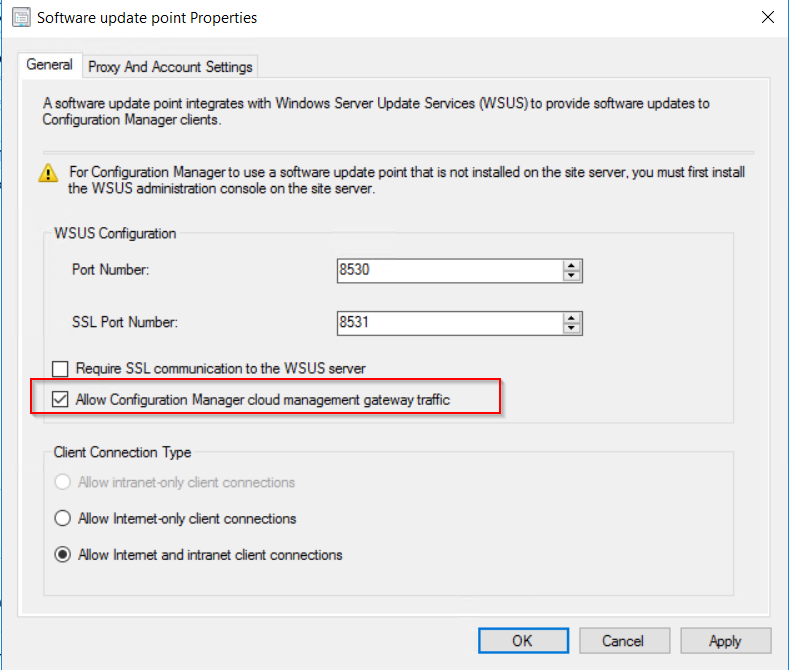 After this has been configured the clients should now pick up a the CMG as a internet based management point in the network tab of client agent properties.
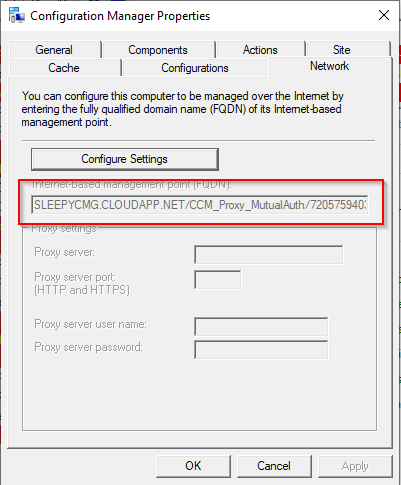
Once the client moves off the internal network and does a location lookup we should see that the connection type will change to internet from internal. 
We can also check the location services log to see if the CMG is being picked up. 


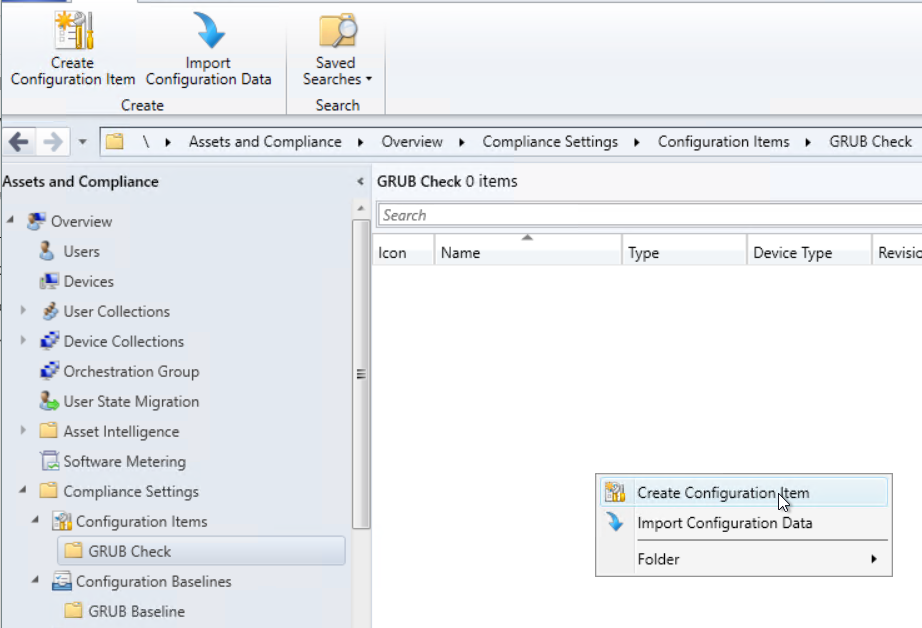 Select Windows Desktops and Servers (custom)
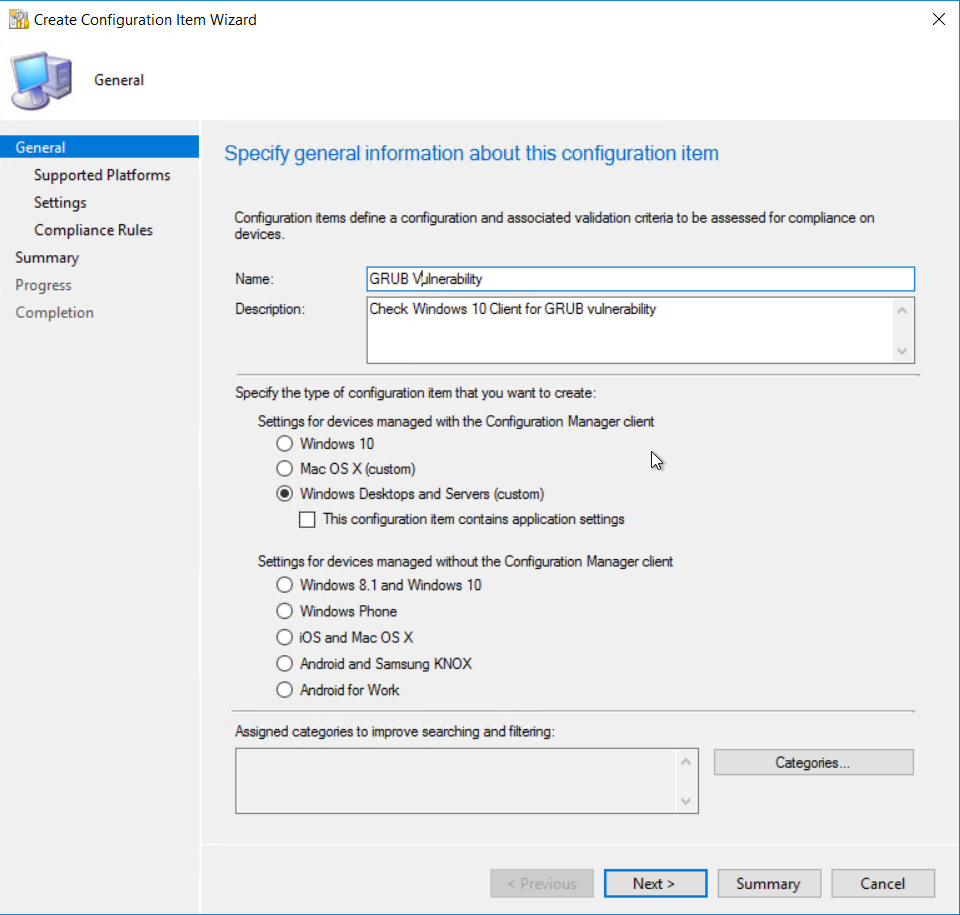 Select Windows 10 as the version of Windows that will be assessed.
 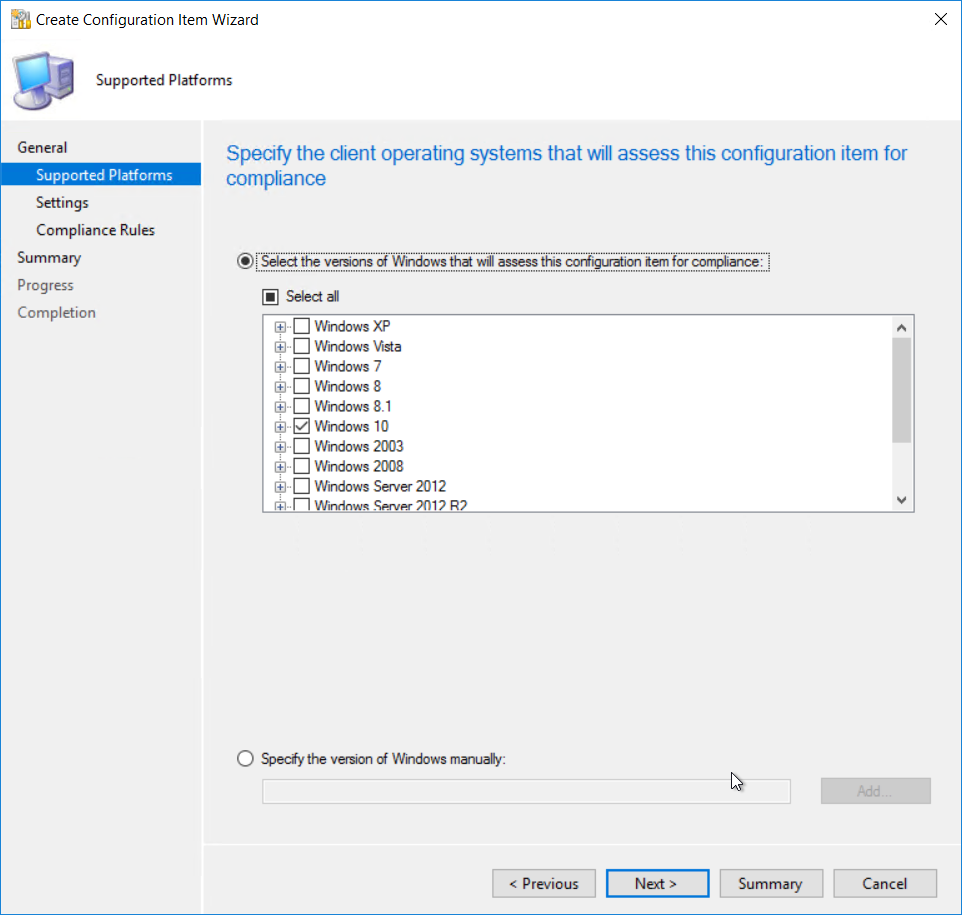 Add a new settings item.
 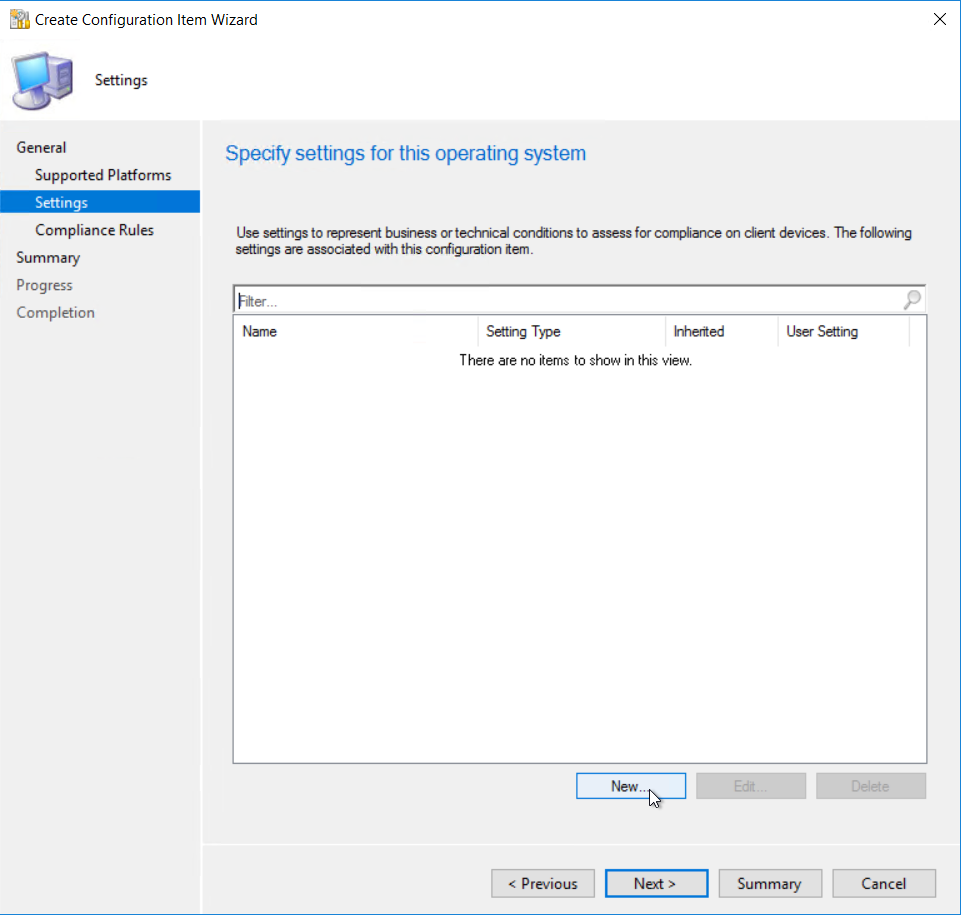 Give the item a name
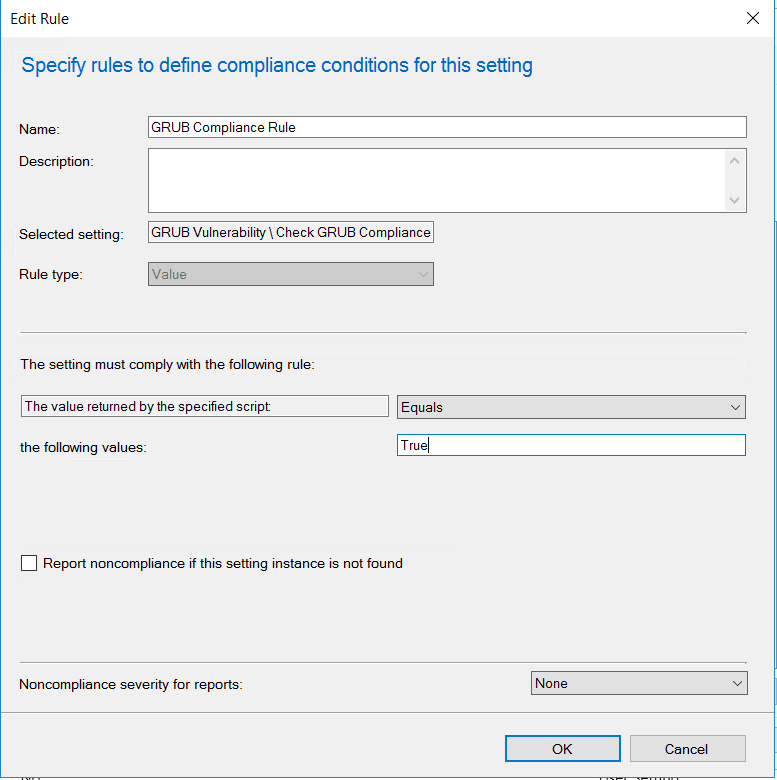
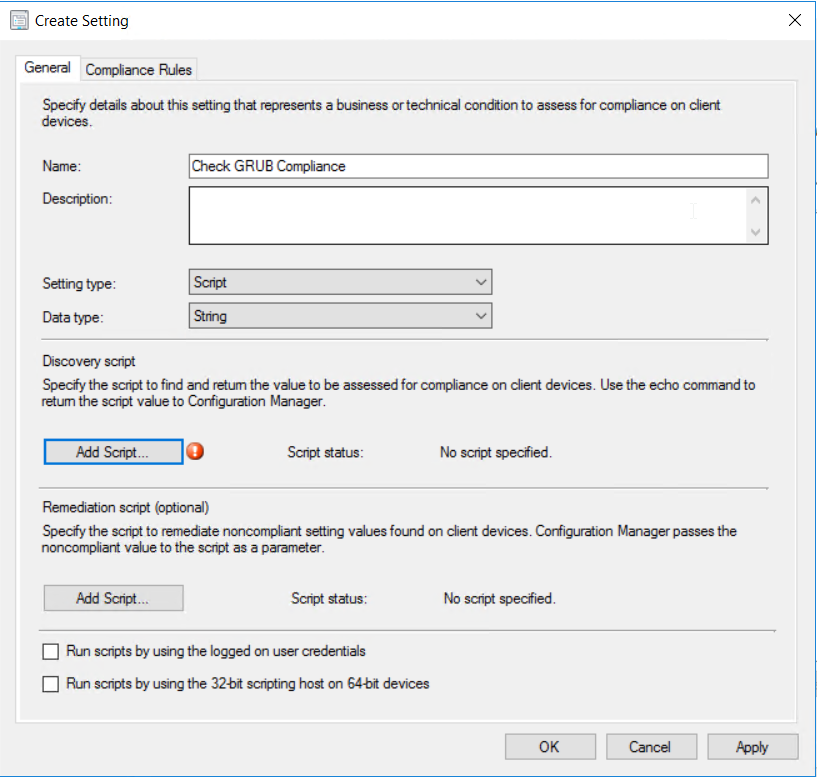 Put in the script above.
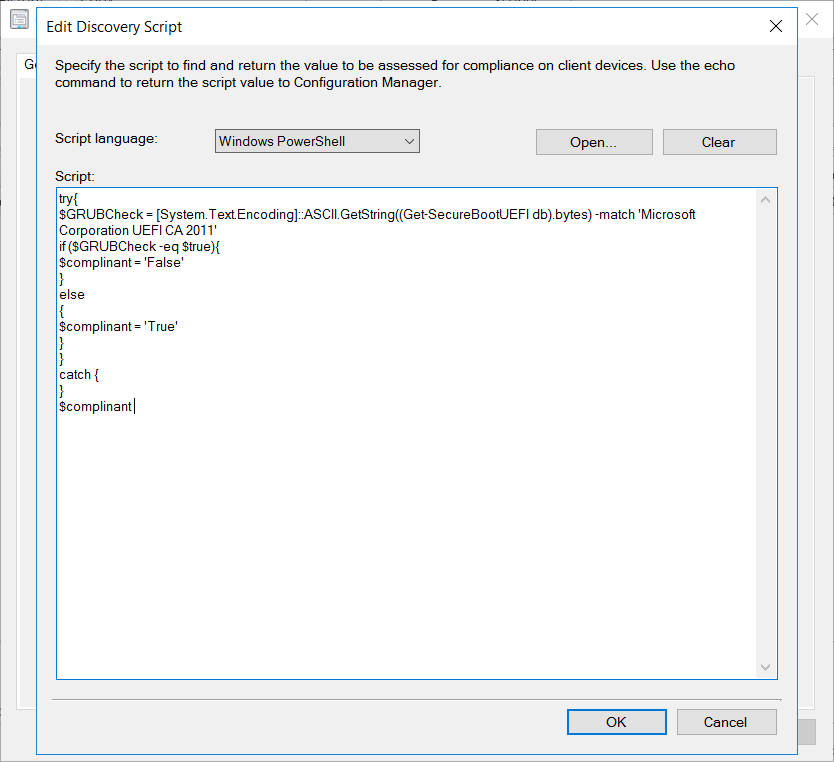 Next add in a compliance rule.
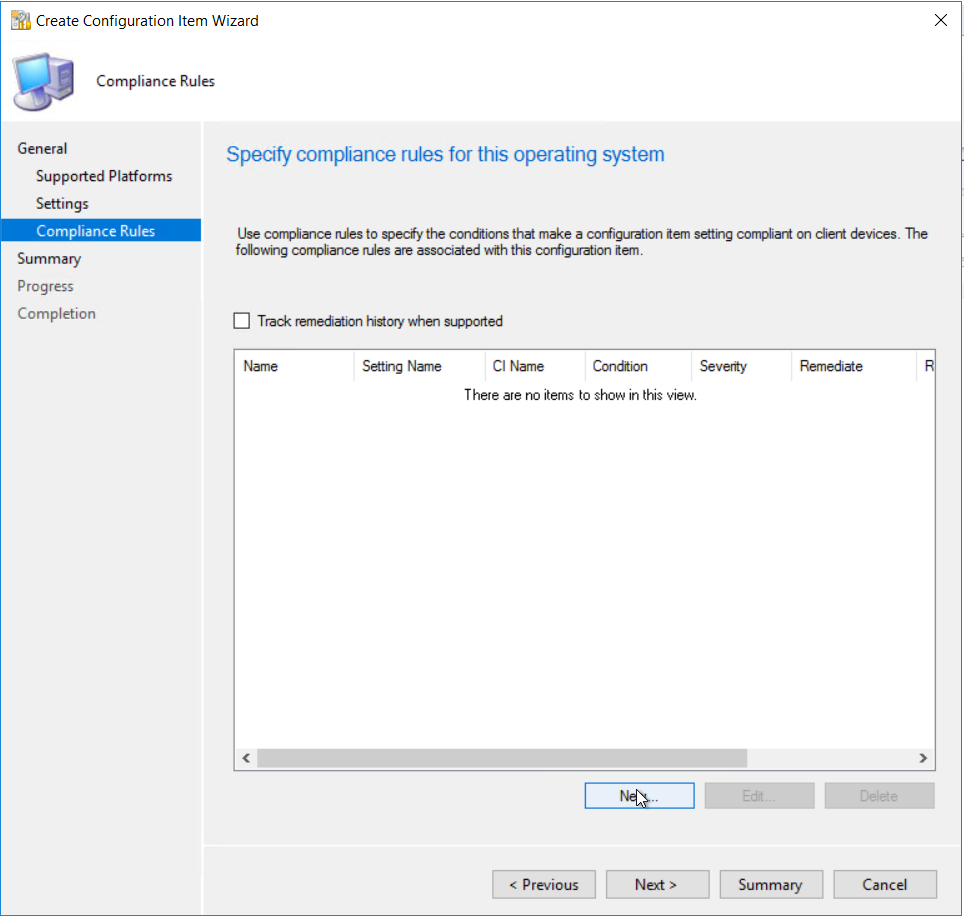
 Once all the settings and compliance rules are configure following the wizard to complete
 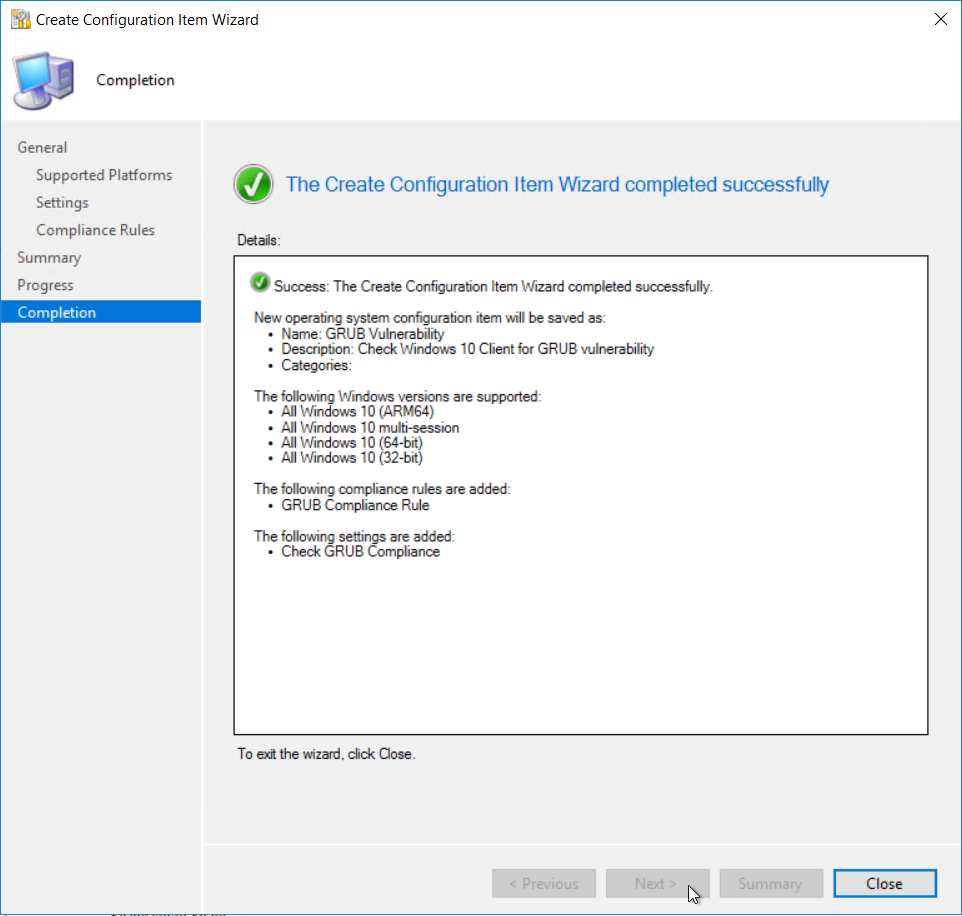 Next we need to create the configuration baseline
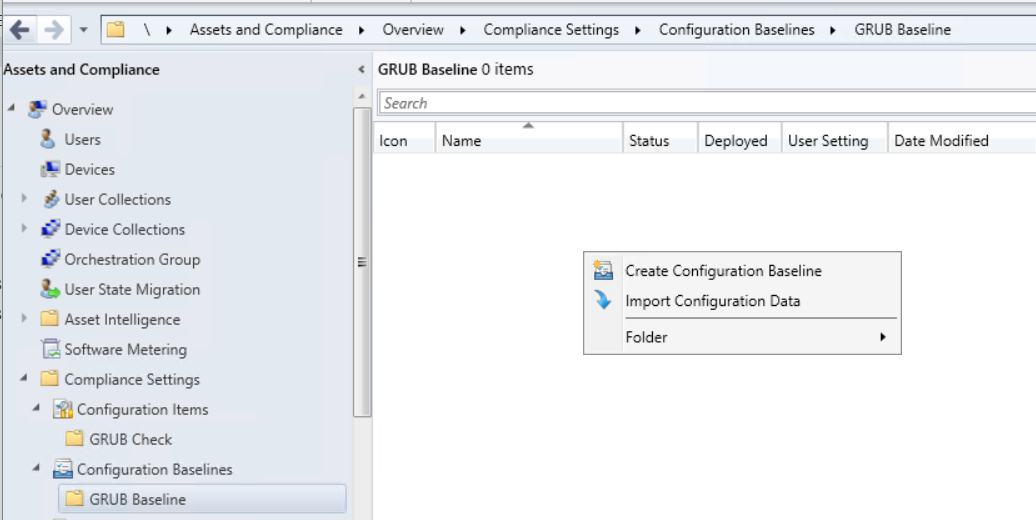 Give the compliance baseline a name
 Add the configuration item created earlier.
 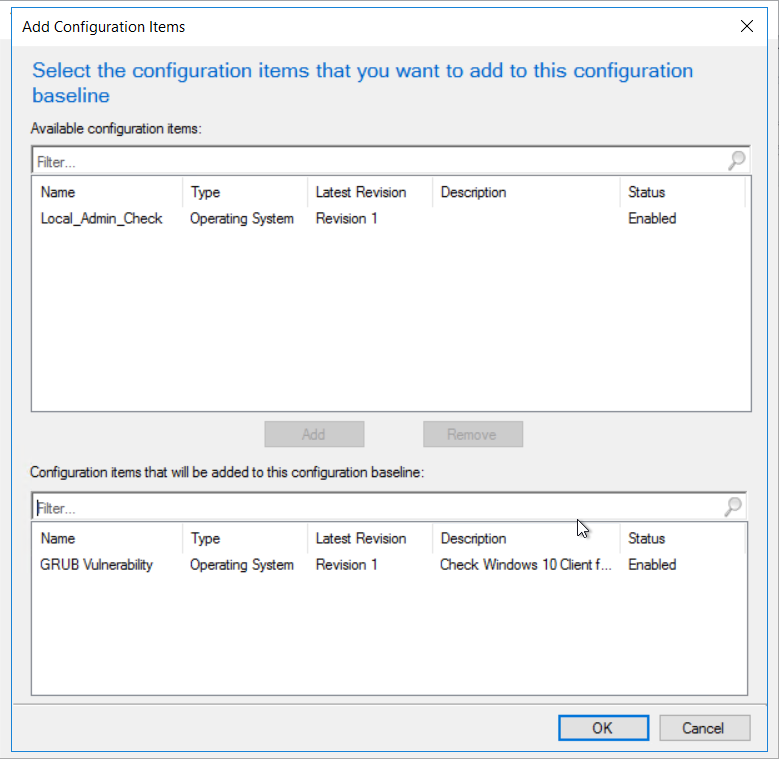 Click ok to complete the baseline
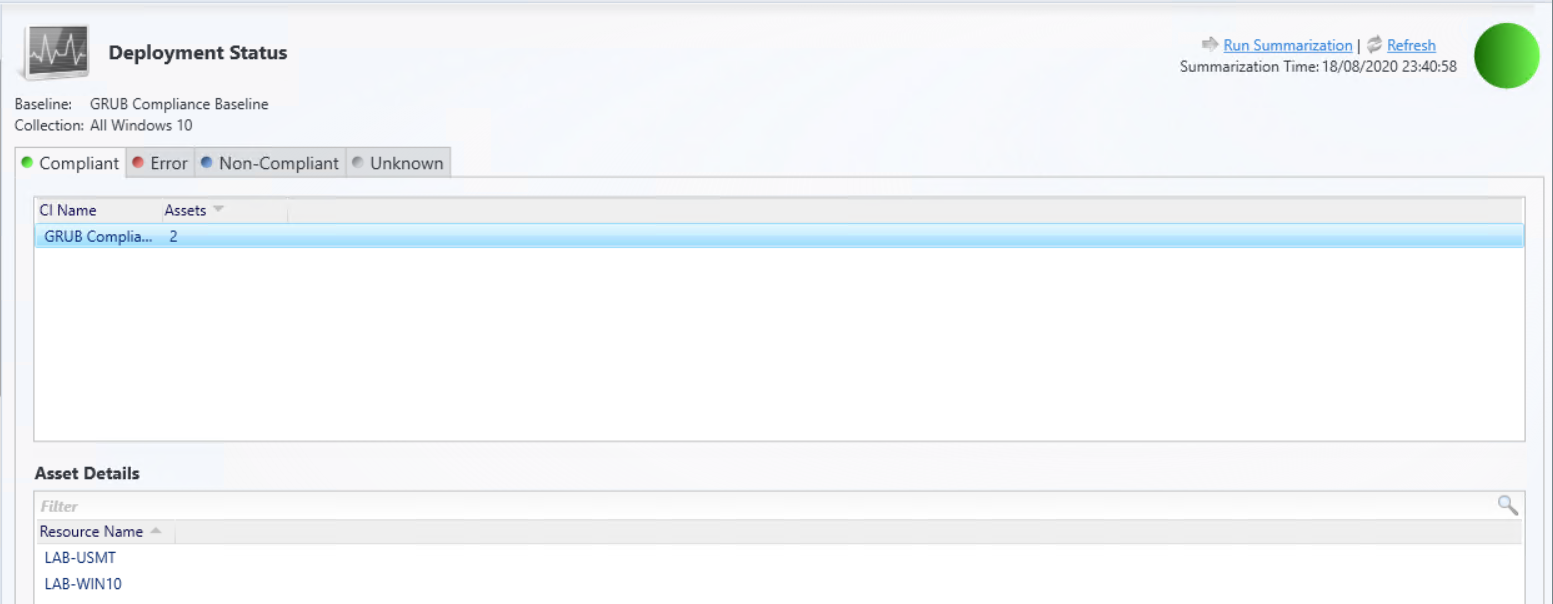
  Once the baseline is configured, deploy the baseline to the required device collection
  You can either wait for the next time the client does a machine policy retrieval or run the action manually from the client. Once the client get the updated policy the baseline should show under configurations.
 By default USMT will use the MigApp.xml and MigDocs.xml to set what will be copied.
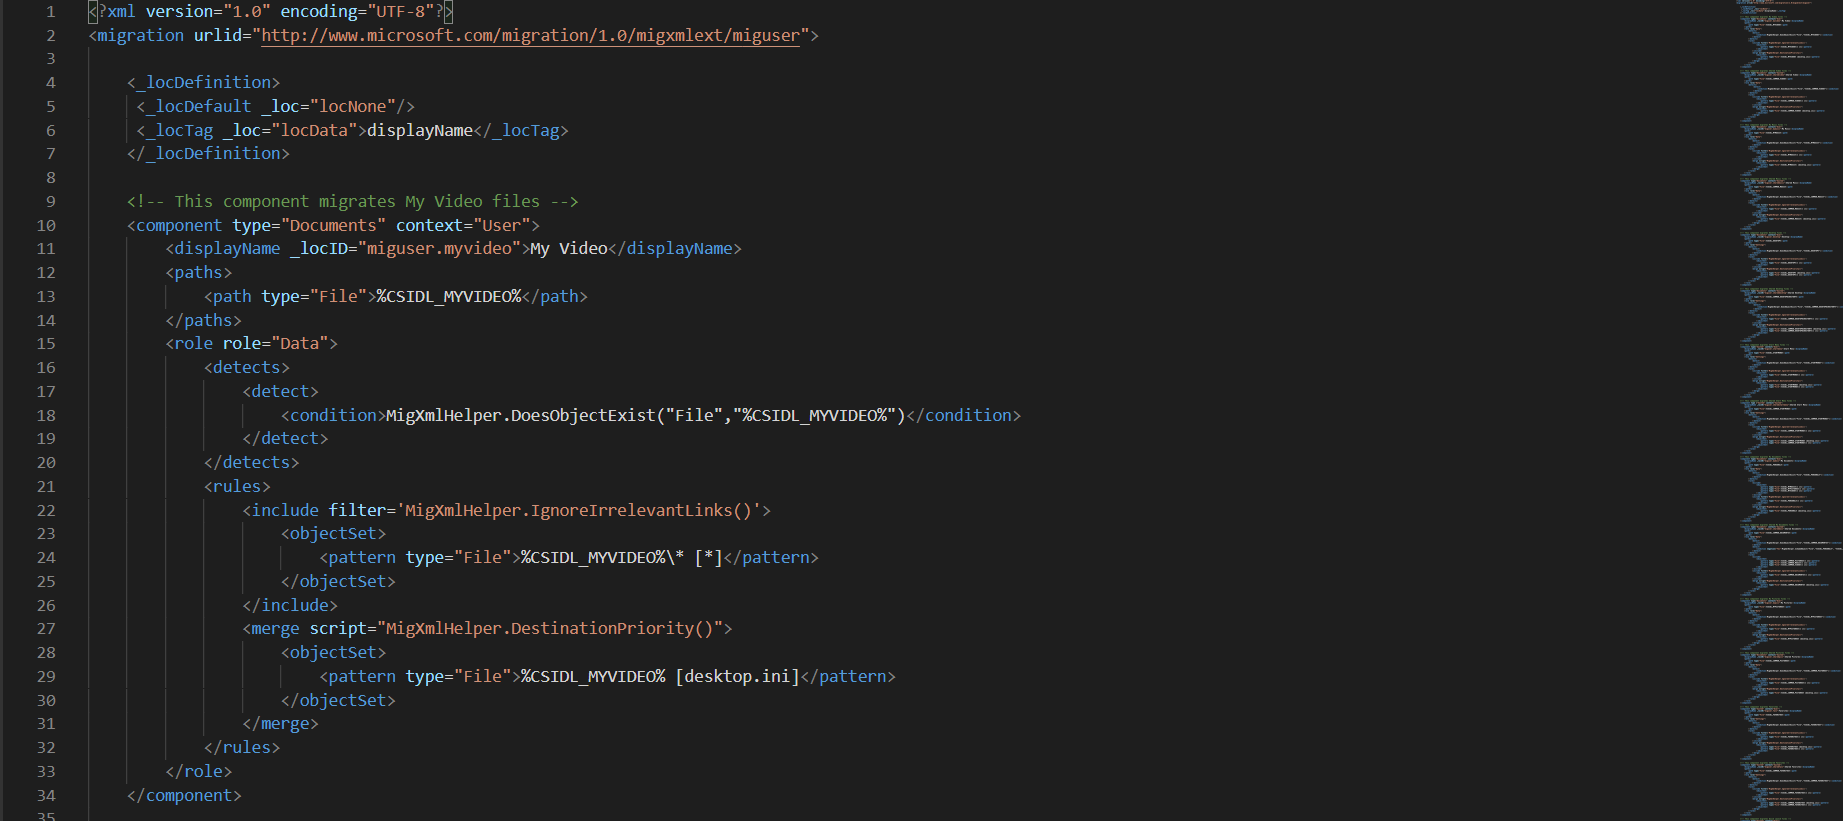 We will be using the default xml but you can create custom xml’s to customize what files and setting need to be copied and restored.
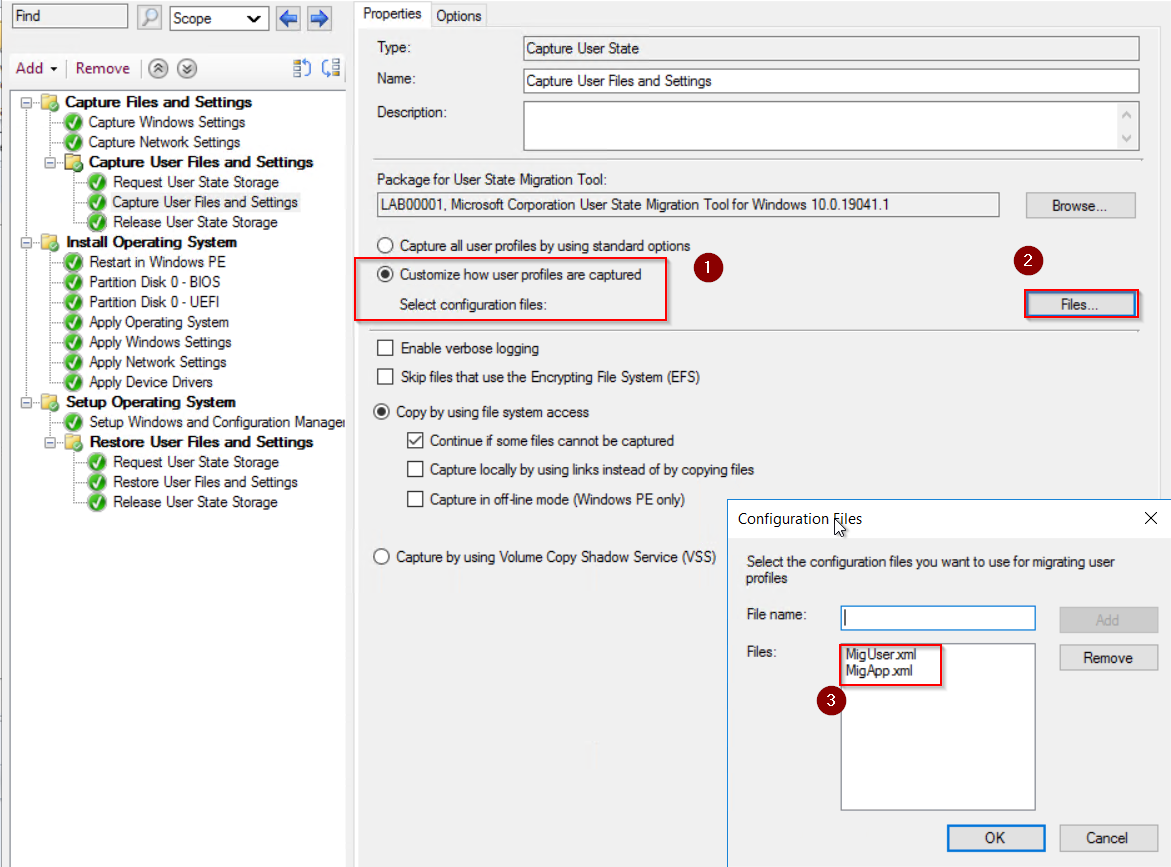 Once the TS is setup we just need to deploy to a collection so that devices can be added and pick up the wipe and reload TS.
 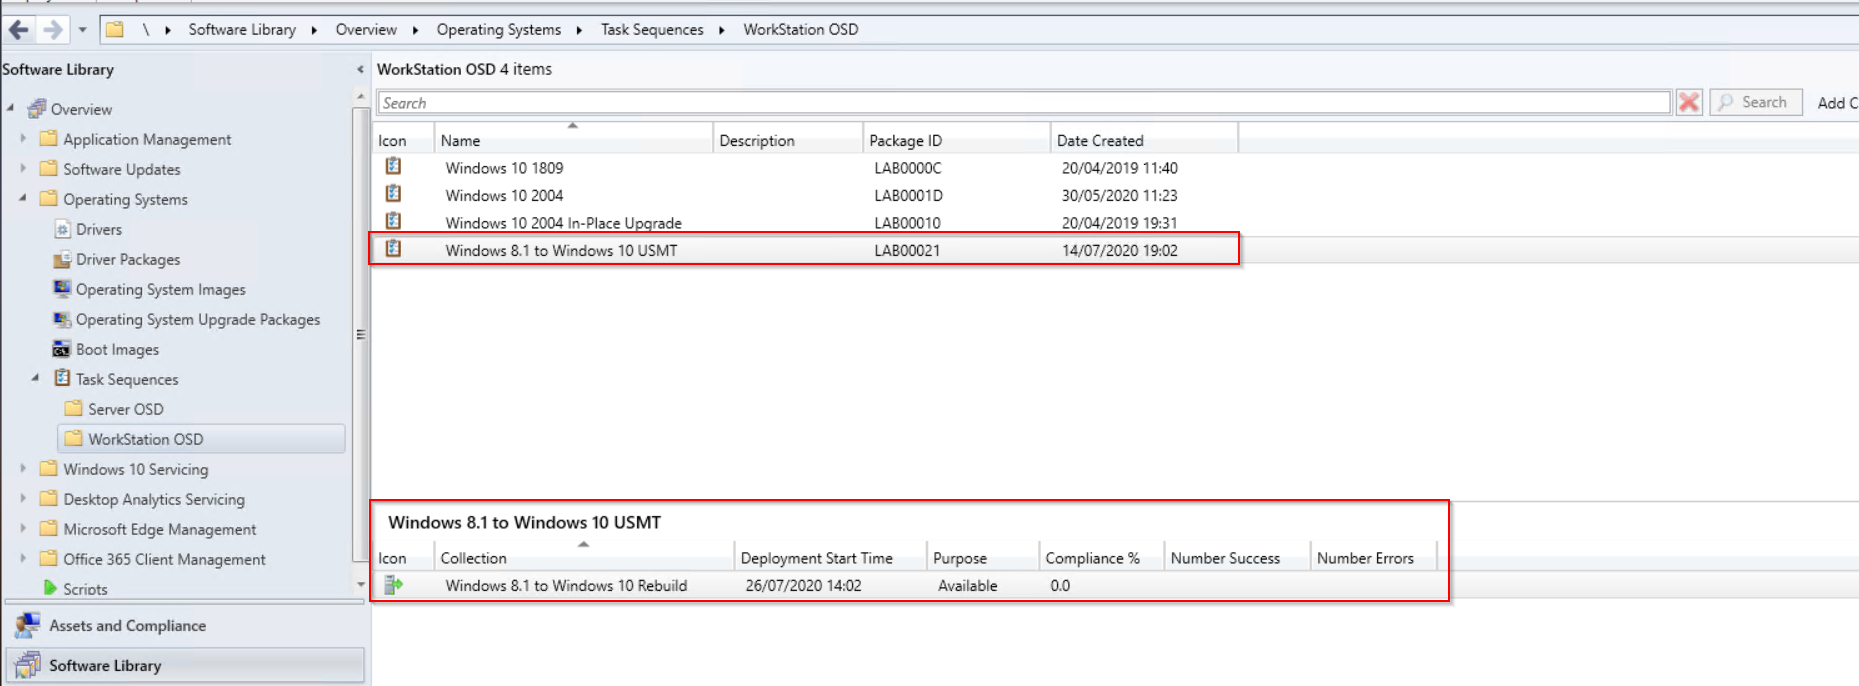 Once deployed either wait for the TS to be picked up or run the client action machine policy and app deployment evaluation.
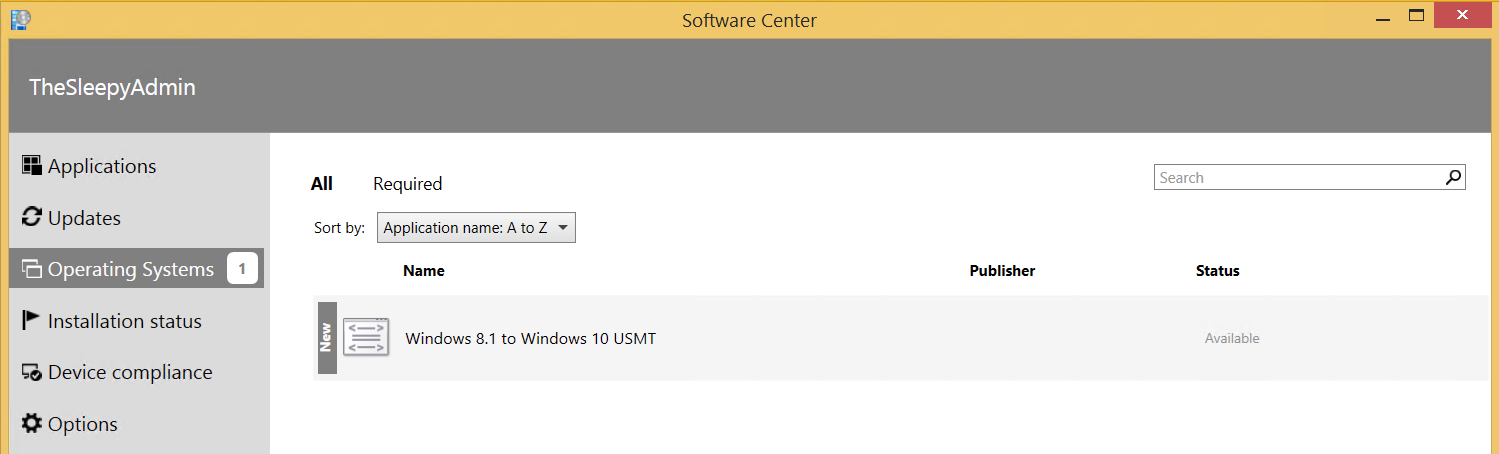
 We can check the smsts.log file to view what is happening we can see below that the files are being downloaded for the USMT package.
  Once the scanstate kicks off you can see the xml files that are used in the log.
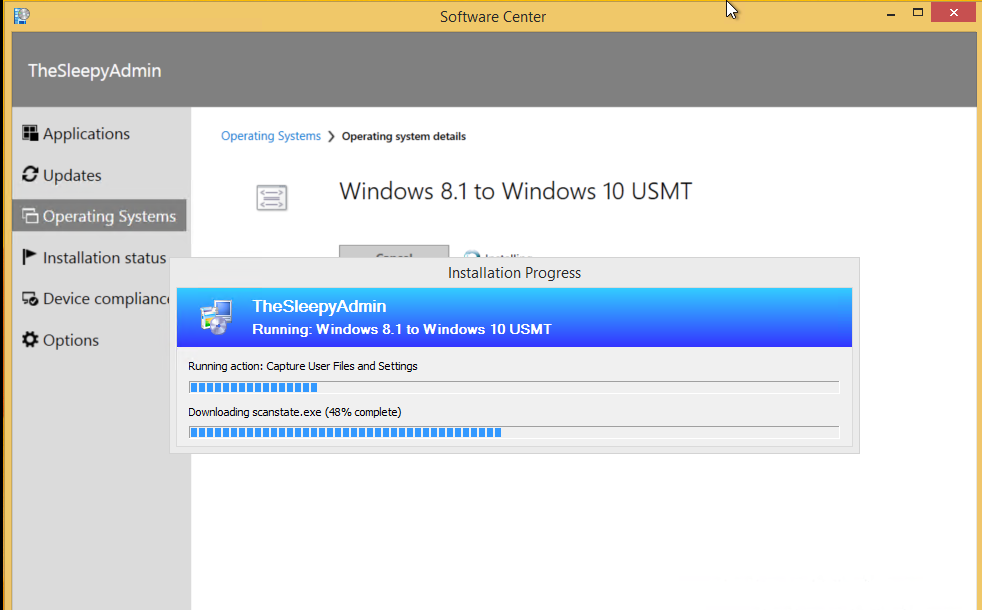
 We can check the USMT folder on the state migration point to see if data is being copied.
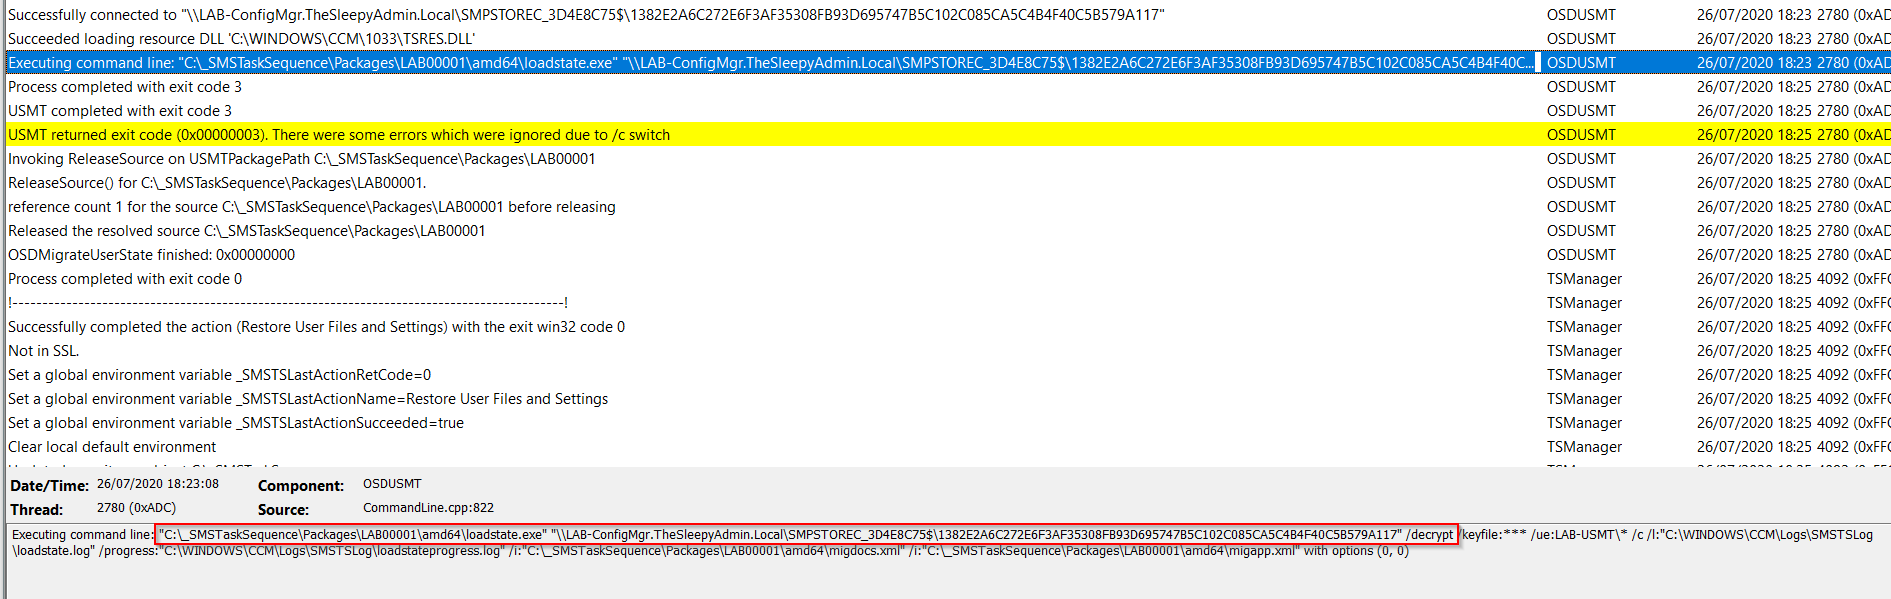
  Once the image is applied, we can check the restore state task in the smsts log. The command will call the loadstate and cause use the default or custom xml files.

 When the TS has fully finished we can logon to Windows we should see that the devices is running Windows 10 and also has the file and settings migrated.
 To confirm the query is working we can create a search filter for all software updates to make sure they match.
 Last step was to create a weekly email report using SQL Server Reporting Services (SSRS).
 I created a custom Reports folder to keep any report I created.
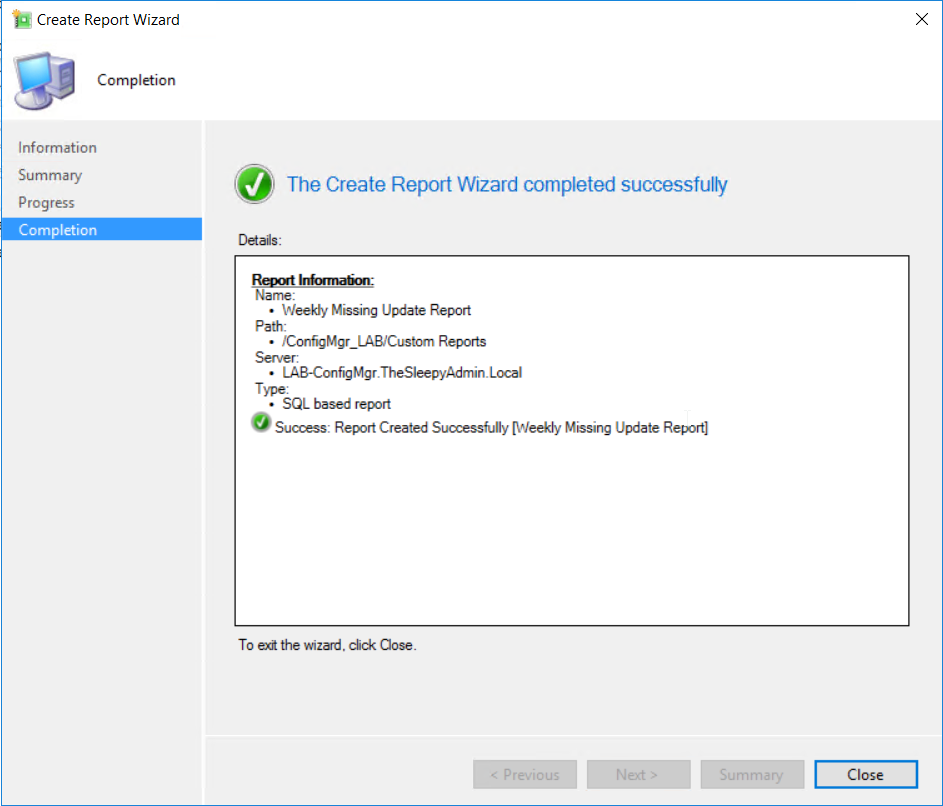
 Follow the report wizard to finish the report creation.
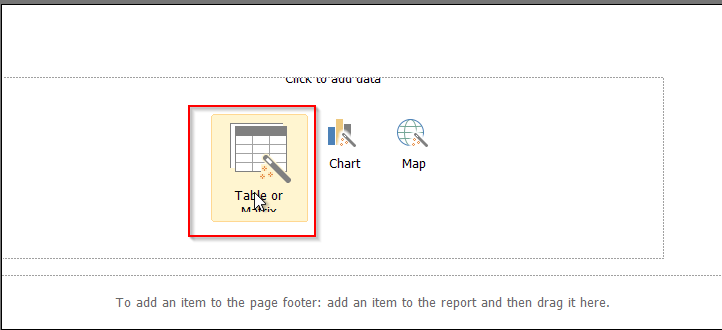
 Once the report wizard completed the report builder should load.
 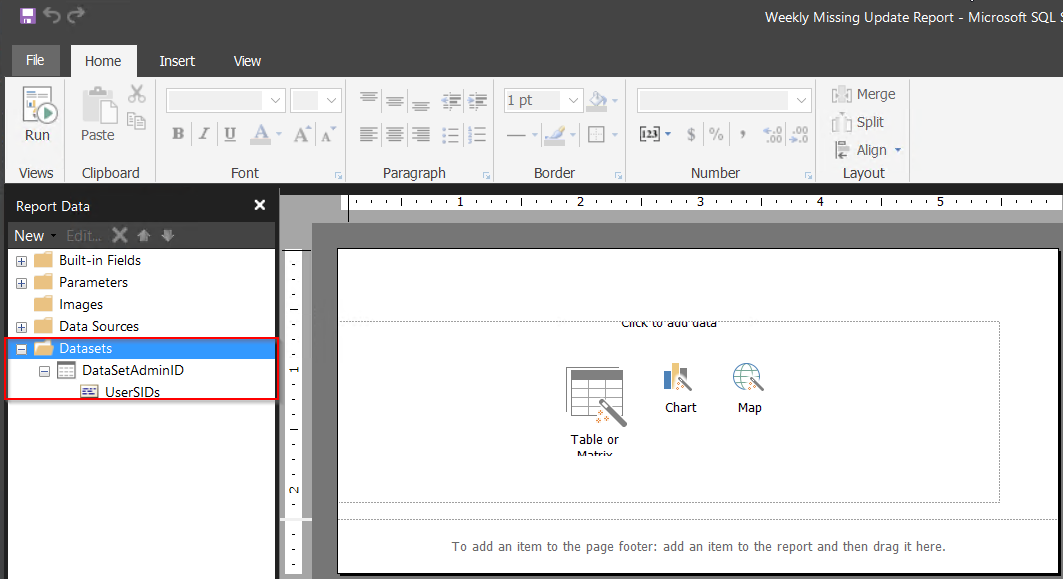 First create a new dataset. Right click on Datasets > Add Datasets
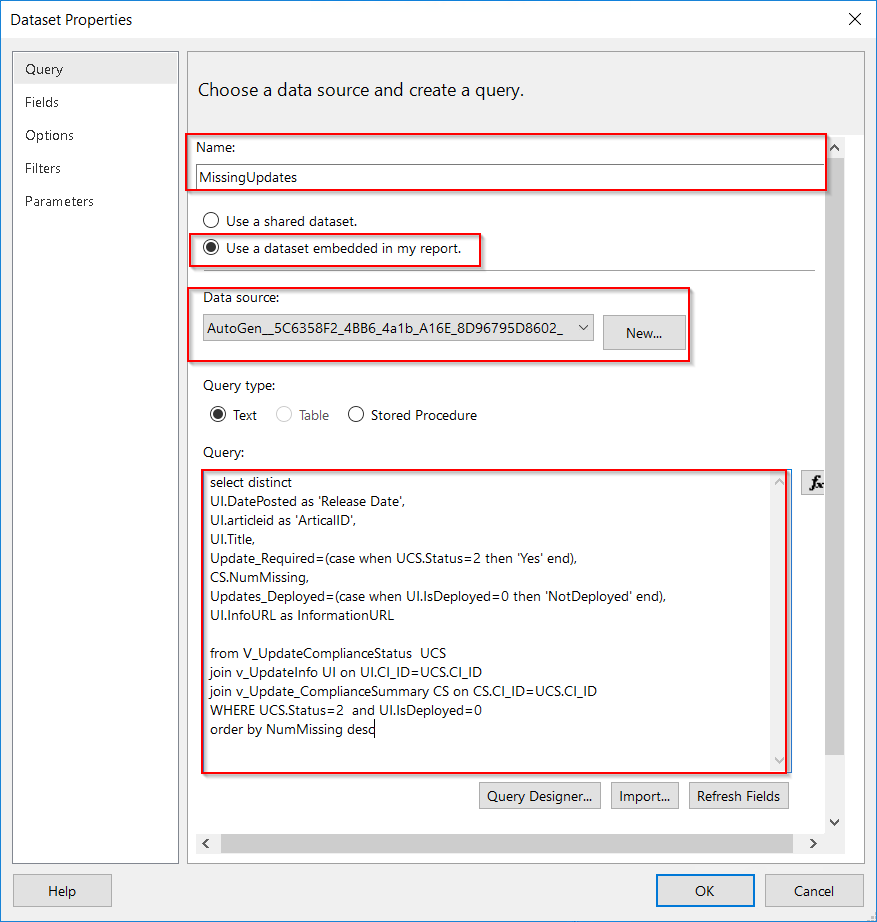 Once that click ok and the dataset should show under datasets.
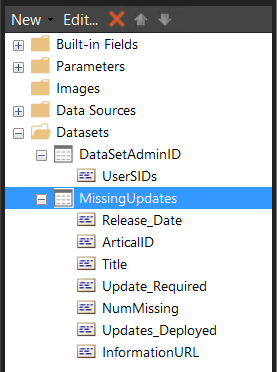
 Select the dataset we create.
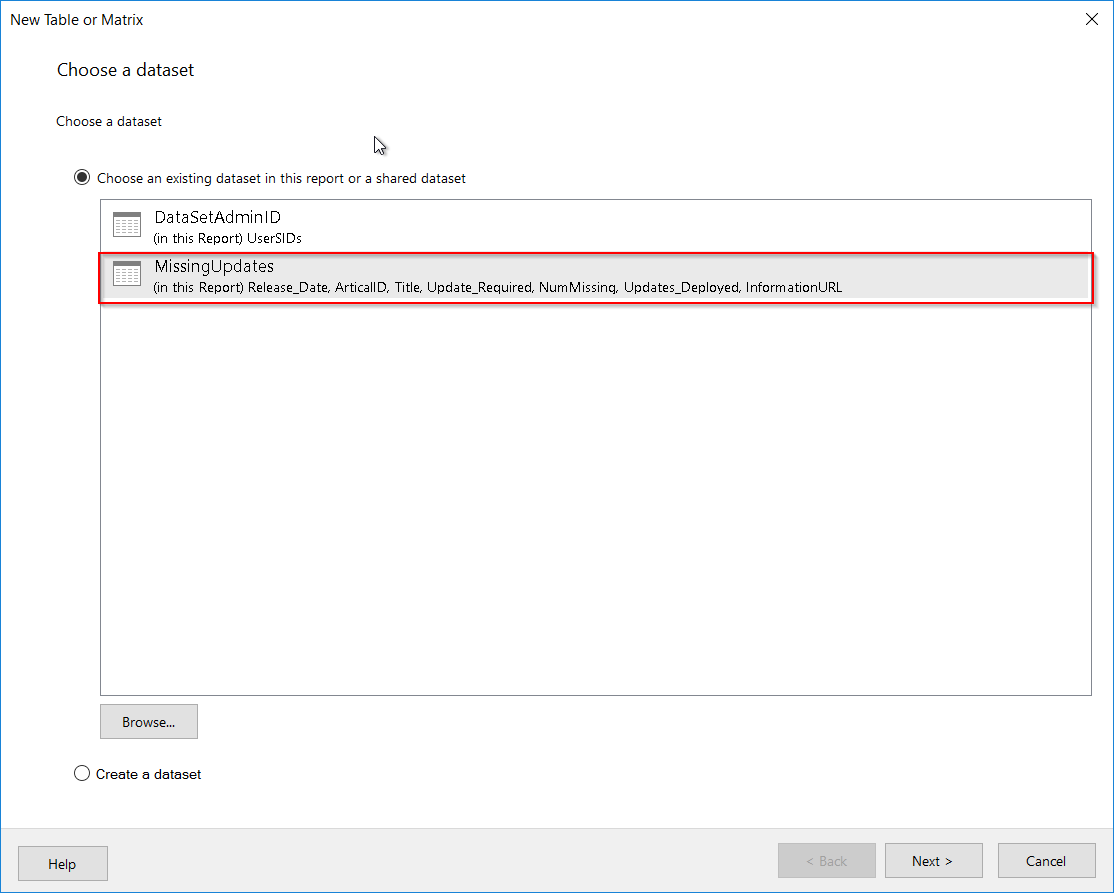 I just wanted to use all values so drag all row to the value box.
 Next just go through the rest of the wizard. Once completed you should see something similar to the below. I added a text box at the top for a tile and added in some grey filling on the table.
 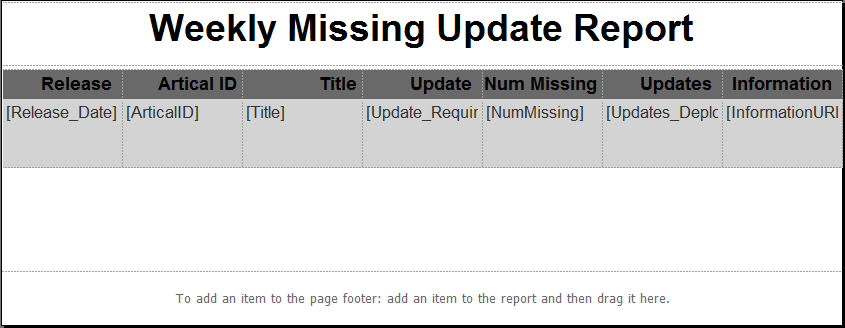 Now save the report and we can run from the MECM console to see what the report will look like.
  Last step is to create subscription to send a the weekly report
 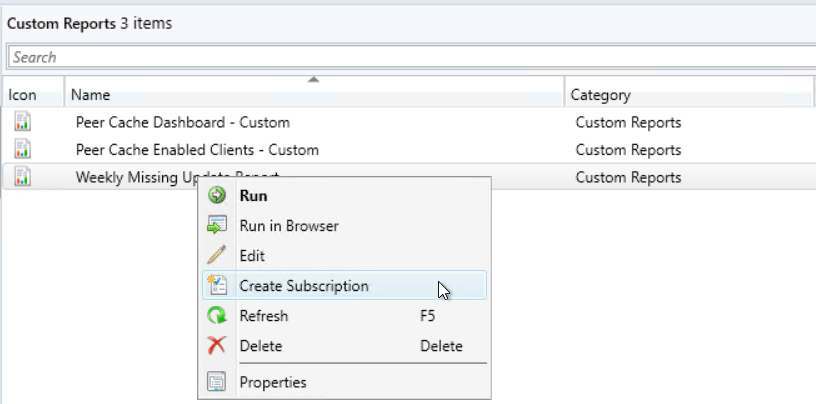 Select report delivered by Email and put in the required detail and report to be included.(Email settings need to be configured in SSRS before you can select email as a deliver option)
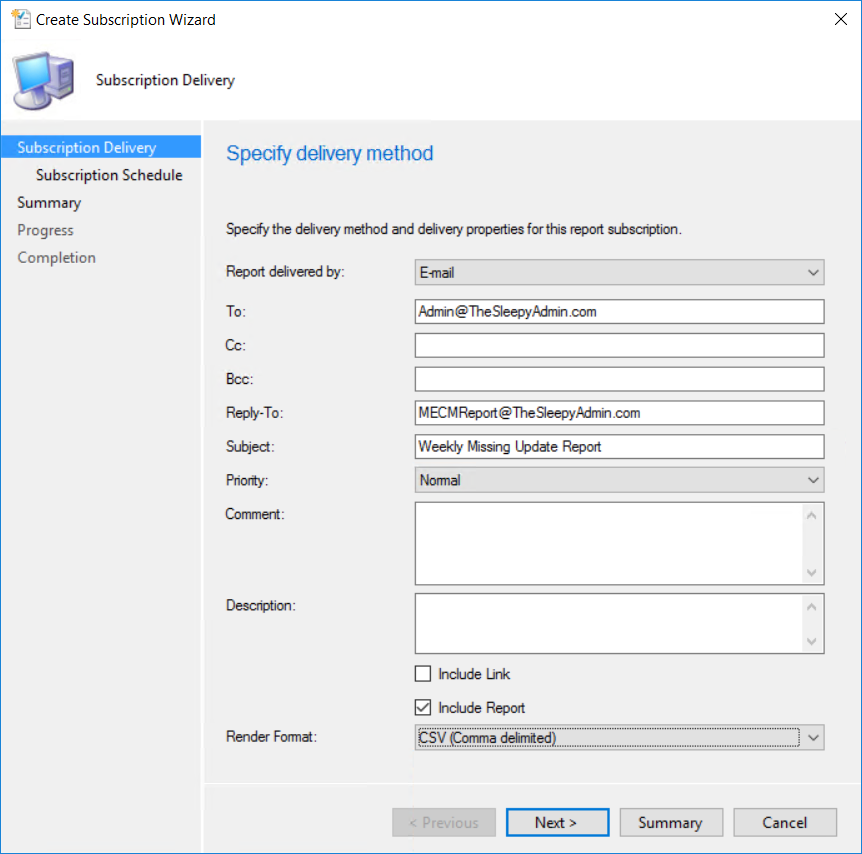 Set the schedule that is required and complete the wizard.
 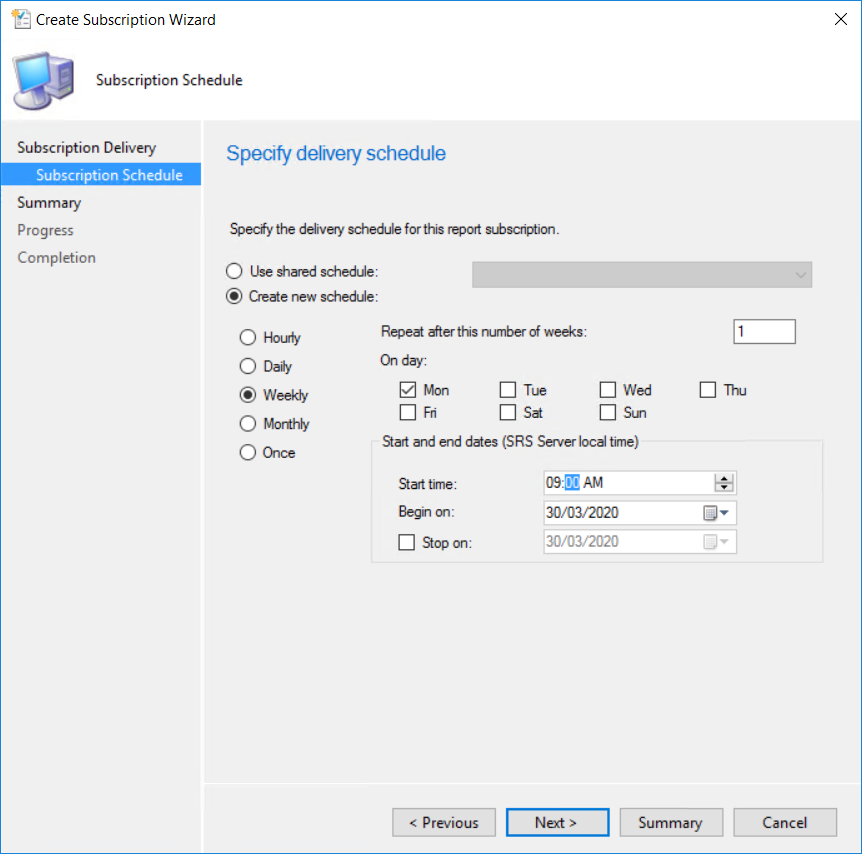 The report should now be sent out weekly as a csv file.
 We currently install MBAM successfully on Windows 1809 so it didn’t look like a MBAM server issue or connection issue. I checked and there was a newer servicing release from May 2019


 Now I can image the surface pro 6 1TB model successfully.
 Select deployment tools.
 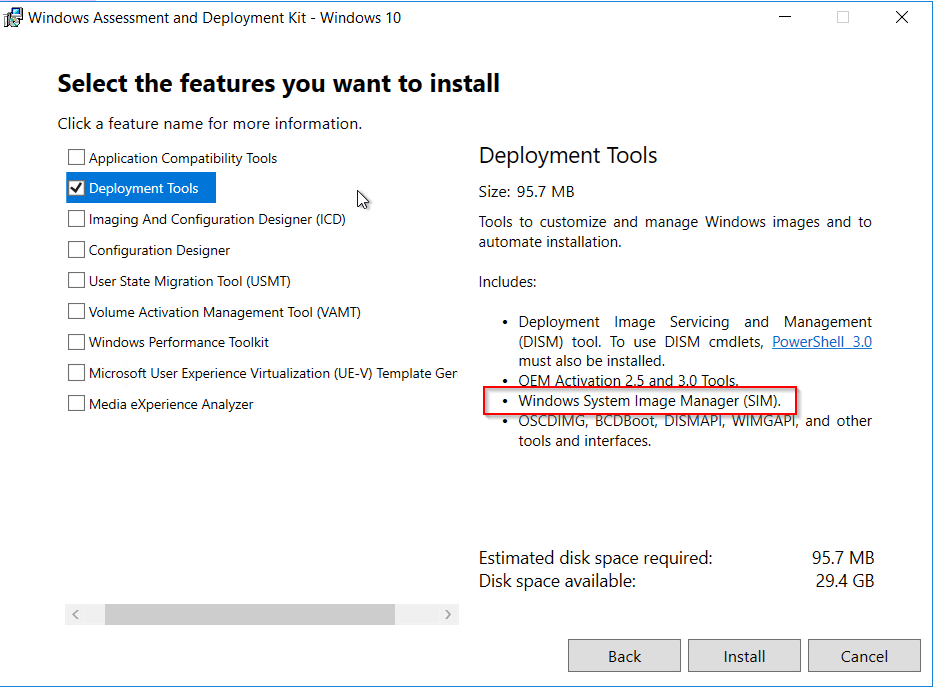 Once the install has finished, go to the start menu and down to Windows Kits and open Windows System Image Manager .
 Below is the extracted ISO.
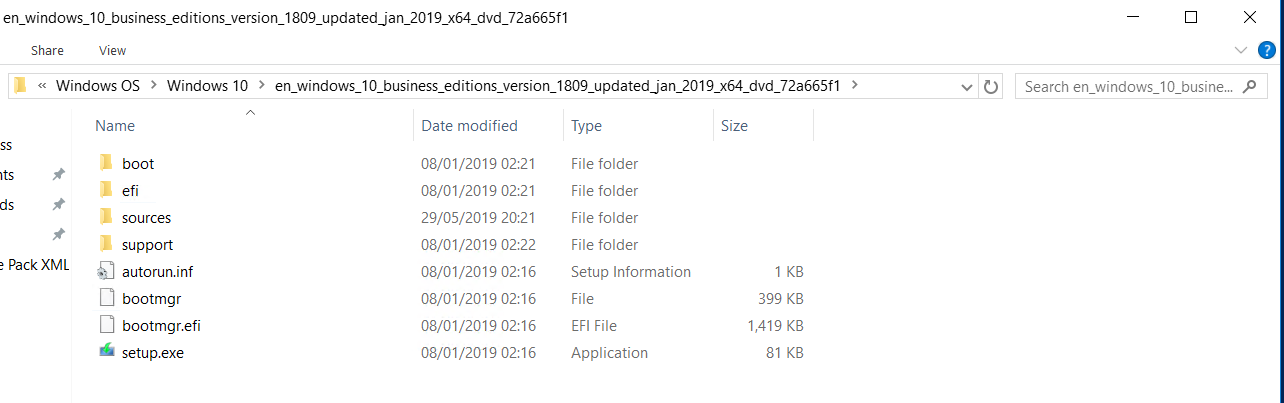 Go to Sources > install.wim.
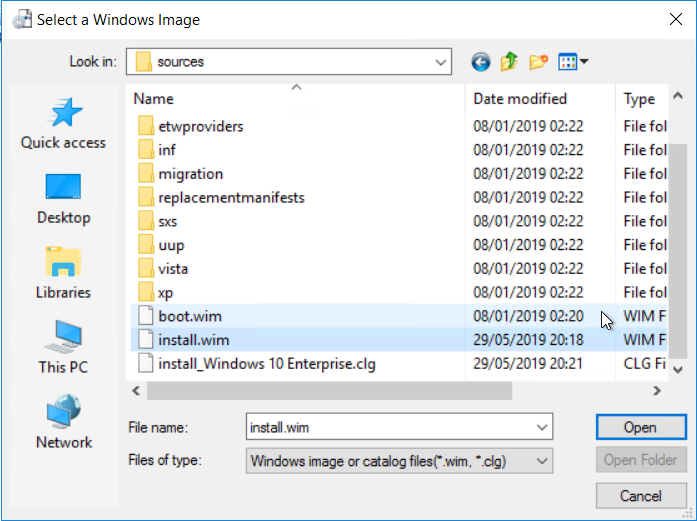 Select the version.
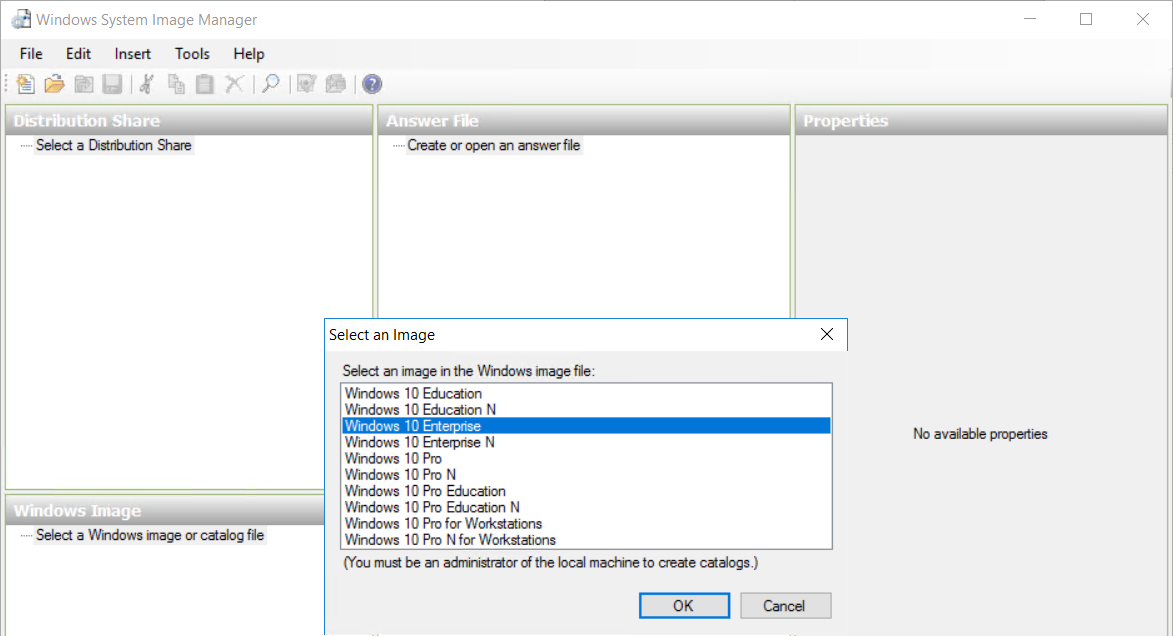 Next create a new answer file.
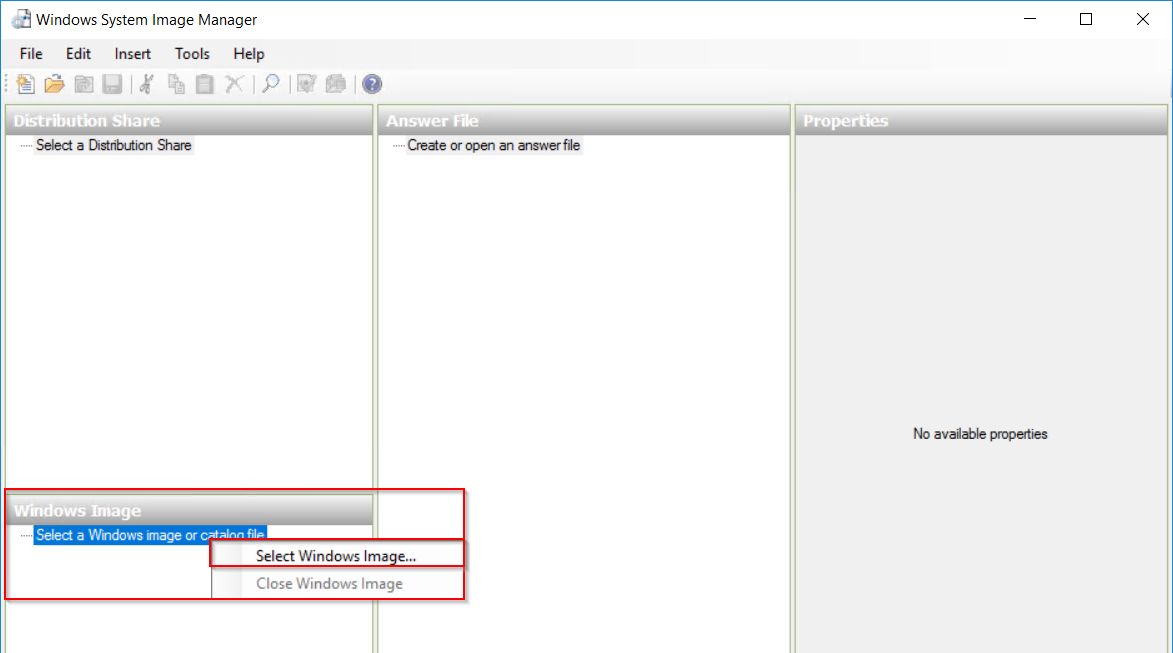
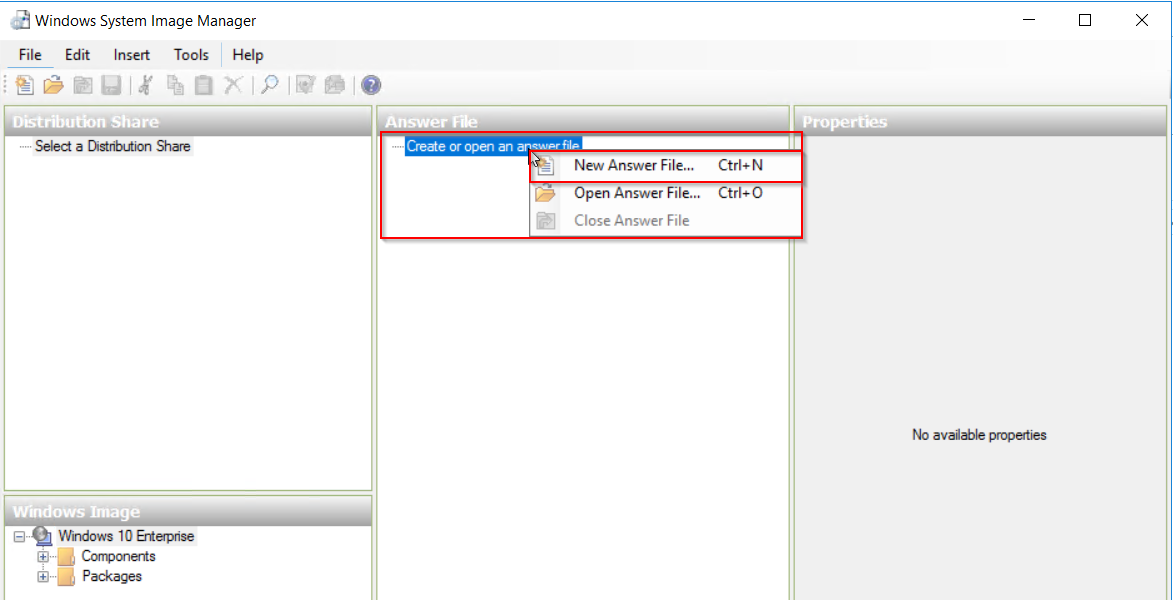 Go to Windows Image
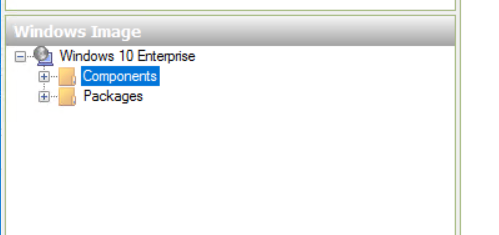
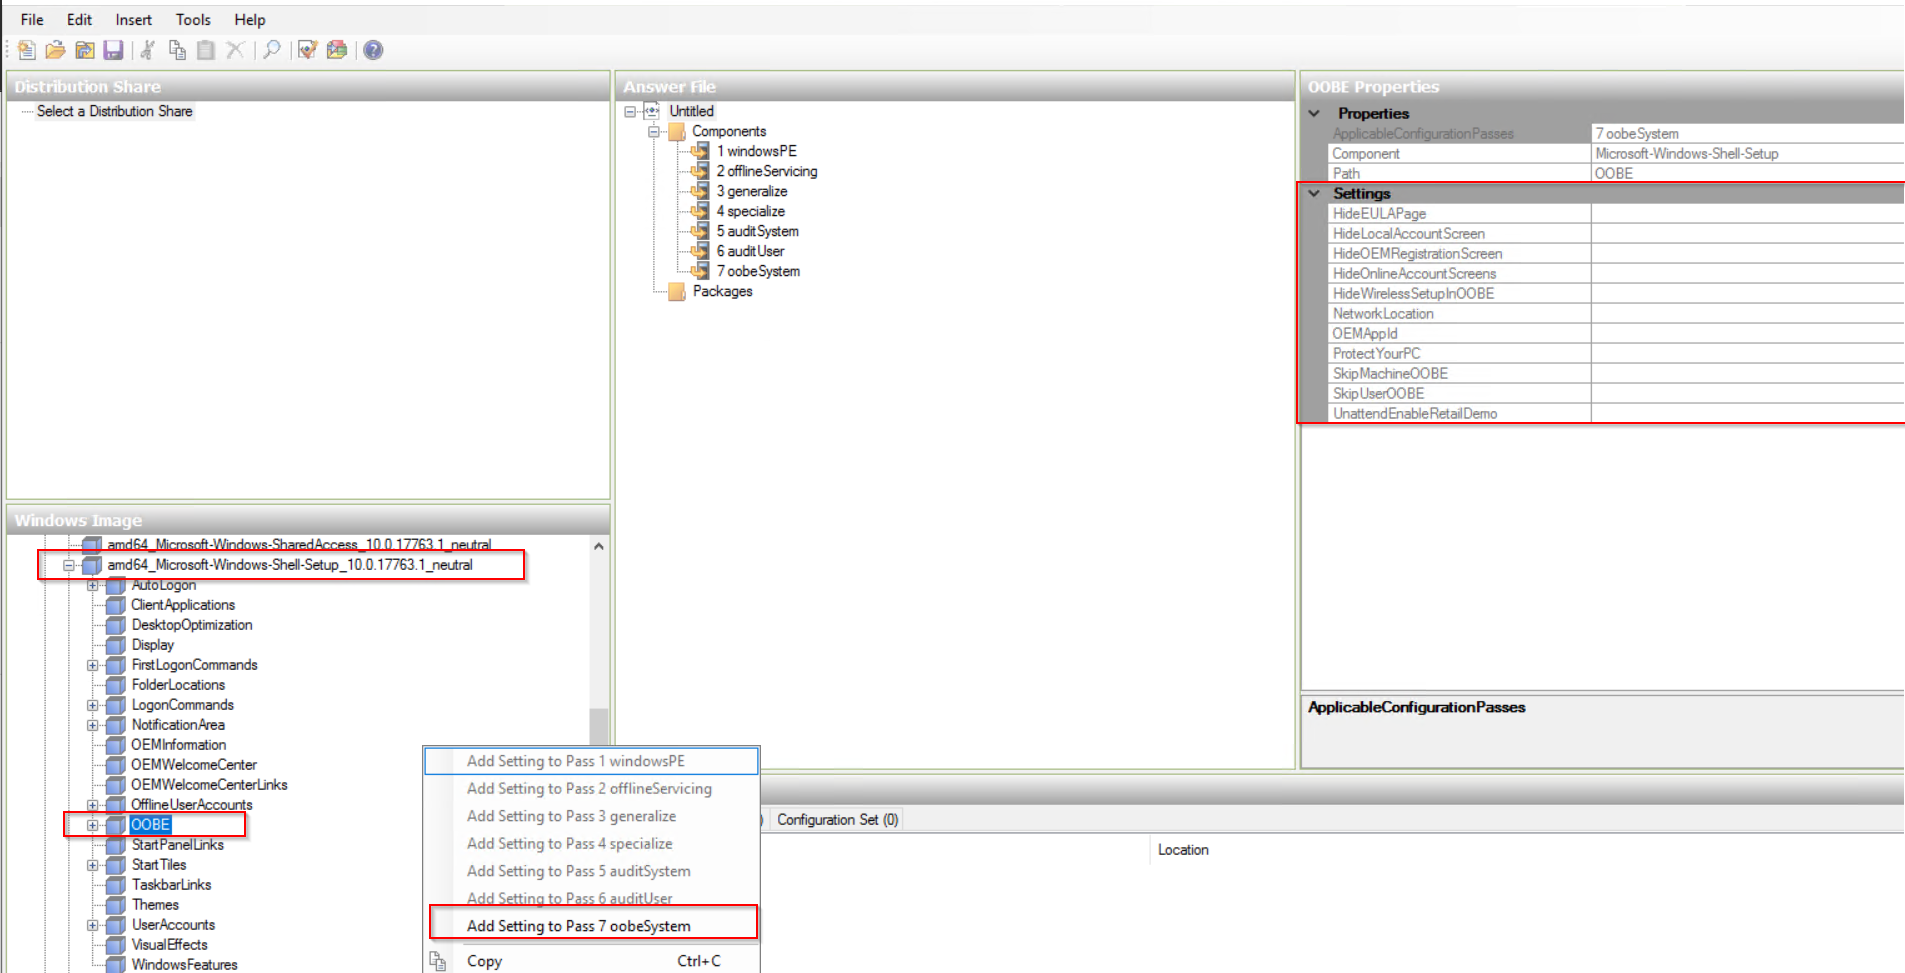 Edit “amd64_Microsoft-Windows-Shell-Setup__neutral” to add in Register Owner and any other details as required.
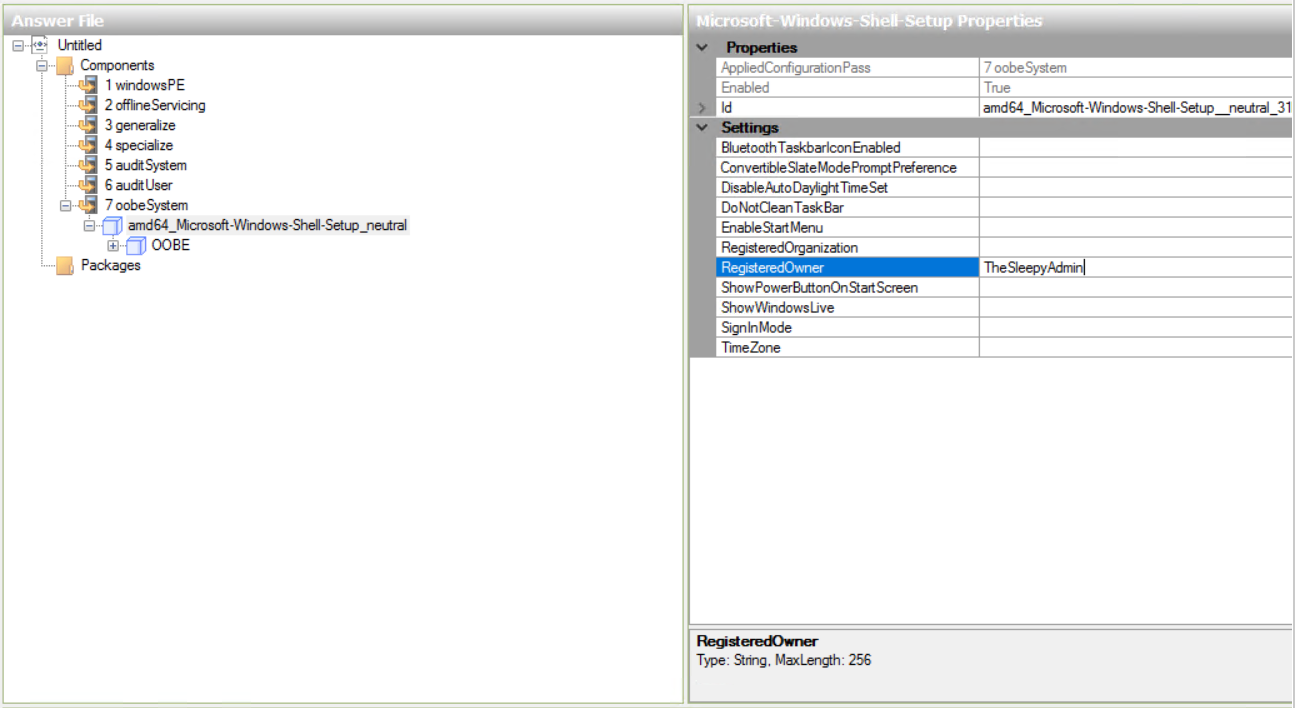 Next edit the required OOBE settings.
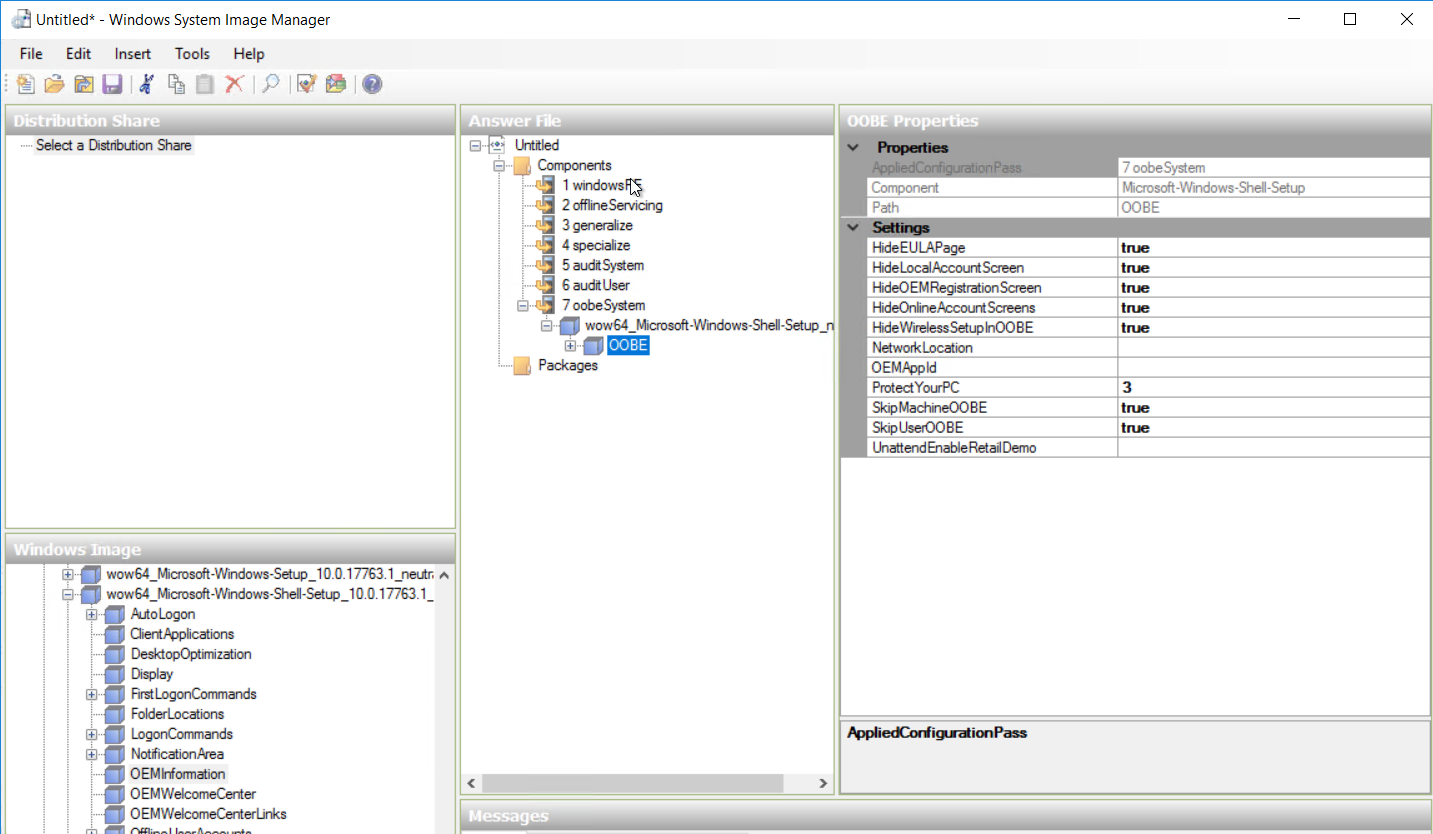 Once all the settings have been added save the answer file.
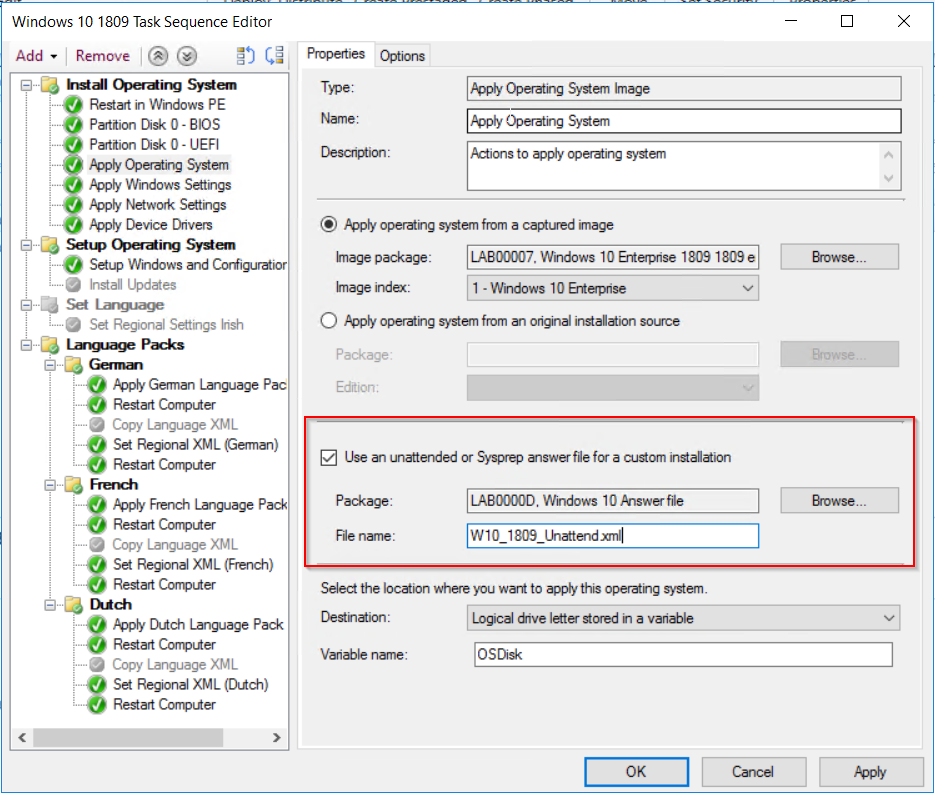
 Last step is to create a package for the answer file and apply the answer file in the SCCM task sequence.