During a recent migration we have been having issues with Azure Migrate VMware (Agentless) where the replication would start failing intermittently with ErrorID 181009 and Error Message:
ErrorCode: ‘1028’ VM: ‘ServerName’. Appliance: ‘ApplianceName’. Disk Id: ”. Disk path: ‘vmdk’. Error: The operation VirtualDiskSnapshotOpen failed with the error ‘Unknown error’ [Unknown error]
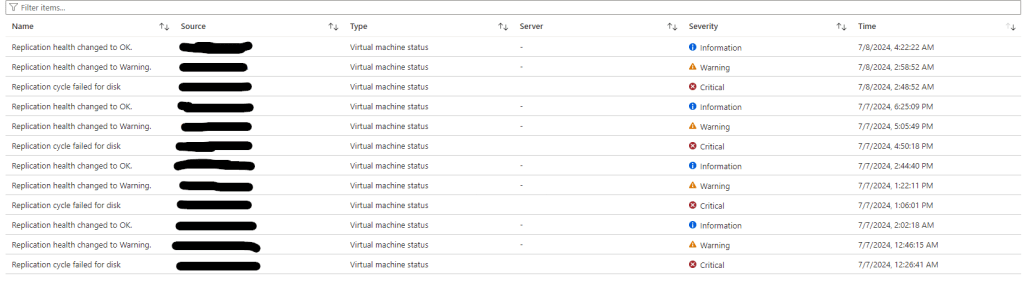
Replication failures
We had checked all the correct permission had been applied.
Also confirmed that we were running the VDDK 7.0 for vSphere 7.
Confirm the password for the account didn’t contain unsupported special characters.
We used the troubleshooting link below but there was no issue listed that matched our issues.
During troubleshooting with VMware / Azure support we end up having to download the VMware VDDK 8.0, delete the existing VDDK from “C:\Program Files\VMware\VMware Virtual Disk Development\” and updating this with the VDDK 8.0 version.
I was setting up an Azure FileShare recently and wanted to connect with the storage account key to configure the initial permission and folder structure.
When trying to added the connect account details I was getting the below response.
CMDKEY: Credentials cannot be saved
The issue was due to one group policy that was blocking saved passwords. The specific policy setting was Network access: Do not allow storage of passwords and credentials for network authentication
To fix the issue I had to create a new GPO that would change the policy setting for the device I was connecting from. Setting to Disabled.
Once this was updated the command then completed successfully.
After getting the credential to successfully add I still couldn’t map the shared.
I was getting New-PSDrive : The specified network password is not correct
After a bit of troubleshooting the issue was down to having NTLM v2 disabled on the security setting on the Azure FileShare.
The settings is under storage account > select the storage > Data storage > File shares > Security.
Under security check that NTLM v2 is enabled under Authentication mechanisms.
After enabling NTLM v2, I was able to connect to the Azure FileShare using the storage account key.
In this post we will be going through the process of using PowerShell to deploy VM’s using the Az module. We will then use a csv file to create multiple VMs.
To start we will need an existing resource group, vnet and subnet that will be use for the VM to be built in and connect the nic.
Next we need to have the Az PowerShell module installed this can be done by using
Install-Module -Name Az -Repository PSGallery -Force
if the module is already installed it a good idea to check if there is any updates we can use the below command to update the module.
Update-Module -Name Az -Force
Once we have the module and pre-req resources in Azure we can start to create the command that will be used to build the VM.
I use the New-AzVM learn page to check on what parameters I wanted to use to create the VM .
Once we have the parameters set we can then call them using
New-AzVm @vmproperties
We can run get-azvm to check the vm is created and running.
To deploy multiple VM’s using a csv file we can use the same splatting we will just be updating to using a foreach loop and import csv.
First we need to create the csv below is the heading that I used.
Next we need to update the parameters splatting to use the variable that will be used in the foreach loop in my case its $vm.
Below is the updated parameters.
Save the script and we will connect to Azure again and run.
The csv and splatting can be updated to add or remove additional parameters.
The only issue I have found is that there is no way to stop a new NSG being create unless you specify an existing NSG. For each VM I deployed it create a new NSG.
I had to manually go in and delete these NSG’s as I am using a NSG on the subnet and don’t want them on the VMs nics.
It looks like in a future release of the Az module you will be allowed to specify no NSG.
This can be an useful alterative for deployments of VM’s if you aren’t that familiar with Arm or bicep templates and more comfortable using PowerShell.
In this post we will be going through the process of migrating a VM in to an availability zone.
Azure availability zones are designed to help with availability for business-critical workloads. Using availability zone allow VMs to be replicated to different datacenter within the same Azure region.
There is not currently an easy process to move a VM in to an availability zone as this needs to be configured when the VM is originally deployed.
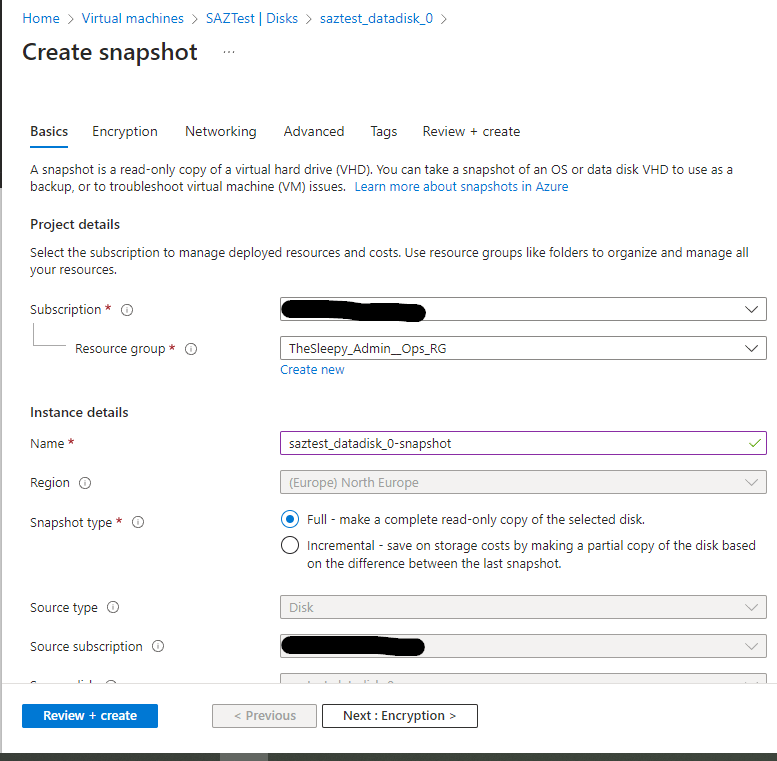
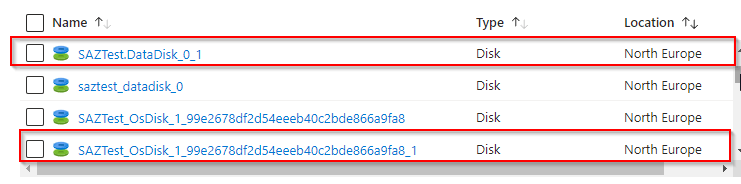
The process to migrate does required down time for the VM as we will need to snapshot the VM, create new disks from the snapshot and deploy in to an availability zone.
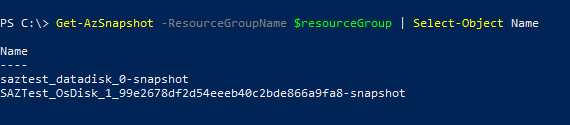
We will be using PowerShell to create a snapshot of the existing VM disks , create the new disks from the snapshots and create a new VM using the existing VM config.
I will be doing this on test VM with no live data but for an live server make sure to have a full backup as we will be deleting the VM and use the existing configuration to recreate the VM with disk in the availability zone.
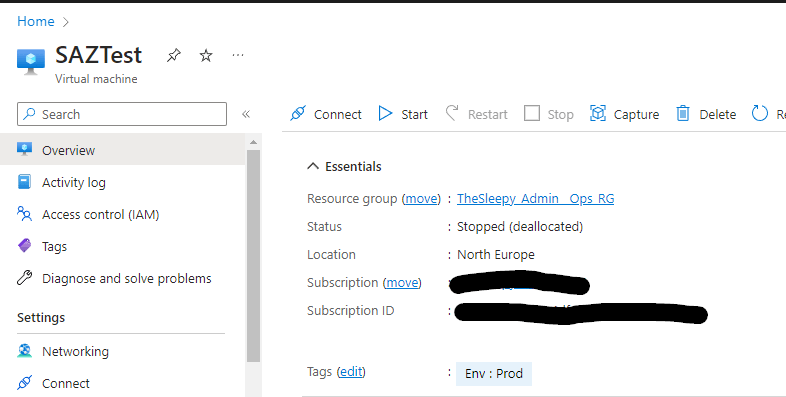
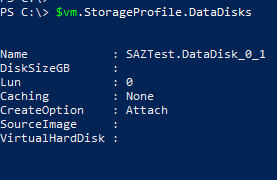
I created a test VM call SAZTest with one data disk, that is not in an availability zone.
First we need to connect to AZ PowerShell and select the correct subscription if there are multiple.
Next we get the VM that we will create a snapshot of the disk. We will be using the $vm variable to get the disk and for recreating the VM later to keep the existing configuration.
Next we set the VM boot diagnostic if this is not set the VM will default to create a storage account to use for boot.
Set-AzVMBootDiagnostic -VM $createvm -Enable
We can also change this after by going to boot diagnostics on the VM and changing to enabled with managed storage account.
Last step is to create the new VM. If you have Azure Hybrid Benefit licensing you can enabled this on the by adding the -LicenseType Windows_Server (I don’t so I wont be on this example).
In this post we will be going through setting up and configuring Azure Site Recovery (ASR) using zone to zone replication.
The zone to zone replication feature of Azure Site Recovery allows the replicate data and resources within the same region but across different zones. This is particularly useful for high availability of applications and services in the event of a zone outage.
Zone to Zone Replication in Azure ASR offers several advantages. It provides low recovery point objectives (RPOs) and recovery time objectives (RTOs) by continuously replicating changes. This ensures minimal data loss and enables quick failover in case of a disruption.
When configuring zone to zone replication there are a few pre-req, one is that the VM’s that are going to be replicated needs to be in an availability zone if not you wont be able to select it.
For existing VM’ the only way to move to an availability zone is through a CLI to copy and re deploy the VM.
Setting the availablity zone can be done when building the VM through the portal or using bicep /arm templates.
The second pre-req is that there is enough free IP on the subnet.
To keep the same IP address as the source VM it needs to be configured to use a static address on the network adapter settings.
To start using ASR we need to create a new recovery services vault.
To create a new ASR go to Recovery Services vaults blade in the Azure portal and click on create.
Select the subscription that the vault will be deployed, resource group, give the vault a name and set the region.
Add tags if in use and then review and create.
The deployment of the vault can take a few minutes complete.
Select the vault, go to replicated items and select Azure virtual machines.
Select the region, resource group and select the availability zone that the VM was deployed too.
Select the VM to be replicated, if the VM doesn’t show check to make sure it was deployed to an availability zone.
Next either create a new target resource group or use an existing one and select failover network.
Select availability options to specify the target zone.
Select the default or create a replication policy. I set to update extension to allow ASR to manage (this will create an Azure Automation Account).
Review setting to confirm everything is correct and enable.
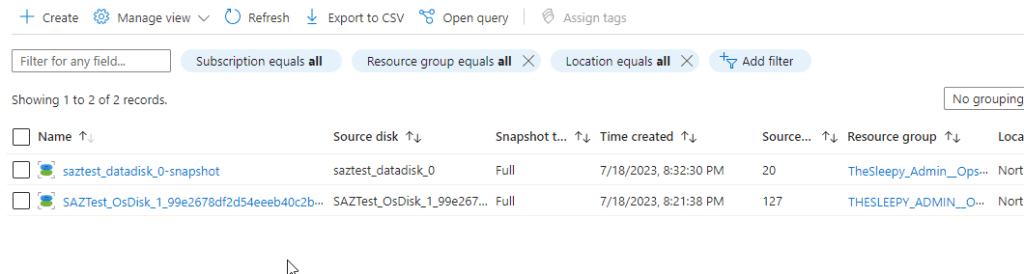
If we check the site recovery jobs we should see the replication be create.
We can also see the status of the replication under replicated items.
It will take a little while for the synchronization to complete. Once completed there will be a warning, this is just alerting that the failover hasn’t been tested.
Last step will be to test failover.
If we click on the three dots beside the replicated item we then have the option to failover or test failover.
select the recover point and virtual network (for a test failover this can’t be the same as the production VNET.)
To check the status of the failover job, go to Monitoring > Site Recovery Jobs and select the failover job.
Once the job completed there should be a VM running with -test at the end of the name in the recovery resource group.
The VM will have a different IP address than the production VM, once where finished testing the last step is to clean up the failover test.
Go back to the replicated items and select cleanup test failover.
We can add in a note if we want, tick testing complete and then click ok to remove the test VM.
The cleanup job will run this will take a few minutes to complete and the test VM should now be gone.
To do the full failover is the same process just using failover.
In this post we will be going through the process of setting up Azure Backup Email Reporting.
First step is to configure the Azure Backup Reporting, for this you will need to have already configured at least one Azure Recovery service vaults and have backup running.
I have gone through this process in a previous post so wont be going over here. see previous post for steps involved.
Once we have the backup vault and backup configured we need to configure an Log Analytics workspace to send diagnostic data to so the reports can generate data.
To create a Log Analytics Workspace go to the Azure Admin portal > Log Analytics workspaces.
Click create
Select the resource group the workspace will be created in, give it a name and select the region.
Add tags if required and create.
Now that we have the log workspace we can configure the backup vault to send diagnostic data.
Go to Backup center > Vault
Select the vault that will have diagnostic enabled and go to Diagnostic settings.
Give the diagnostics a name, select the Azure backup category’s and send to log workspace. Select the log workspace to send to.
Click save it can take a few hours before data starts to show in the workspace.
To check that the backup report are showing data,
Go to Backup center > Backup reports and select the workspace from the drop down list.
Click on summary tab to view the summary report.
Once we have reports working we can now configure the email reporting.
To configure email reporting,
Go to Backup center > Backup reports > Email Report
Give the task a name (this will be the name of the logic app), set the subscription, resource group and region.
We will also need to set email frequency, destination email address and email subject.
There is a bug in the naming of the task it suppose to allow hyphens but the UI gives an error if you use them. The work around to this is to create without the hyphens and then once the logic app is deployed clone with the correct naming.
Once the logic app is created if we want to use hyphens, go to Clone and use hyphens for the name of the cloned logic app.
Then remove the logic app without the hyphens.
Next we need to approve both the API’s
On the Office365 API authorize the account that is authorize will be used to send the mail so if there is no mailbox associated against the account you will receive an error like the below.
“Office 365 Outlook” connector Error:- REST API is not yet supported for this mailbox. This error can occur for sandbox (test) accounts or for accounts that are on a dedicated (on-premise) mail server
To use a Shared Mailbox the Logic app will need modified the send a mail v2 action and add in a from address and use an account that has send as permission set on the mailbox.
Once both API have been authorized we can run the trigger to test the job.
The backup report should then send.
To modify the time that the mail is sent at, we will need to set the time in the logic app. Open the logic app designer and add a new parameter under Recurrence.
When deploying VMs in Azure using template we need to be able to check the VM SKU and sizes to be able to update templates to deploy different OS version and VMs sizes.
There are a few different methods that can be used.
There is the Microsoft document, below is the link to the virtual machine size docs.
This is ok when deploying resources that require only a few values to be set, but this can become difficult to manage when there are a lot of parameter like when deploying virtual machines or web apps.
A parameter file for Bicep is a json file that has the specific parameter names and values set.
I used this Microsoft document as a reference to create the parameter file.
Next we will create a template to deploy a virtual machine and it network interface. To create base template in visual studio code type
res-nic to populate the network interface:
Use res-vm-windows to populate the virtual machine.
I will be creating parameters for each part that requires customization and anything that doesn’t I will leave with the hardcode values like. The @descirpiton is a Parameter decorators that allow use to add a description of what the parameter is used for.
I create two variables for the vnetId and subnetref that are used for the network interface
Below is what the updated virtual machine resource template looks like.
Once we have the Bicep template file ready the next step is to configure the parameter file. I copied the default template file code from the above Microsoft document and added in each of the required parameters.
To get the virtual network ID that will be used in the parameters file go to the virtual network and click on properties > Resource ID.
Once we have that we can fill out the reset of the parameter values.
After the template file has been configured, we can test the deployment same way as the storage account and use the whatif to confirm there are no errors.
As I have not set the admin password in the template or parameter file the deployment will prompt for the admin password to be set on the VM.
If the test deployment comes back without any issues we can check the results from the whaif deployment to confirm all the are correct.
Since the template and parameter files have returned no error we are ready to run and deploy the new VM resource.
If we check the resource group the new VM, OSDisk and network interface should be created.
Now that we have all the template and parameter file working we can just create a new parameter file for each VM resource. We can now create fully customized VM’s pretty quickly instead of having to deploy using the Azure market place and manually select the options we want to set.
In a previous post we went through deploying resource using ARM templates. I have been recently working on creating some new templates to be used for additional deployment and decided to use Bicep templates instead as it seem to an easier and more straight forward way of writing template files to deploy resources in Azure.
Bicep uses a simpler syntax than creating templates using JSON, the syntax is declarative and specifies which resources and resource properties you want to deploy.
Below is a comparison of a JSON and Bicep template file to create a storage account.
We can see that the bicep file is an easier format to read and create.
JSON TemplateBicep Template
To get started with Bicep we will first be installing the Bicep extension to Visual Studio Code so we can edit and modify Bicep templates.
The extension adds intellisense which makes it easier than looking up the full syntax for each resource.
To create a new template click on new file in VS code and select bicep as the language.
To create a template using intellisense either start typing the res-resource type or the resource type itself.
Click on the resource to pre populate the template.
The values can be hard code in the template file but this would require manual change each time the template is run.
We can add parameters to the template to make it more reusable. There are a few different types of parameters that can be used.
Below is a brief description of each type.
Parameter
Description
string
Single line value
array
Allow multiple values
int
Integer value
bool
Required true or false
objects
Allows property types
Microsoft have a more in depth document on the different data types.
The below is an example of a template with parameters set.
Once we have the template we need to install Azure PowerShell if not already installed and to install the Bicep tools, below is the document to install.
Once connected we can use the New-AzResourceGroupDeployment to deploy the template and specify the parameters values. To test the deployment for errors without running an actual deployment we can use the -whatif parameter.
Run the command and it should return any error if there is an issue or green if there is no issue.
Once the template comes back with no issues we can remove the -whatif and the storage account will be created.
To confirm the storage account has been created use the Get-AzStorageAccount
Using parameters in the Bicep template is fine when there are only a few that need to be called but for more complex deployment it will be better to use a parameters file and pre fill each value.
In the next post we will go through the process of using a template to create a VM and its network interface and will call a parameters files instead of call the parameters in PowerShell directly.
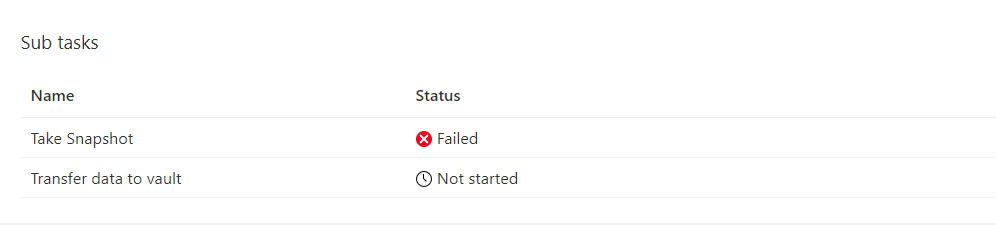
During a recent project I have been deploying new VM to Azure, when trying to configure the Azure VM backup I was getting a failure at taking snapshot.
The error that showed in the reason was UserErrorRequestDisallowedByPolicy.
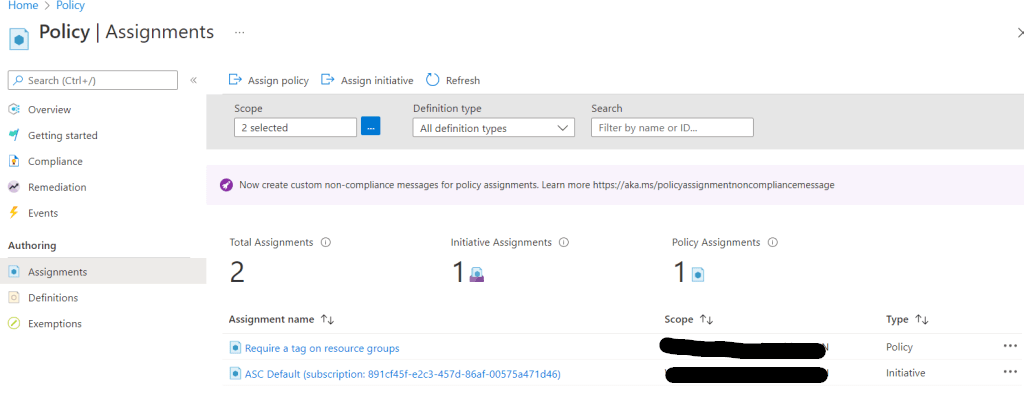
This was being caused by a policy that one of the Azure Admins had setup to require tags be configure on resource groups. When a initial backup is run it creates a resource group to save the restore point collection to and it is this resource group that is getting blocked by the Azure tag policy.
To view the policy details we can go to Policy > assignments
Click on the policy to view the parameter’s.
There are two option to work around this issue, either changing the policy from a Deny effect to a Modify effect, or create the resource group manually.
I will be creating a manual resource group as I am not that familiar with creating custom policy yet and this was the quicker workaround.
Below is the link to the Microsoft document on creating a manual resource group for restore collection point.
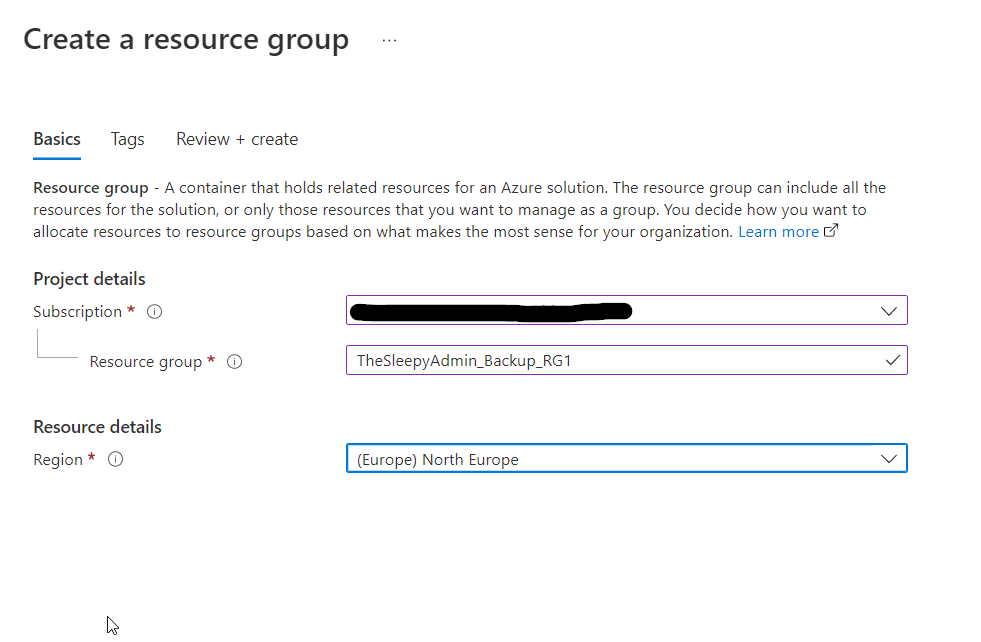
Here are the steps that I did to get around this, by manually creating the resource group that will be used for the backup.
This needs to be RG name with 1 as this starting number in my case I used TheSleepyAdmin_Backup_RG1.
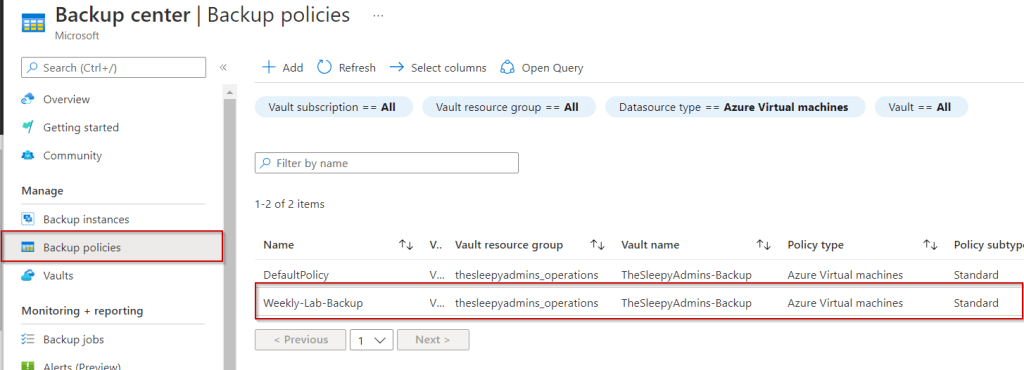
In the backup policy we specify the new resource group. Go to Azure Backup center > Backup policies.
Put in the name of the resource group we create manually without the number. In my case this was TheSleepyAdmin_Backup_RG
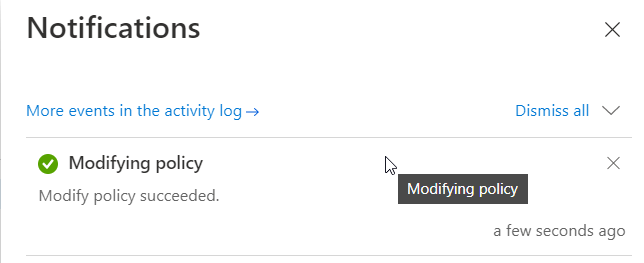
Wait for the policy update to complete.
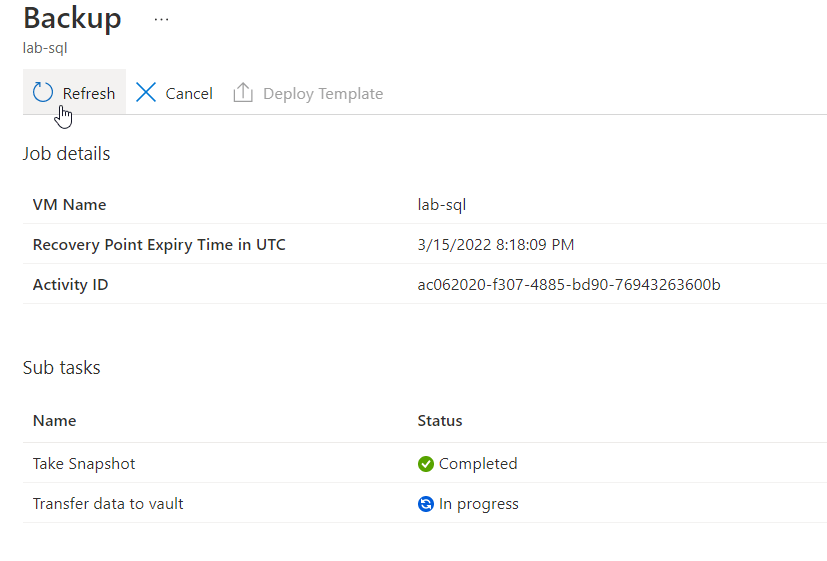
Now try the backup again and it should complete.
If we check the resource group we can see that the restore point collection has been created.
Any addtional backup should now also be successfully, if the resource group becomes full it will try to create a new RG so there maybe a need to create another RG in the future. I will be having a look at creating or updating the tag policy to apply a modify instead of a deny but that will be in a different post as this seems like it would be a better longer term solution.