Azure Migrate Services Setup

With more companies looking to move workloads from on-prem to cloud providers, it can be difficult to work out the cost for current workloads.

In Azure we can utilize Azure Migrate Services.

At the time of this post VMware is only supported, this will be extended to Hyper-v in future releases. VMware VMs must be managed by vCenter Server version 5.5, 6.0, 6.5 or 6.7.

In this post we will be going through the process off assessing the on-prem VMware environment and view the assessment report.

The environment we will be assessing is VMware vCenter 6.7 and ESXi 6.7 and a VM running Windows Server 2016.

The architecture of the Azure Migrate Service is shown in the following diagram

AZMIG

Below is the process

  • Create a project: In Azure, create an Azure Migrate project
  • Discover the machines: Download collector VM as an OVA and import to vCenter
  • Collect the information: The collector collects VM metadata using VMware PowerCLI cmdlets. Discovery is agentless and doesn’t install anything on VMware hosts or VMs. The collected metadata includes VM information (cores, memory, disks, disk sizes, and network adapters). It also collects performance data for VMs
  • Assess the project: The metadata is pushed to the Azure Migrate project. You can view it in the Azure portal.

Logon to Azure

Go to All services search for migration projectAZMIG_1

Select Create migration project

AZMIG_2

Give the project a Name, subscription, Resource group & Geography

AZMIG_3

Select Discover & Assess AZMIG_4

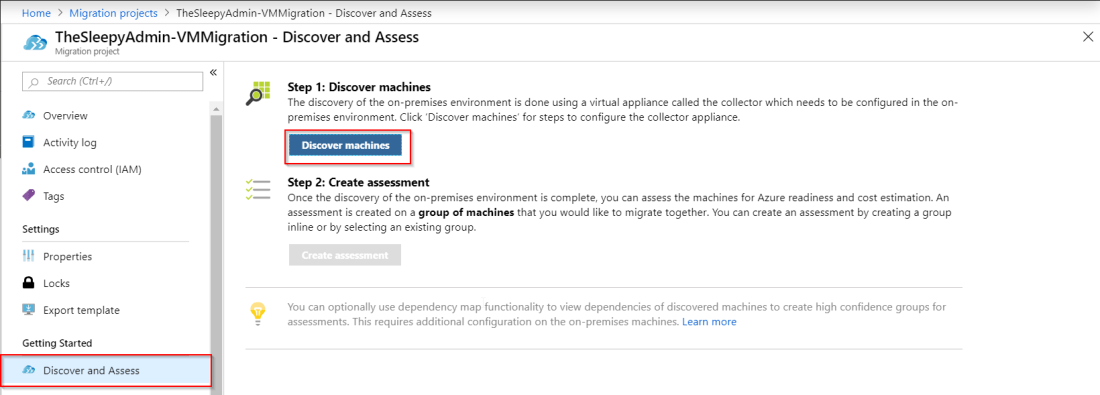
Select Discover and Assess. then Discover machines AZMIG_5download OVA. The system requirement for the OVA are:
CPU: 8 vCPU’s; Memory: 16GB; HardDrive: 80GBAZMIG_6

Next step is to import the OVA to VMware

Go to vCenter

AZMIG_7

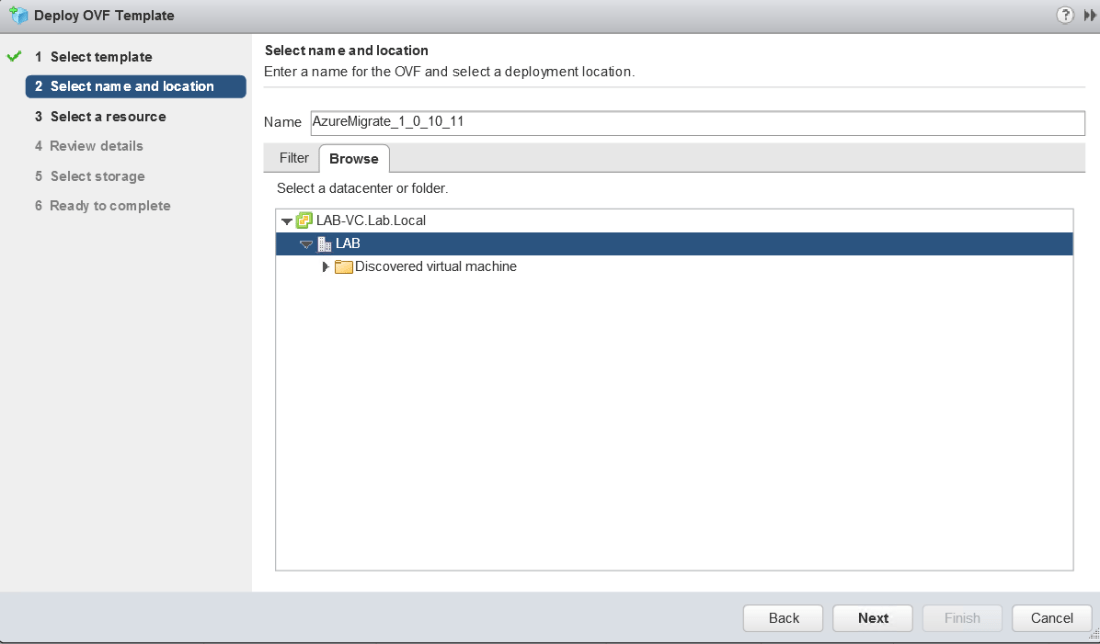
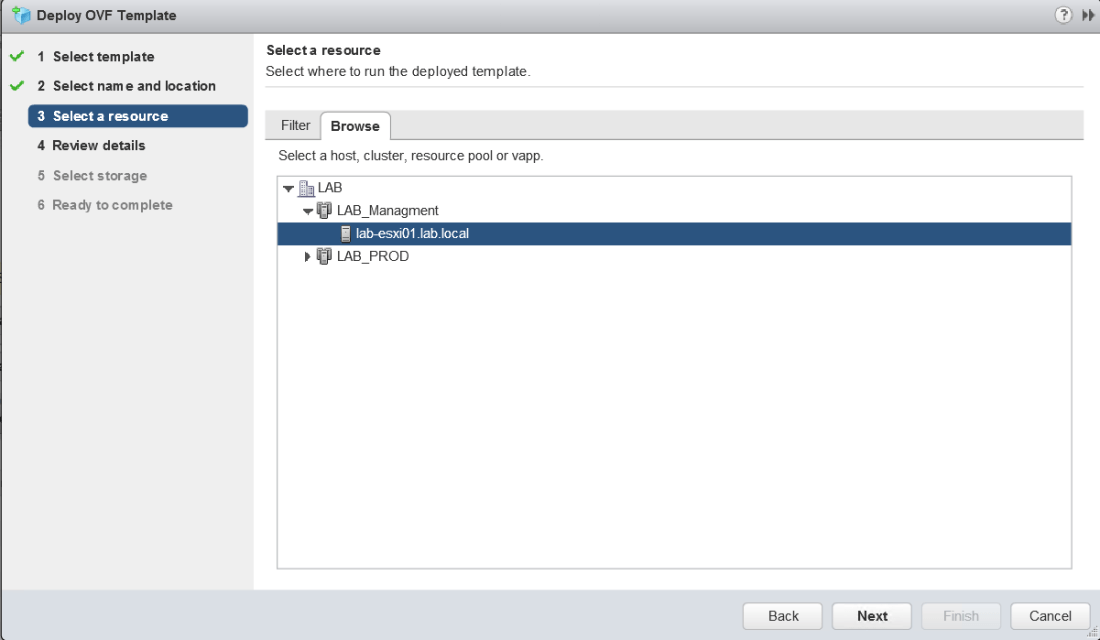
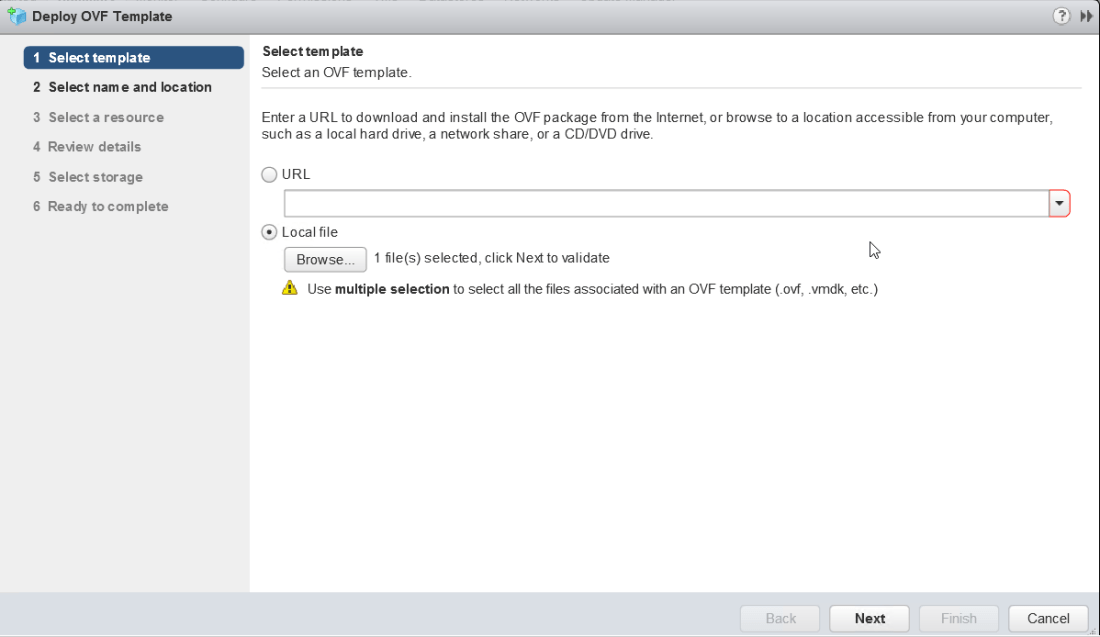
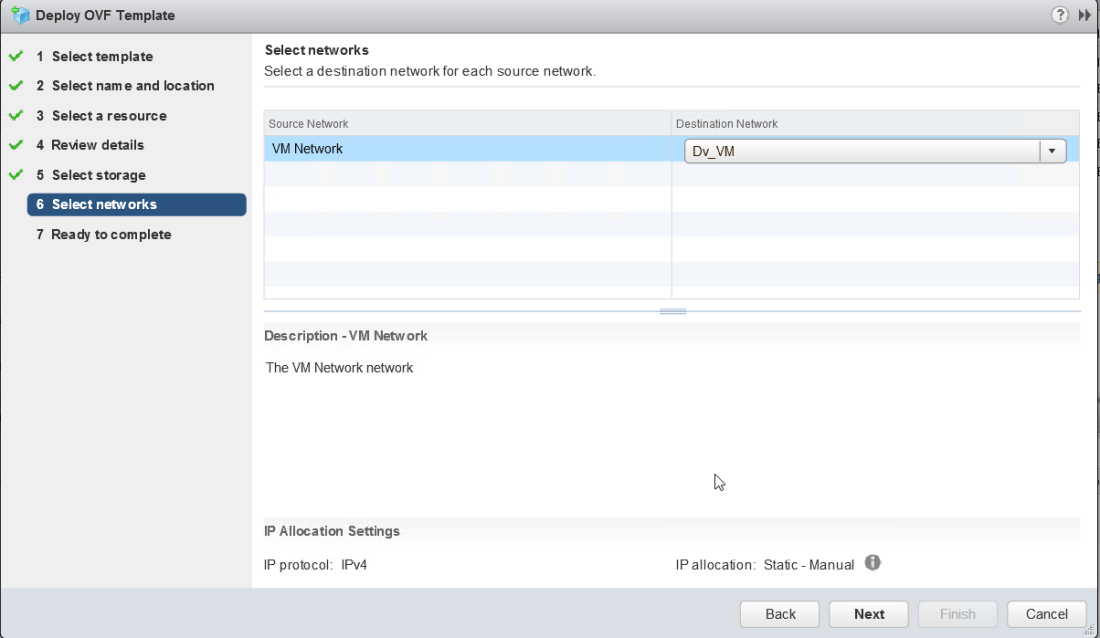
Browse to the OVA file location and selectAZMIG_8Select the Name and location of the OVAAZMIG_9Select the destination cluster AZMIG_10Click NextAZMIG_11Select destination data store and specify either thick or thin provisioned diskAZMIG_12Select the port group tha the VM will useAZMIG_13Review and confirm settingsAZMIG_14
Once the OVA is imported, power on the VM

Read and accept the license terms and give the collector an admin password.

Log into the VM and run the connector utility on the desktop.

AZMIG_15

Got through the prerequisites checksAZMIG_16

Next step is to connect to the vCenter. Put in the vCenter IP or hostname, Username / Password and once connect select the cluster or host that is currently running the VM’s that need to be assessed for migration.

AZMIG_17

Next step is to connect back to Azure using the migration project credentials that were generated when creating the projectAZMIG_19AZMIG_18

Click continue and the last screen will start the discovery this can take a while to complete (60 minutes or so)AZMIG_20

Once the discovery has completed, we then need to Create assessmentAZMIG_21

Create a new group and select the VM that will be assessedAZMIG_22

Once this has completed go to Overview and click on the assessmentAZMIG_23

Once in the assessment you can see the readiness of your VM and the Monthly estimated cost for running the workloads and AZMIG_24

Click on the VM to view specific details and performance statsAZMIG_25

We can now see what the cost will be for migrating workloads to Azure and this can be presented to give a better understanding of the cost savings that can be achieved with cloud migrations.


Configure Branch Cache SCCM 1810

We recently started to roll out Windows 10 and started to see spikes on our WAN links caused by the increased size of updates. We looked at installing local DP’s on each site but this would add a lot of over head for managing these DP’s.

We then looked at using branch cache, I decided to do a post on enabling branch cache in SCCM.

First I need to check on clients if branch cache was enabled to do this run the below command.

netsh branchcache show status all

BC1

Once confirmed we need to enable branch cache in SCCM client settings this can be either enabled on an existing device policy or create a new policy I am going with a new policy.

Logon to SCCM Admin console > Administration > Client settings

Right click on client settings > Create Custom Client Device SettingsBC2

Give the policy a Name and select Client Cache SettingsBC6

set the below settings

  • Change Configure BranchCache to Yes
  • Change Enable BranchCache to Yes
  • Configure the cache size settings (default is 10%)

BC3

Once the policy has been setup just need to deploy to the required collections that have the clients that branch cache needs to be enabled on.

As part of Windows 10 OS it does it’s own branch Cache while downloading updates and it will overwrite SCCM client settings. To disable this setting we can create a group policy and apply just to windows 10 OS’s.

Below is the location of the settings that need to be disabled

Computer Configuration \ Policies \ Administrative Templates \ Windows Components \ Delivery Optimization, set (Download Mode) to disabledBC5

If the policy is not showing it is probable because the ADMX template for windows 10 has not been added.

The last part is to enable Branch Cache in SCCM for the distribution points by selecting the properties of the distribution point as given below.BC4

To test that the policy has been applied, go to a client device and update the machine policy. Then run netsh command again and we should now see branch cache has been enabled.

netsh branchcache show status allBC7

Install and Configure VMware NSX

Recently we have been looking to implement zero trust networking. One way to achieve this was to use physical firewall and multiple VLAN’s to break out traffic and restrict access to each VLAN this would take a long time to complete and is quite difficult to manage.

It would require adding between 30 to 60 additional VLAN to our physical servers and VMware and re assinging IP to each server which would cause a lot of downtime.

As an alternative to this I have been looking at VMware NSX to try achieve this same segmentation without the need to redesign the entire VMware networks.

NSX consists of multiple components under different planes like management, control, and data plane’s below is an image of the different plane’s. 

In the next set of posts I am going to go thorough install and configuring a basic NSX deployment. I will be setting this up in a Lab environment and will use nested ESXi and appliances.

It is recommended to have NSX installed on its own management cluster along with vCenter.

First step is to download the OVA for NSX current version is 6.4.4

https://my.vmware.com/web/vmware/details?productId=417&downloadGroup=NSXV_644

below are the system requirments to deploy NSX

NSX Component Hard Drive Memory vCpu
NSX Manager 60 16 4
NSX Controller 20 4 4

NSX 6.4.4 is not supported on vSphere 5.5 below are the supported and recommed verison of vSphere to run NSX 6.4.4:

  • For vSphere 6.0:
    Supported: 6.0 Update 2, 6.0 Update 3
    Recommended: 6.0 Update 3. vSphere 6.0 Update 3 resolves the issue of duplicate VTEPs in ESXi hosts after rebooting vCenter server. SeeVMware Knowledge Base article 2144605 for more information.
  • For vSphere 6.5:
    Supported: 6.5a, 6.5 Update 1
    Recommended: 6.5 Update 1. vSphere 6.5 Update 1 resolves the issue of EAM failing with OutOfMemory. See VMware Knowledge Base Article 2135378 for more information.

Once the OVA is downloaded logon to vCenter right-click on datacenter and deploy OVF Template.

NSX6_1

Select the location of OVANSX2

Give the appliance a nameNSX3

Select the Cluster that will run the applianceNSX4

Click next NSX5

Accept the licence agreement and click continueNSX6

Chose Thick ProvisionNSX7

Select the network that will be used for the management networkNSX8

The next screen is where all the customization will be setup

Appliance Password:

HostName:

Network settings: management IP, subnet, gateway, DNS and NTP. Leave blank if  you want to use DHCP but its recommend to use static addressesNSX9NSX10

Once all setting are configured click next and confirm all settings on the last screen. Once finished the OVA should start to deploy. (Note that this failed the first time for me as I selected a host and there seems to be an issue with this in vCenter 6.7, once I selected the cluster the OVA deployed without issue)NSX11

Once the OVA had been deployed I decided to edit the memory size as I was running low on memory so I change it from 16Gb to 8Gb but for production this should be left at 16Gb.

After this you can connect using DNS name configured above or through the management IPNSX12

The last step in this post is to connect NSX to vCenter

Logon using  admin and the password specified in the config of the OVA

Click on Manage vCenter Registration NSX13

both the lookup and vCenter server connection will need to be configuredNSX15

Add vCenter server and user name / passwordNSX16NSX18

There will be a prompt to trust the vCenter certificate click yes to continueNSX17

Once configured both status should show as connectedNSX19

Open the vCenter web client and once logged on there should now be an addtional tab for Networking & Security. (At the time of this post this option is only available in the Flash version of the Web client not the HTML 5 version) 

NSX20NSX21

In the next post we will start to configure the NSX and controllers.