In this post we will be going through creating a functions in PowerShell.
PowerShell functions are reusable code created to perform specific tasks. Functions can accept inputs (parameters), process data, and produce outputs (return data).
PowerShell functions make code readability and efficiency better and allows easier automate of tasks.
Functions can be either saved in script file (.ps1), then called as part of the script or saved as modules (.psm1) and these can then be imported using the import-module command or added to a PowerShell profile so they load each time PowerShell is launched.
First we will go through creating a basic function, this can be made up of existing PowerShell commands, standard command line or we can add .Net Name spaces and classes.
Functions
To create a new function we type function and set a name. Then a script block to contain the code that will be run. When naming a functions it can be called anything but it is a good idea to keep the same Verb-Noun that is used by other PowerShell commands.
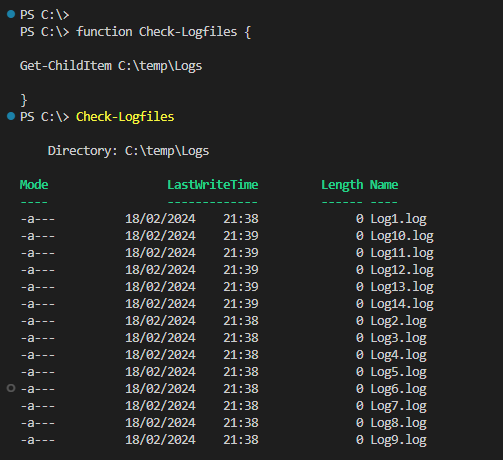
The below example will create a new command called Check-Logfiles and when its run it will use get-childitem to look in the specific logs folder
function Check-Logfiles {

Get-ChildItem C:\temp\Logs

}
This can be useful if you have a repeatable tasks as you can create a new command and instead of having to add all the parameter each time to an existing command, you can just set in the function and run each time to check logs, services or any other specific checks.
Parameters
Most PowerShell commands, such as cmdlets, functions and scripts, rely on parameters to allow users to select options or provide inputs.
Parameters can be set to either required or not required by adding mandatory.
When setting parameters we need to use a type, the most common type I use is string but there are many additional like Boolean or date.
String: This can either be hardcoded text or a variable. This can then be passed to the command in the function.
Bool: Set the script to use $True, $False, 1 or 0.
Parameters can be set to either be required or not required by adding mandatory.
The below is the update Check-Logfiles function above and replaces the path with a $path variable and a confirm parameter to run the script.
 function Check-Logfiles {

    [CmdletBinding()]
    param (
        [Parameter(Mandatory = $true)]
        [string]$path,
        [bool]$Confrim
    )

    Get-ChildItem $path
    }
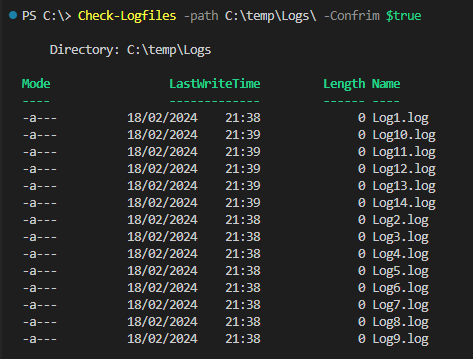
Next we an add in the Boolean to put in true or false requirement to run the script.
function Check-Logfiles {

    [CmdletBinding()]
    param (
        [Parameter(Mandatory = $true)]
        [string]$path,

        [bool]$Confrim
    )

    if($Confrim -eq "True"){
    Get-ChildItem $path
    }

    else {
        Write-Warning "Confirm not set to true"
    }

    }

Parameter Validation
We an add validation to parameters to set what values will be accept by the parameter. To use validation we will add ValidateSet to the parameter.
For the below example we will only be accepting two paths in the Check-Logfiles function. If a users set a path outside other than the set paths the function will fail immediately and output the reason to the PowerShell console.
function Check-Logfiles {

    [CmdletBinding()]
    param (
        [Parameter(Mandatory = $true)]
        [ValidateSet('C:\temp\Logs','C:\temp\Logs2')]
        [string]$path
    )

    Get-ChildItem $path

    }

The above are just a few examples of the different ways to use a function. Functions are great way to create reusable code / commands and give structure to your scripts. Functions should be kept a small as possible and set to do only a single task this will allow easier troubleshooting.
Multiple functions can be combined in a single script to complete more complex tasks.