Azure Network Security Groups (NSG) to Restrict Management Access

For security reasons it is good practice to lock down access to Azure resources and not leave management ports open to the internet.

One way to restrict access to remote access protocols like RDS / SSH is to create a Network Security Groups (NSG) and apply this to either virtual machines or virtual network subnets.

To create a NSG

Logon on to the Azure portal: https://portal.azure.com

Once logged on go to All Services > Network security groups

If you have created VM’s or other resources there might already be some pre-existing NSG’s.NSG1

To create a new NSG click on Add

Give the NSG a name, assign subscription, resource group and locationNSG2

Once the deployment has completed, click on the NSG this will bring up the configuration page.

First part is to configure the inbound security rules. NSG4

Go to settings > Inbound security rules

Once in Inbound security rules. To add a rule click add.

I want to restrict access to a specific Public IP for RDP access. Set the source as IP Addresses and add in the IP that will be allowed this can be a full range or a single IP depending on network subnet bit. I am only going to add one address so I used /32 below is an example 10.10.10.92/32.

I left source port ranges and destination as default as I don’t want to restrict these.  Choose the required port in this case its 3389, set protocol to Any if you require both TCP/UDP I only need TCP.  Set action to allow, set priority value and last step is give the port a name / description. NSG5

Below is the updated rule I have marked out my public IPNSG6

The outbound rule is set to allow any/any by default so if there is a requirement to lock down certain ports then create a new rule here to block the required ports.

Last step once all rule have been configured is to apply the NSG against resources. I am going to apply the policy to both my subnet and NIC’s assigned to both my test VM’s.

The policy should only need to be applied to either the subnet or VM’s,  I just want to show how to apply to both. If you apply a rule to both VM and subnet they need to match or any port that is not allowed on both wont be work.

To assign to subnet: go to settings > SubnetsNSG7

Select virtual network and subnet. NSG8NSG9

To apply to each VM Nic: Go to settings > network interfaces

As I already had NSG’s associated from the VM deployments I need to re-associate to the new NSG.

Select the NSG of the VM you want to move and go to network interfacesNSG10NSG11

Chose the required NSG

NSG12

Once applied I can now only access the VM’s from my own network.


Azure VM Backup using Azure Recovery Service Vault

In this post I am going to go through setting up a weekly backup for VM’s using Azure Recovery Service Vault.

Recovery Services vaults protect:

  • Azure Resource Manager-deployed VMs
  • Classic VMs
  • Standard storage VMs
  • Premium storage VMs
  • VMs running on Managed Disks
  • VMs encrypted using Azure Disk Encryption
  • Application consistent backup of Windows VMs using VSS and Linux VMs using custom pre-snapshot and post-snapshot scripts

To backup a single VM we can click on the VM and go to backup and configure the Recovery Vault. I want to add all my servers at one time so I will create Recovery Vault first.

Logon on to the Azure portal: https://portal.azure.com

Once logged on go to All Services > Recovery Services vaults

Once in Recovery Services vaults click createRSV1

Give the Recovery Vault a Name, assign a subscription, resource group and location.

RSV2

Once the deployment has finished,  click on the newly create object. RSV3

First thing I am going to set the backup configuration to locally-redundant as this is just for my Lab VM’s and it will save on cost.

Go to Manage > Backup Infrastructure and set to Locally-redundant.RSV4-1

I am going to create a custom policy as I only want to backup my test VM’s once a week. go to Manage > Backup policies and click Add.RSV3-2

Once in the new backup policy configure settings as required. I have set frequency to every sunday at 22:00 and set retention to 4 weeks backups. Click create once all settings are configured. RSV3-1

The policy should now be available to assign to backup jobs. Next step is to setup the backup. Go to Getting started > backup

Select where the work load is running (Azure or on prem), I only want to backup my Azure Lab VM so I selected Azure. Next select backup type

  • VM
  • Azure File Share (in preview at the time of the post)
  • SQL server in Azure VM (in preview at the time of the post)

Select the backup policy, I am using the policy created above. RSV5

Next select the VM’s that will be backed up. RSV6

Click enable backup to finish the config.

I will kick off a manual backup job to get an initial backup.

Click on backup Item > Azure Virtual Machine > Backup nowRSV8RSV9

To view backup jobs go to Monitoring > Backup JobsRSV7

Once the backup is complete, the option to run VM restore or file level recovery becomes available.RSV10

Azure Automation “Run Login-AzureAccount to login”

When I was creating my Azure Automation account and tried to run a runbook that needed to logon to Azure,  to start my VM’s I was getting an error:

Run Login-AzureAccount to login.AZAUError2

After looking on technet there where a few different recommendations but none worked.

In the end I just decided to try update the Azure modules. This fixed the issue.

Below is how to update the modules.

Go to Automation Accounts > select account > Modules

AZAUError1

There will be a prompt to update all Azure modules click yes to continue. AZAUError3

To view the progress click on below. AZAUError4

Click on all logs or output to view what is currently running. AZAUError5

Once completed the below will show. AZAUError6

After this I was successfully able to run my runbooks.


Azure Automation PowerShell Runbook

In this post I am going to go through setting up an Azure automation account and creating a runbook to PowerShell.

Azure Automation allows for process automation, configuration management, update management and PowerShell script execution on both Azure / Office 365. I like using Azure Automation as it allows me to save credentials in Azure for running task opposed to having them called in my script which is less secure.

I am going to setup a runbook to power on and off my LAB servers so that they only run during the day.

To start using Azure Automation

Go to All services > Automation Accounts

Once in Automation Accounts we need to create a new account.AZAU2

Give the Automation account a name, assign to a subscription, resource group and location.  Leave create as yes and click crate. 

AZAU3

Once the task has completed there will now be Automation account showing. AZAU10

Next step is to create a runbook to run the PowerShell command. Click on the Automation account and go to process automation and click on runbooks.AZAU4

Once in runbooks there will be some pre-configure runbooks that can be used as references. 

To create a new runbook click Add a runbookAZAU11

Once in the runbook give a name and select the runbook type in this case it will be PowerShell. Then click create. AZAU5

Click on edit to modify the PowerShell script. AZAU6

The connection commands is generic and is copied from AzureAutomationTutorialScript runbook.

$connectionName = “AzureRunAsConnection”
try
{
# Get the connection “AzureRunAsConnection “
$servicePrincipalConnection=Get-AutomationConnection -Name $connectionName


“Logging in to Azure…”
Add-AzureRmAccount -ServicePrincipal `
-TenantId $servicePrincipalConnection.TenantId `
-ApplicationId $servicePrincipalConnection.ApplicationId `
-CertificateThumbprint $servicePrincipalConnection.CertificateThumbprint
}
catch {
if (!$servicePrincipalConnection)
{
$ErrorMessage = “Connection $connectionName not found.”
throw$ErrorMessage
} else{
Write-Error -Message $_.Exception
throw$_.Exception
}
}
 

I have added the command I want to run at the bottom. Once finished, the runbook needs to be saved and published. 

AZAU7

To test if the script will work as expected there is a test pane icon 
AZAU12
 
Once in test click start and the script will be executed the output of the command will be returned to the console. 
AZAU13
 
Once the runbook is saved, the start icon will become available so the runbook can be executed. 
AZAU8
 
Last step is to schedule when the runbook will execute, click schedule.
 
Add a name, description, start time/date, time zone and if the task is a once of or a recurring task. 
 
AZAU14
 
Once the schedule has been created it will show under schedules. 
AZAU15
 

Azure VM deployment

In this post I am going to go through setting up an Azure resource group, VNet and deployment of a basic VM. There are many different VM version that can be deployed.

Below is a table with the current VM types, sizes and description:

Type Sizes Description
General purpose B, Dsv3, Dv3,
DSv2, Dv2,
Av2, DC
Balanced CPU-to-memory ratio. Ideal for testing and development,
small to medium databases, and low to medium traffic web servers.
Compute optimized Fsv2, Fs, F High CPU-to-memory ratio.
Good for medium traffic web servers,
network appliances, batch processes, and application servers.
Memory optimized Esv3, Ev3, M,
GS, G, DSv2,
Dv2
High memory-to-CPU ratio.
Great for relational database servers,
medium to large caches, and in-memory analytics.
Storage optimized Ls High disk throughput and IO.
Ideal for Big Data, SQL, and NoSQL databases.
GPU NV, NVv2, NC,
NCv2, NCv3,
ND
Specialized virtual machines targeted for heavy graphic rendering and video editing,
as well as model training and inferencing (ND)
with deep learning. Available with single or multiple GPUs.
High performance
compute
H Our fastest and most powerful CPU virtual machines
with optional high-throughput network interfaces (RDMA).

First step for deploying a VM is to create a resource group, a resource group is basically a container object that will hold Azure objects like VNet’s, VM and any other Azure serivces that will be added to the RG . A RG can be created while deploying a VM but I prefer to create them before hand.

Logon to the Azure portal, once in the Azure portal if the resource groups tab is not showing.

Go to All services > Resource GroupsAZ1

Once on resource groups click on Add

AZ2

Give the resource group a name, select a subscription and set the location.AZ3

The resource group should only take a few seconds to create. Once created you should get an alert.

AZ4

Now that there is a resource group, we can move to the next step which is to create a new VNet. all services > Virtual networksAZ5

Once in Virtual network’s go to create virtual network. Give the Network a name, IP address space /Subnet mask, select subscription, location,  added to a resource group and set the IP range that will be available for use.

AZ6

Once completed the new VNet will show under virtual networks.AZ7

Final step is to start creating VM’s go to all services > Virtual machinesAZ8

Click on create new Virtual machine

Set the subscriptions that will be used, resource group, VM name & image type. We can also do availability options  for high availability and resilience.AZ9

Select VM size, user name and allowed ports.AZ10

Next page allows you to change the disks used for the VM (premiere SSD, standard SSD or standard HHD) if the disk is change this may reset the VM type so I would usually leave this as is, unless there is a specific reason to change.

Next step is to select the VNet / subnet that will be used for the VM.AZ11

There is auto shutdown feature in Azure. I like to use this on my Lab as it saves credit as this is only a lab server, I want the VM to shut down at 12AM. I can start the VM up again when I want to do any further testing.AZ12

I wont add any guest config, tags so the last step is to review and validate the VMAZ13

The VM should now deploy it will take a while to deploy once completed the VM will now show under Virtual Machines.AZ14

If we check the resource group, we can now see all the object contained in the resource group.AZ15

SCCM 1806 Software Center Customisation

Since SCCM 1710 there was the addition to device settings to allow customisation of software center 1806 added an additional customisation to add a custom web page as an additional tab. As above you need to be at 1710 or above to have these customisation options.

by default the below would be the basic colour and appearance for the software center:

soft1

To start I usually create a new policy to test before pushing out to all users.

  • Open SCCM console
  • Go to Administration > Client settings

Right click and create a new policy (I called mine Custom Software Center)soft2

Click the Software Center check box in the policysoft3

Under device settings set select these new settings to specify company information to yes. soft4

Then go to customize. Edit company name, set color scheme and add a company picture. Below is the default settings. The logo image file needs to be a maximum size is 400×100 and 750kbsoft5

Here is the updated settingssoft6

To add a custom tab with URL to a support site or blog post. Go to tabs and put a check box on: Specify a custom tab for Software Center. (This is only available if SCCM is 1806 or above.)

  • Add a custom tab name
  • Add a URL

soft7

Once finished editing the policy it then needs to be deployed to the require collection. Right click on the custom policy and go to deploy.soft8

Then select the device collection to deploy tosoft10

Once the policy is deployed, go to a device in the collection to update the machine policy. Go to Control Panel > Configuration Manager > Actions > Machine policy retrieval & Evaluation cycle and click run now. soft11

Once the policy is updated the Software Center should be updated with the new color scheme, company logo and custom URLsoft12.png


Using VMware PowerCli Part 1

Since VMware 6.0 I have started to use VMware PowerCli module to automate task and checks that I do daily or for large task that would take a long time to do manually. I am going to go through installing PowerCli and some of the useful command and script that can be use to check VMware.

To install PowerCli there are some pre-req’s

OS Type
64-Bit
Server
  • Windows Server 2012 R2
  • Windows Server 2008 R2 Service Pack 1
Workstation
  • Windows 10
  • Windows 8.1
  • Windows 7 Service Pack 1
  • Windows PowerShell 3.0, 4.0, 5.0, or 5.1
  • .NET Framework 4.5, 4.5.x, 4.6, or 4.6.x

I would recommend installing the latest version of PowerShell which is currently 5.1

To check current version of PowerShell run $PSVersionTablePcli

To install the latest version install the latest Windows Management Framework 5.1 link to download page is below.

https://www.microsoft.com/en-us/download/details.aspx?id=54616

Step 1 is to install PowerCli

The old PowerCli was a PowerShell snap in and required downloading an exe to install, the new version is module based and can be installed directly from the PowerShell console. To install run the below command.

Install-Module VMware.PowerCliPcli1

If you need to update the module to a new release run

Update-Module VMWare.PowerCliPcli2

If a path is not specified the default location that the module files will be placed in is

C:\Program Files\WindowsPowerShell\Modules

Once the install has finished to verify that PowerCli is installed run the below commandPcli3

Step 2 is to connect to vCenter

To connect to vCenter open an elevated PowerShell console and import the VMware Module

Import-Module VMware.PowerCliPcli4

Connect-VIServer lab-VC vCenterServerPcli5

Once connected we can now start to run command against vCenter.

To get host information run

Get-VMHost

Pcli6

To find all VM’s that have snapshots over a certain date. I want to get all snapshots older than 1 day to change this just edit the $date variable.

$date = (Get-Date).AddDays(-1)
$Snapshot = get-vm | get-snapshot
$Snapshot | where {$_.Created -lt $date}Pcli7

To check datastores you can run

Get-Datastore

Pcli8

To get additional info you can do some math’s and use arrays to get % free space of the datastores. The below will get all datastores that have less than 25% free space.

Get-Datastore | select Name,@{N=”UsedSpaceGB”;E={[math]::Round(($_.CapacityGB),2)}},
@{N=”FreeSpaceGB”;E={[math]::Round(($_.FreeSpaceGB),2)}},
@{N=”%Free”;E={[math]::Round(($_.FreeSpaceGB)/($_.CapacityGB)*100,2)}} |
where %Free -lt “25”
Pcli9

Add secondary IP to Network Adapter Windows

A web developer was adding IP’s to some existing web server and once these were added we started having routing issue on the servers where the sites would not respond and the server could not talk back to the production network from the DMZ.

I checked the server and I was getting inconsistent results as I could ping a device sometimes but not others so it looked like a network issue.

I ran the below command to check what traffic was being sent and I saw that there where multiple IP’s being used as local address for traffic.

Get-NetTCPConnection -LocalAddress 192.168.0.*

I decided to check the skipasSource on the interface as this was the cause of a similar issue that happened before.

This command’s will return all IP’s the interface name and whether the IP is set to skipassource the new IP should have this set to true.

CMD:                                                                                                                                               

Netsh int ipv4 show ipaddresses level=verbose

PowerShell:                                                                                                                                       

Get-NetIPAddress | Select-Object IPAddress, InterfaceAlias, SkipAsSource

When I checked the new IP was set to false which meant both the orignal and new IP where being used. To set the IP to false I either need to remove the IP and set it using cmd or PowerShell  to set skip as source to true or Set to true using PowerShell.

If you don’t want to remove and re-add the address use the below command

Set-NetIPAddress -IPAddress "192.168.0.200" -InterfaceAlias "LAN" -SkipAsSource $true
IP3

second option is to remove the IP from the network settings and  re-add the IP using command line below is using CMD and PowerShell.

CMD:           

Netsh int ipv4 add address “Interface Name” “IP Address” “Netmask” skipassource=True                                                                                                                                 

Below is a full example:

Netsh int ipv4 add address "LAN" 192.168.0.200 255.255.255.0 skipassource=true
IP2

PowerShell:                                                                                                                                     New-NetIPAddress –IPAddress “IPAddress”  –InterfaceAlias “Interface Name” –SkipAsSource $True

Below is a full example:

New-NetIPAddress –IPAddress 192.168.0.200 -PrefixLength 24 -InterfaceAlias "LAN" –SkipAsSource $True
IP1

Once skip as source was set to true there was no connection issues.

Windows Updates Fail Error Code 0x800F0831 Server 2012 R2

I recently had an issue installing Windows updates on some servers running Windows Server 2012 R2. The server would install most updates but not the monthly update rollups or the security only updates.

I checked the event logs and saw event 0x800F0831Up2

This didn’t give much information on why the update was failing so I checked the CBS log under C:\Windows\Logs\CBS and found the below error. This pointed to a missing or corrupted update for KB4343898 which in my case was the August 2018 monthly update rollup. Up3

CBS Failed to resolve package ‘Package_1101_for_KB4343898~31bf3856ad364e35~amd64~~6.3.1.9’ [HRESULT = 0x800f0831 – CBS_E_STORE_CORRUPTION]

CBS Mark store corruption flag because of package: Package_1101_for_KB4343898~31bf3856ad364e35~amd64~~6.3.1.9. [HRESULT = 0x800f0831 – CBS_E_STORE_CORRUPTION]

Next step was to check to see if the update was showing on the server so I used the PowerShell command Get-hotfix to search for the update.

Get-hotfix | where {$_.hotfixid -like “KB4343898”}Up4

If I check the package folder C:\Windows\servicing\Packages  I can see the update is referenced but not the package showing the error in the CBS log. UP6

I had this issue a few years back and the fix was to add the update using Dism and the update cab file. To extract the update run expand updatefile /f:* exportpath

expand C:\temp\windows8.1-kb4343898-x64.msu /f:* C:\temp\KB4343898Up5
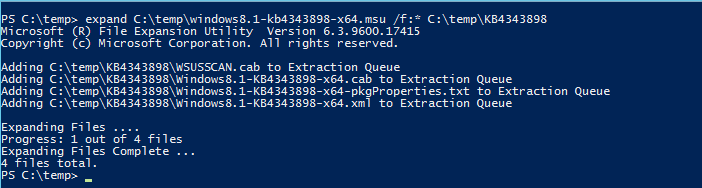
Once the update is extracted use Dism to add the problematic update this should install the missing files.

Dism /online /Add-package:C:\temp\KB4343898\Windows8.1-KB4343898-x64.cabUp7

Once completed reboot the server if required, then try the update again, it should now install without issue.

Adding Multiple Devices To SCCM Collection PowerShell

I recently needed to add a few hundred devices to a collection in SCCM. I couldn’t use a query to achieve this as there where no attributes that I could use. So it would have to be a direct query and I didn’t really want to manually add hundreds of servers as this would take a long time and PowerShell is a much easier and faster option. I decided to write a quick script to get a list of device from a txt file and do a loop to add each device to the specified collection.

First I need to open a PowerShell connect to SCCM I prefer to use Powershell ISE as I can edit and test my script while in one console. To connect go to the SCCM console On the blue drop down icon on the top left, click it and then choose Connect via Windows PowerShell ISE.

Coll1

Once PowerShell ISE is open you should see the connection script.  Just click run script at top of ISE to connect to SCCM. Coll2

Once in ISE copy the script below and change the collectioname, computers and logpath variables to the correct location and collection that you want to added to.  Below is what the script should look like when it run.

Coll3

$collectionname = “RDS Deploy Collection”
$Computers = Get-content “c:\temp\Server_List.txt”
$logpath = “c:\temp”
foreach($computer in $computers) {
try {
Write-Host “Adding $computer to $collectionname” -ForegroundColor Green
Add-CMDeviceCollectionDirectMembershipRule -CollectionName $collectionname -ResourceId (get-cmdevice -Name $computer).ResourceID
}
catch {
Write-Warning “Cannot add client $computer object may not exist”
$computer | Out-File “$logpath\$collectionname-invalid.log” -Append
$Error[0].Exception | Out-File “$logpath\$collectionname-invalid.log” -Append
}
}

There is also a log file that will be export to give devices that have not been added and the error exception generated by PowerShell.

Coll4