
In this post I am going to go through setting up an Azure resource group, VNet and deployment of a basic VM. There are many different VM version that can be deployed.
Below is a table with the current VM types, sizes and description:
| Type | Sizes | Description |
| General purpose | B, Dsv3, Dv3, DSv2, Dv2, Av2, DC |
Balanced CPU-to-memory ratio. Ideal for testing and development, small to medium databases, and low to medium traffic web servers. |
| Compute optimized | Fsv2, Fs, F | High CPU-to-memory ratio. Good for medium traffic web servers, network appliances, batch processes, and application servers. |
| Memory optimized | Esv3, Ev3, M, GS, G, DSv2, Dv2 |
High memory-to-CPU ratio. Great for relational database servers, medium to large caches, and in-memory analytics. |
| Storage optimized | Ls | High disk throughput and IO. Ideal for Big Data, SQL, and NoSQL databases. |
| GPU | NV, NVv2, NC, NCv2, NCv3, ND |
Specialized virtual machines targeted for heavy graphic rendering and video editing, as well as model training and inferencing (ND) with deep learning. Available with single or multiple GPUs. |
| High performance compute |
H | Our fastest and most powerful CPU virtual machines with optional high-throughput network interfaces (RDMA). |
First step for deploying a VM is to create a resource group, a resource group is basically a container object that will hold Azure objects like VNet’s, VM and any other Azure serivces that will be added to the RG . A RG can be created while deploying a VM but I prefer to create them before hand.
Logon to the Azure portal, once in the Azure portal if the resource groups tab is not showing.
Go to All services > Resource Groups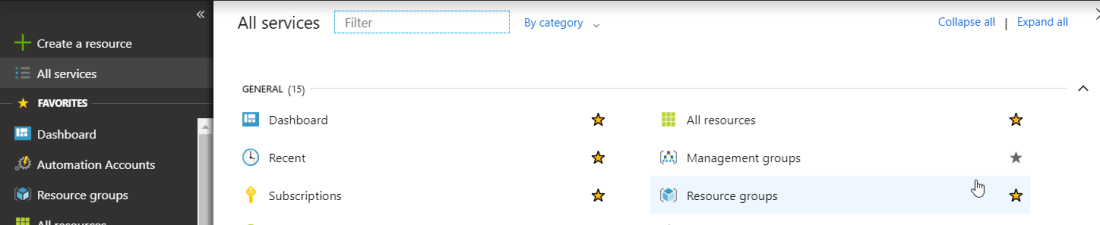
Once on resource groups click on Add

Give the resource group a name, select a subscription and set the location.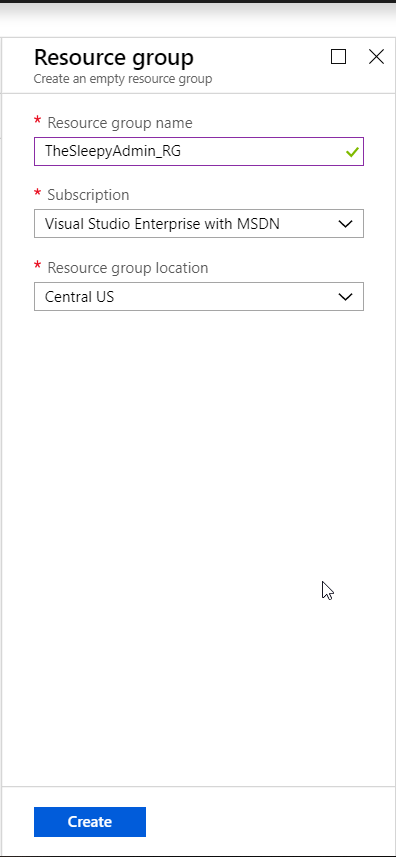
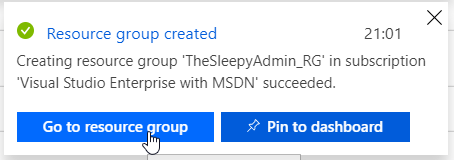
The resource group should only take a few seconds to create. Once created you should get an alert.
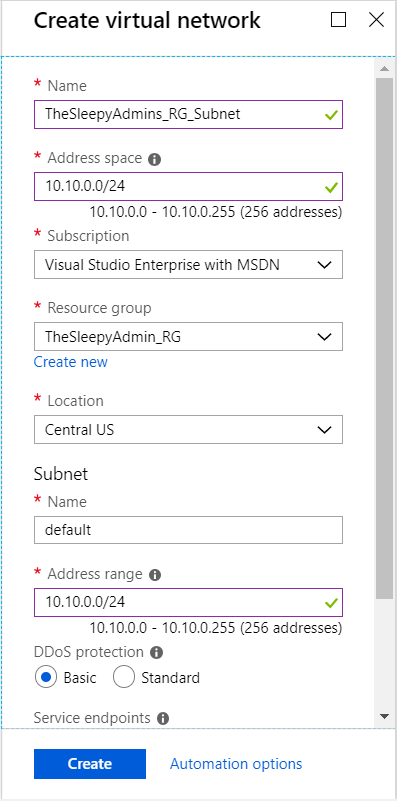
Now that there is a resource group, we can move to the next step which is to create a new VNet. all services > Virtual networks
Once in Virtual network’s go to create virtual network. Give the Network a name, IP address space /Subnet mask, select subscription, location, added to a resource group and set the IP range that will be available for use.
Once completed the new VNet will show under virtual networks.
Final step is to start creating VM’s go to all services > Virtual machines
Click on create new Virtual machine
Set the subscriptions that will be used, resource group, VM name & image type. We can also do availability options for high availability and resilience.
Select VM size, user name and allowed ports.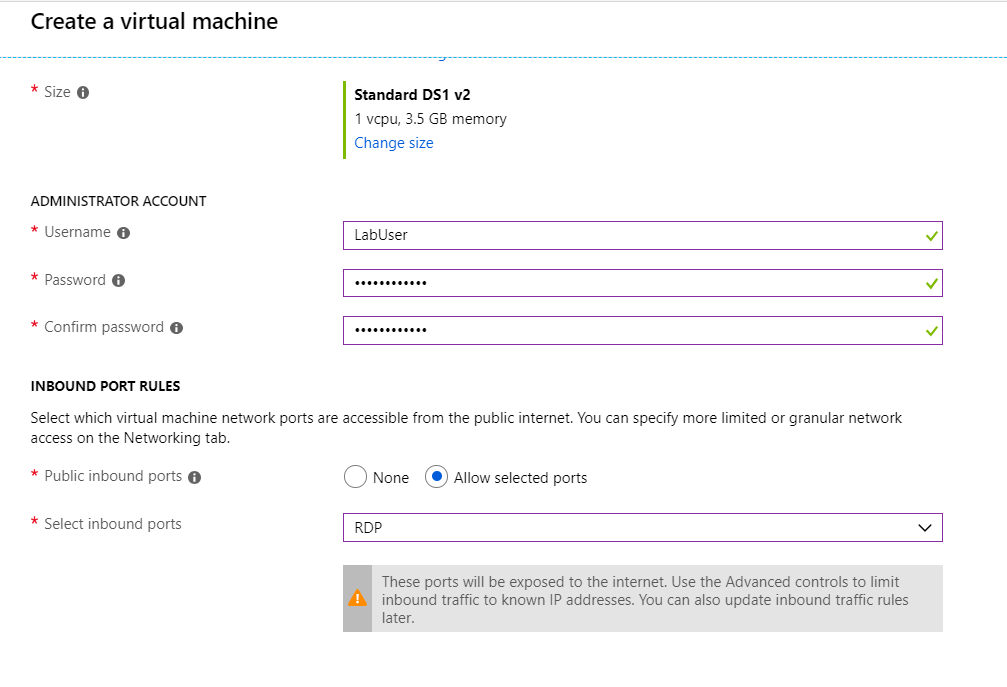
Next page allows you to change the disks used for the VM (premiere SSD, standard SSD or standard HHD) if the disk is change this may reset the VM type so I would usually leave this as is, unless there is a specific reason to change.
Next step is to select the VNet / subnet that will be used for the VM.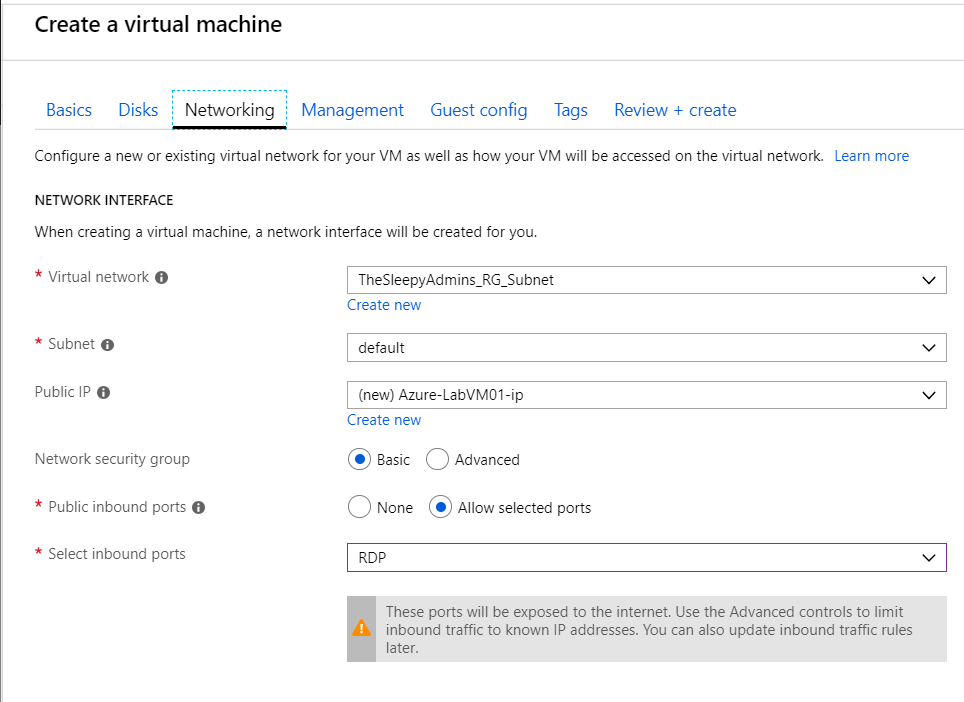
There is auto shutdown feature in Azure. I like to use this on my Lab as it saves credit as this is only a lab server, I want the VM to shut down at 12AM. I can start the VM up again when I want to do any further testing.
I wont add any guest config, tags so the last step is to review and validate the VM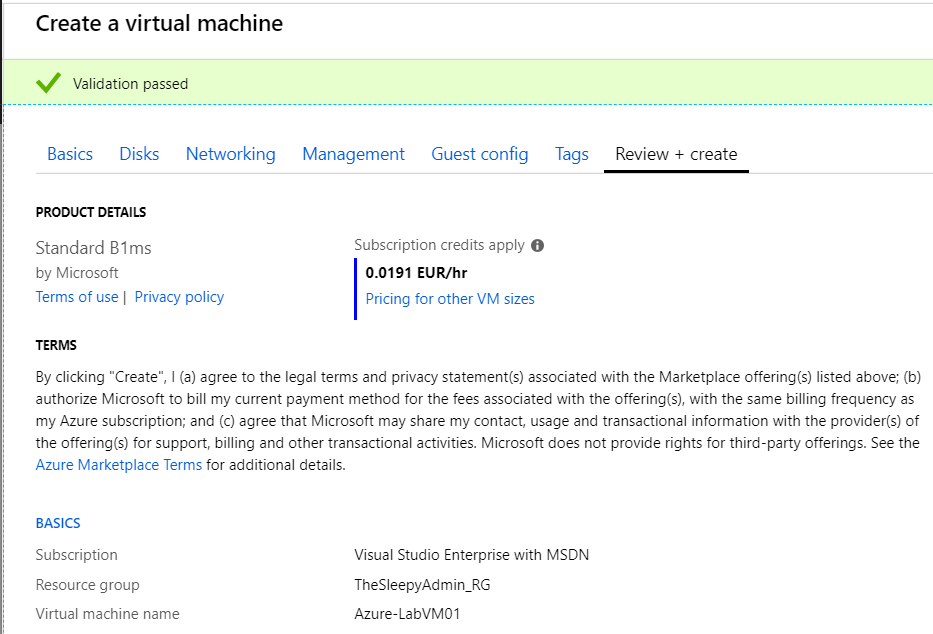
The VM should now deploy it will take a while to deploy once completed the VM will now show under Virtual Machines.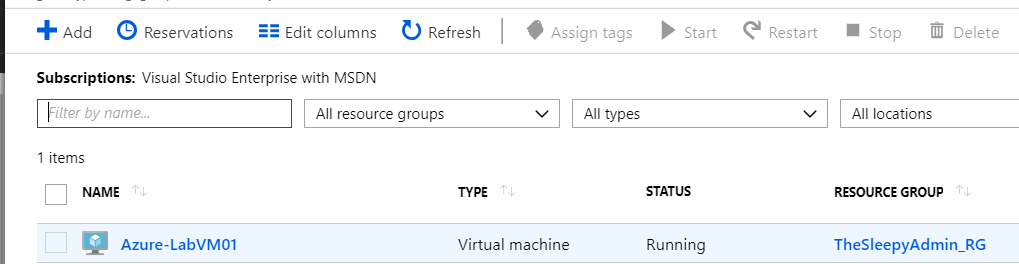
If we check the resource group, we can now see all the object contained in the resource group.
