
Keeping VMware tools updated is an import task to improve performance and keep up with security / bug fixes. VMware tools are not required for a VM to run but are used to enable VMware features.
VMware tools can be upgrade in a few different methods. In this post we will go through some of these different methods these range from completely manual by upgrading to fully automated using VM options, scripting or application deployment.
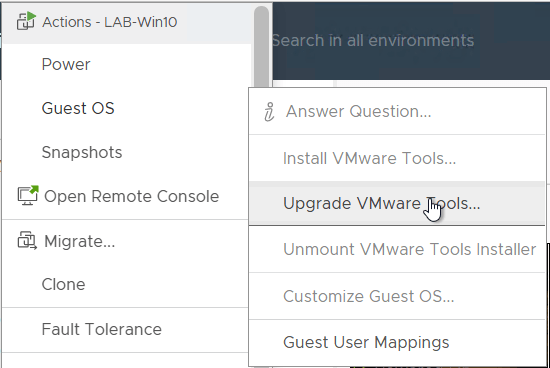
First method is to manually mount the tools on the VM by right clicking and then install in the guest OS, this is the slowest method and is fine if there is a few VM to upgrade but not really great at scale.
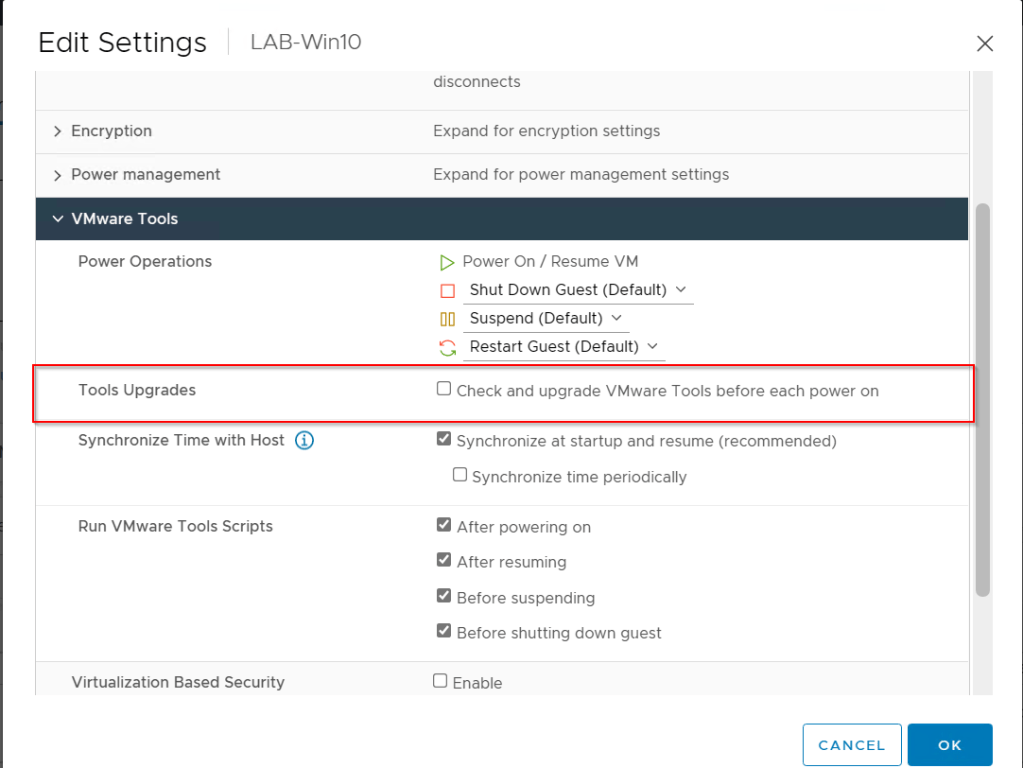
Second method is to set the VMware tools to check for upgrades during power on. This method can be good when doing OS patching as when patching a VM the tools will also be upgraded.
To enabled this either edit the VM setting and go to VM Options > VMware tools > Tools Upgrade
To enabled on multiple VM’s we can use PowerCli to bulk update the VM options.
To view the current upgrade policy we can use
(Get-VM VMName | Get-View).config.Tools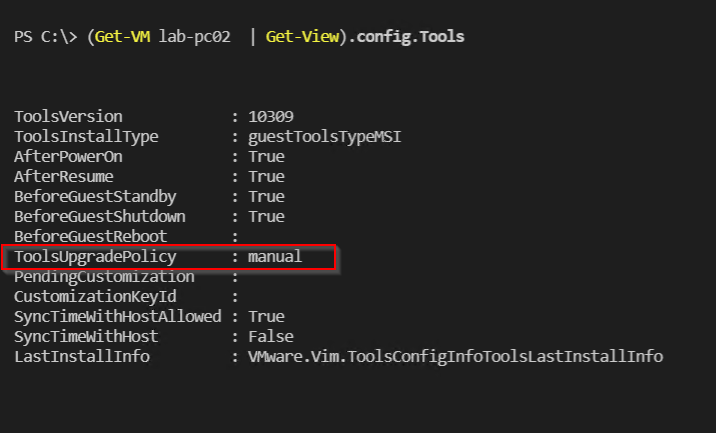
To update the VM Option using PowerCli we can create a new VM configuration and then apply to a list of VMs in a text file using a loop. To set the upgrade policy back to manual just update tools upgrade policy from upgradeAtPowerCycle to manual.
$VMs = Get-Content C:\Temp\VMs\VMware_Tools_Upgrade.txt
$Toolsconfig = New-Object VMware.Vim.VirtualMachineConfigSpec
$Toolsconfig.tools = New-Object VMware.Vim.ToolsConfigInfo
$Toolsconfig.tools.toolsUpgradePolicy = "upgradeAtPowerCycle"

foreach ($VM in $VMs) {
Write-Warning "Setting VM Tools to Upgrade on PowerOn for $VM"
(Get-VM -Name $VM | Get-View).ReconfigVM($Toolsconfig)

 }
vCenter should show the tasks that where run to update the VM option.

Now when the VM’s reboot they should auto upgrade to the newest version.
Third method is to use a script to update the tools. This can be used when we want to have more control over when VMware tools are upgrade.
This can be done by using the VMware PowerCli Update-Tools command
For one VM we could use
Update-Tools VMNameBelow is an example of using a text file with VMs names. I used the no reboot parameter to stop the VM from rebooting after the tools are updated.
$VMs = Get-Content C:\Temp\VMs\VMware_Tools_Upgrade.txt
foreach ($VM in $VMs) {
Get-VM -Name $VM  | Update-Tools -NoReboot
}

If we check vCenter we should see the upgrade task start

The last method I would use would be an application deployment tool to push out the latest VMware tools.
I use Microsoft Endpoint Configuration Manager for most of my deployment so this will be where I will be creating the deployment package.
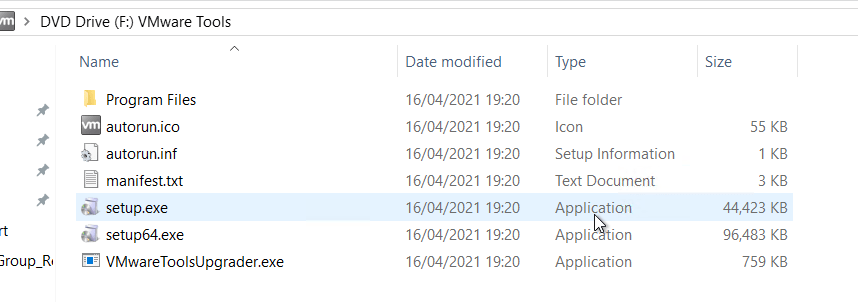
Mount the VMware tools on on of the VMs and copy the install files.
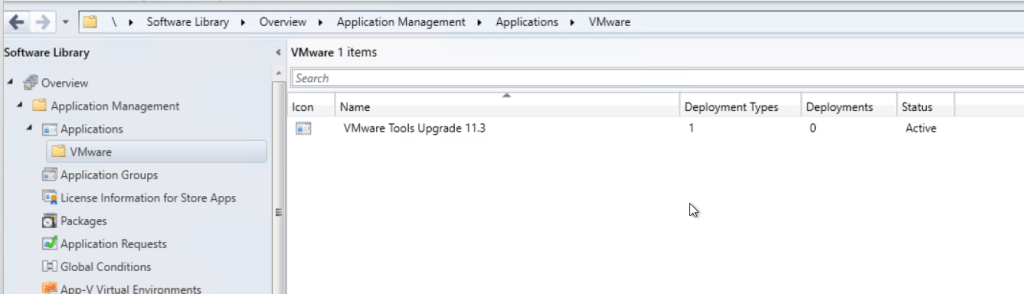
Open the ConfigMgr console > Software Library > Application Management > Application

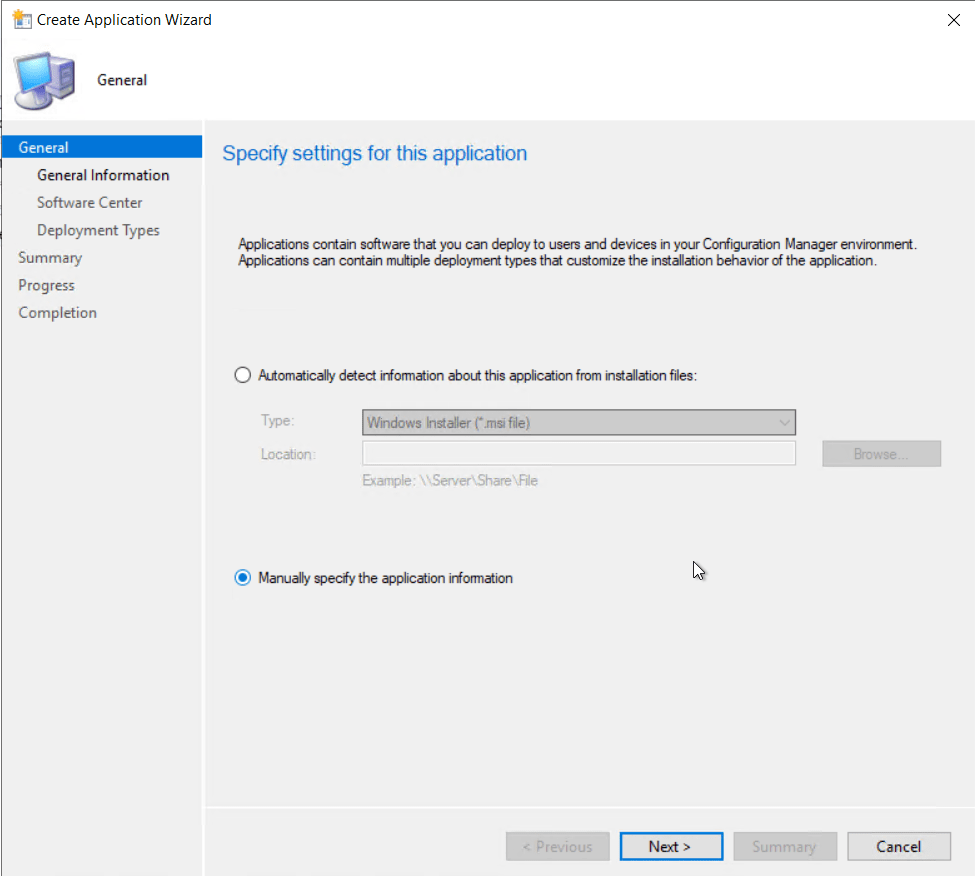
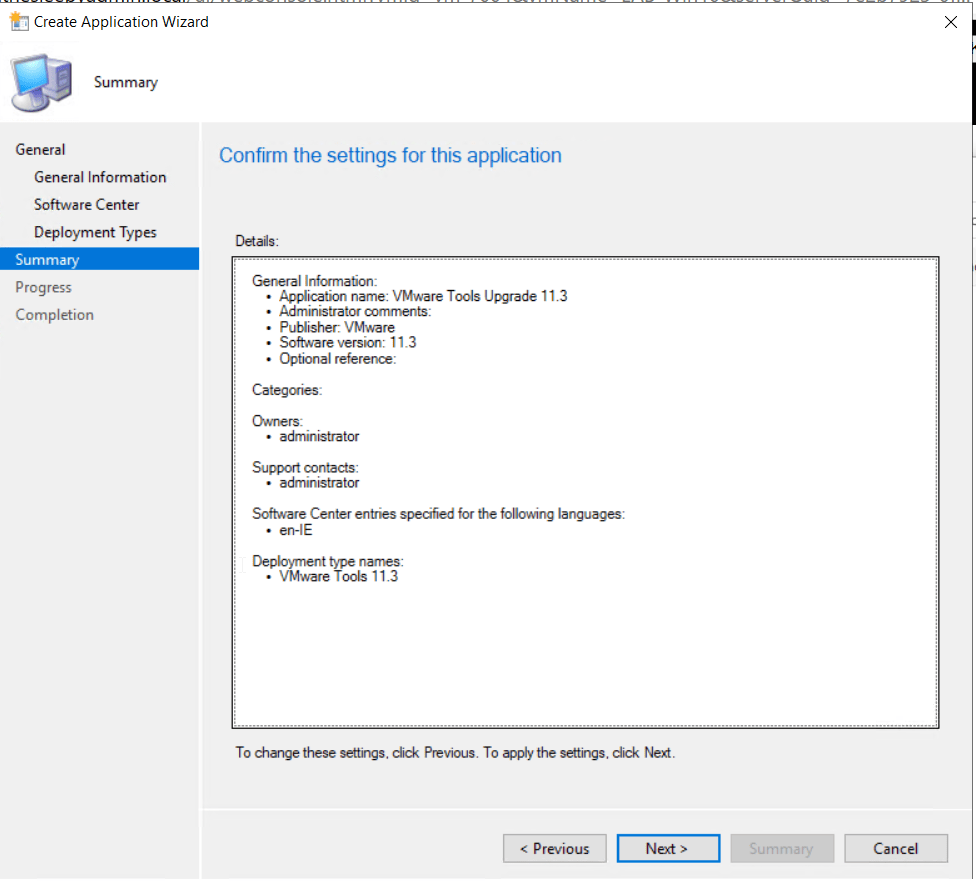
Create a new application and set to manual specify.
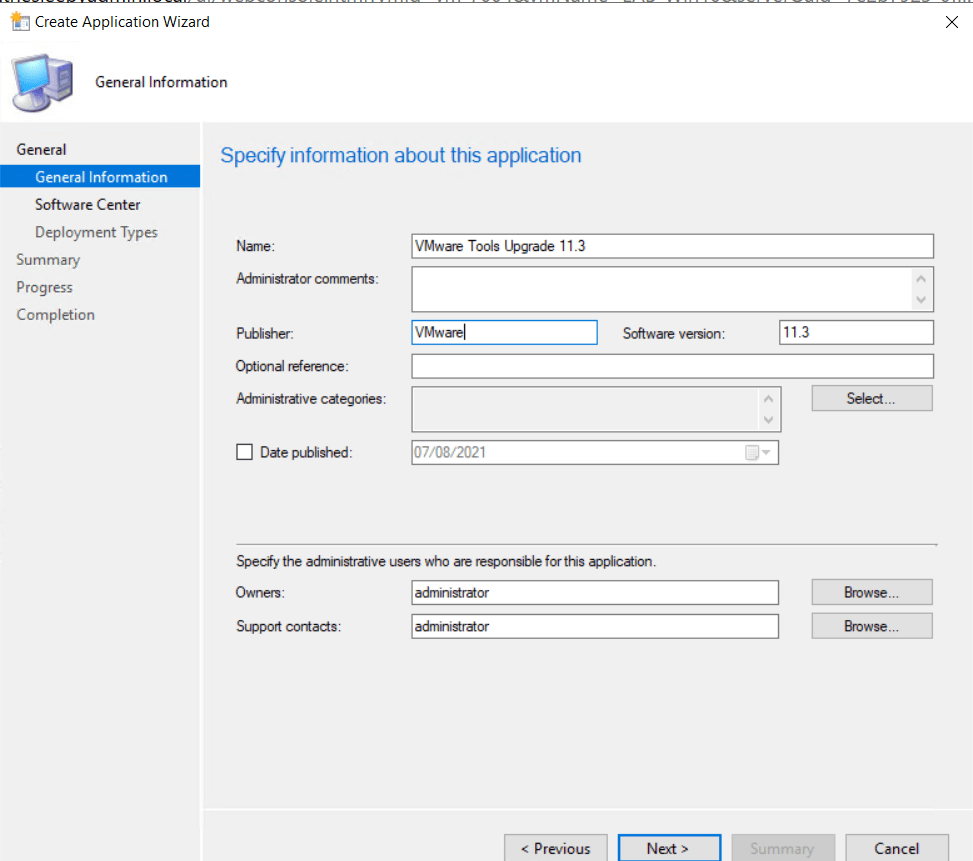
Add in the application details.
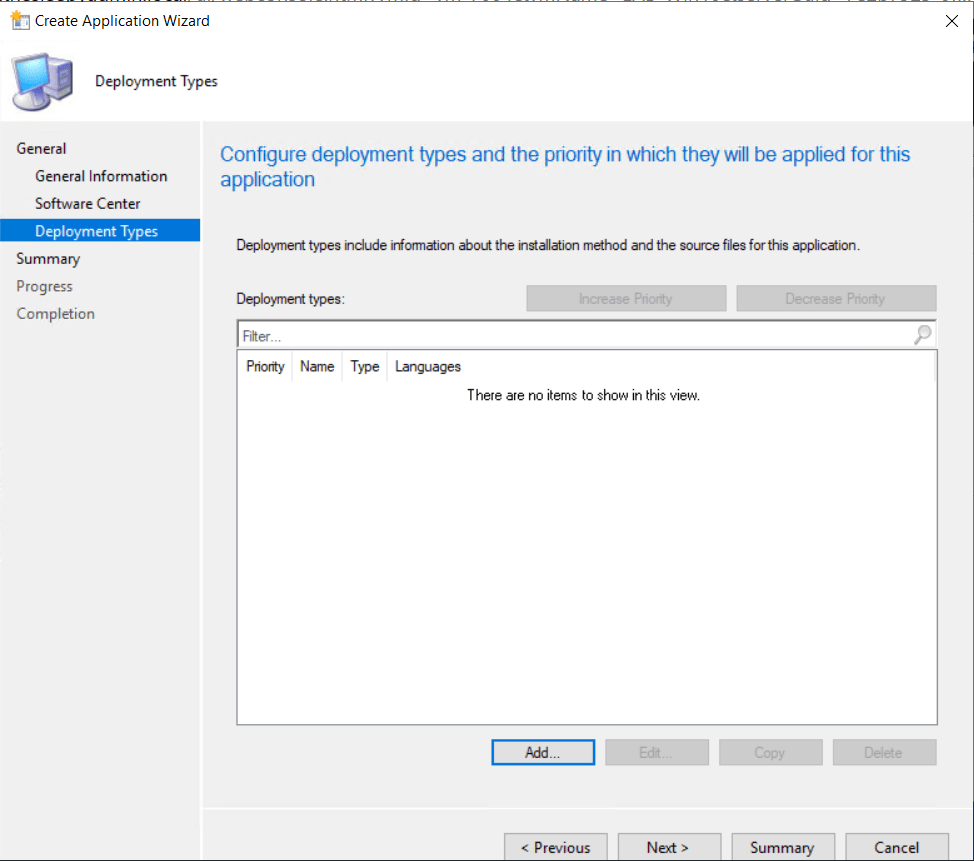
Add a new Deployment Type
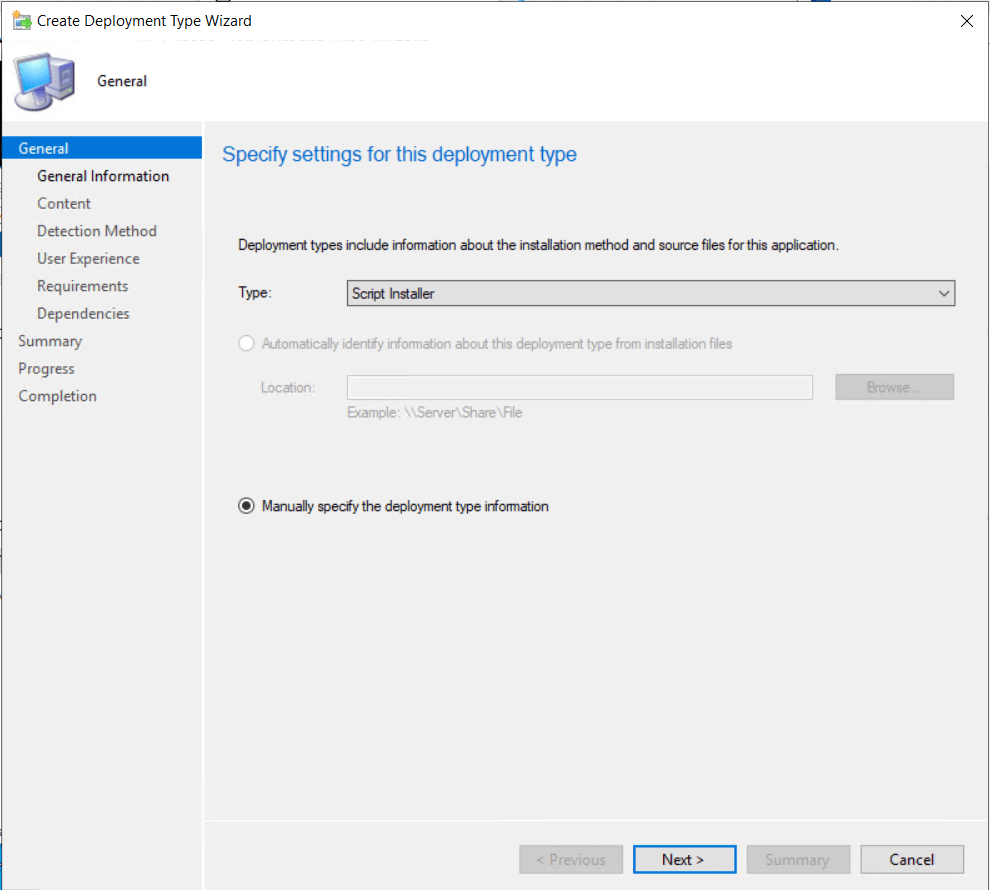
Set type to manual specify.
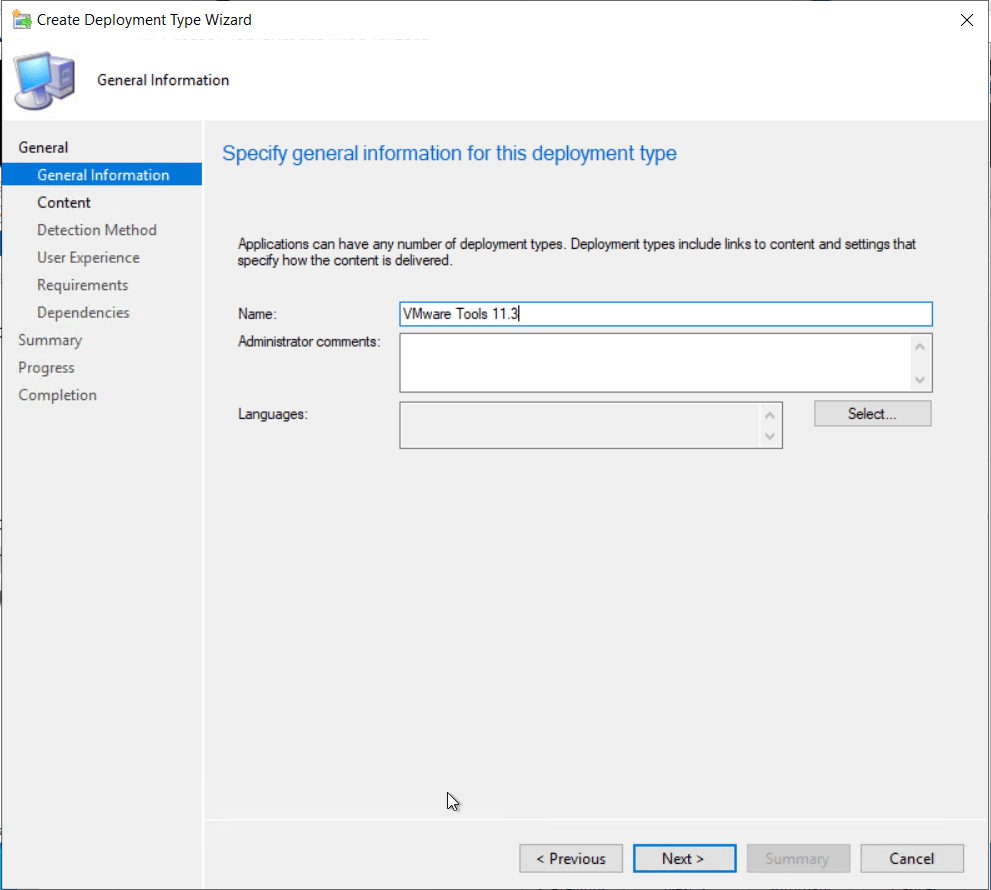
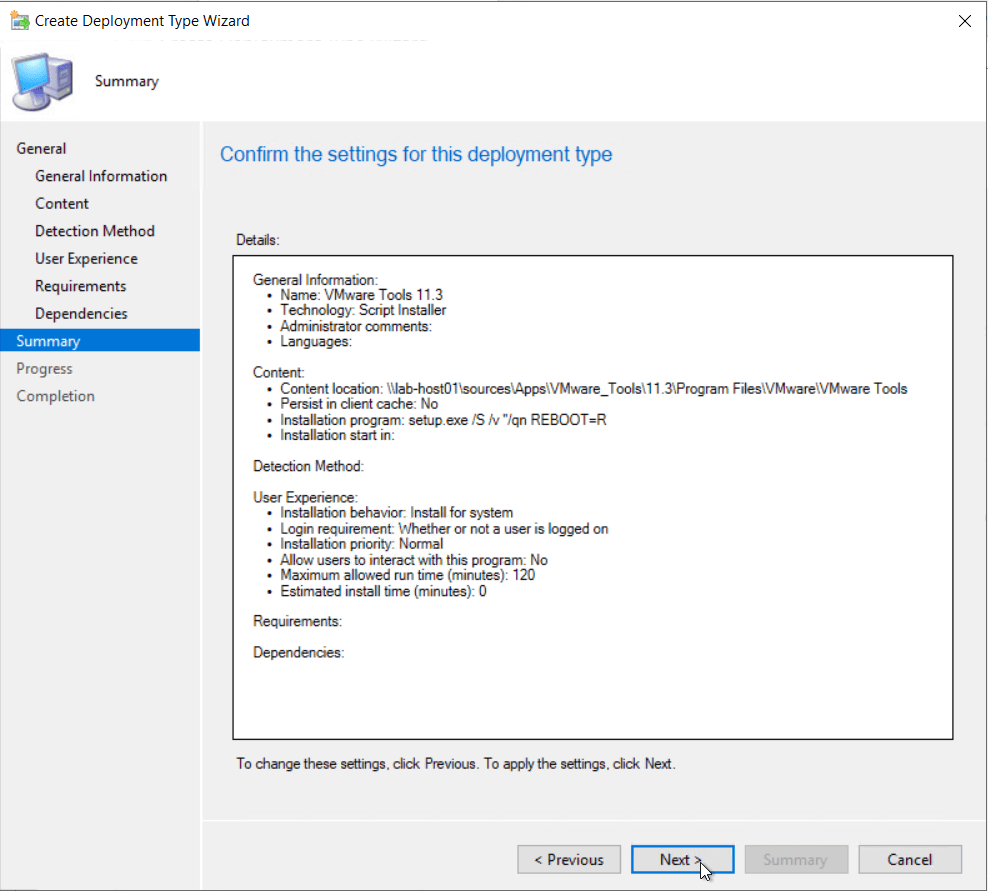
Give the deployment a name
I used the document for the command line switches for the tools upgrade its for version 5.5 but the same switches worked.
Add the path to the copied install files, install command line switches and the uninstall command line (not required)
Command line: setup.exe /S /v “/qn REBOOT=R

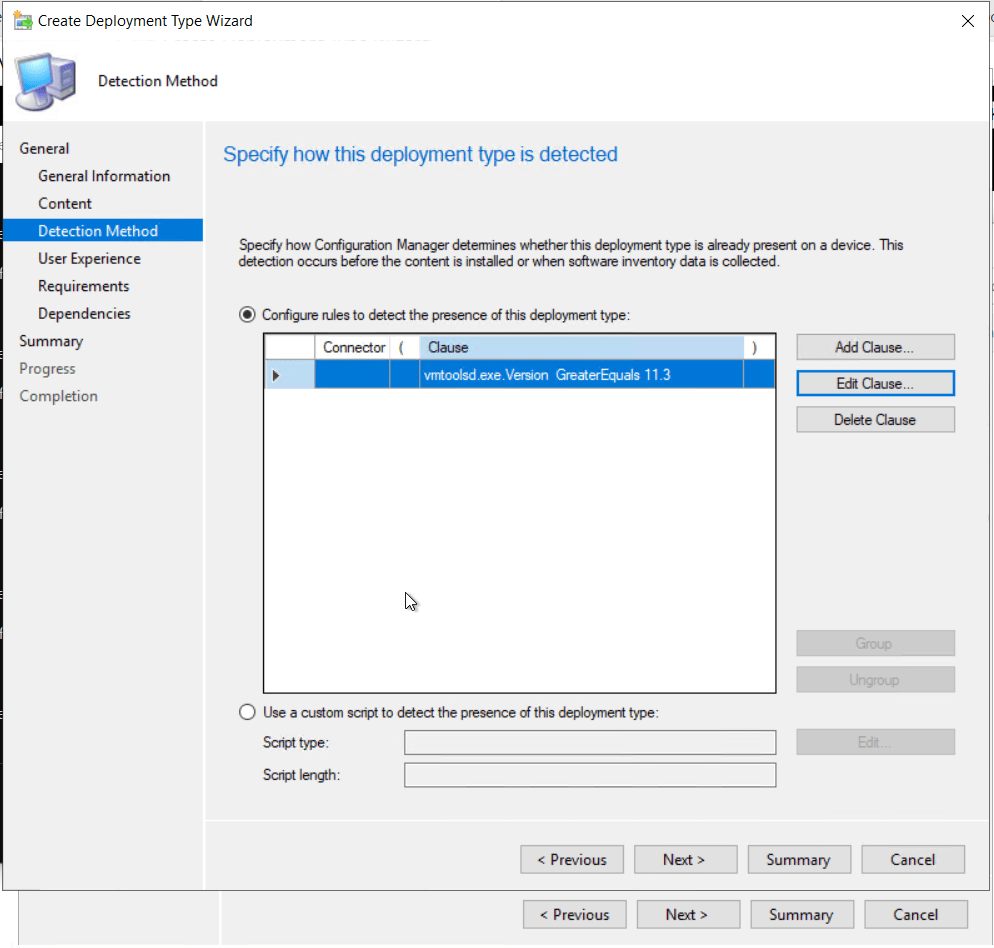
Next set a detection method this can be either MSI install code if available but I used file version for the vmtoolsd.exe.
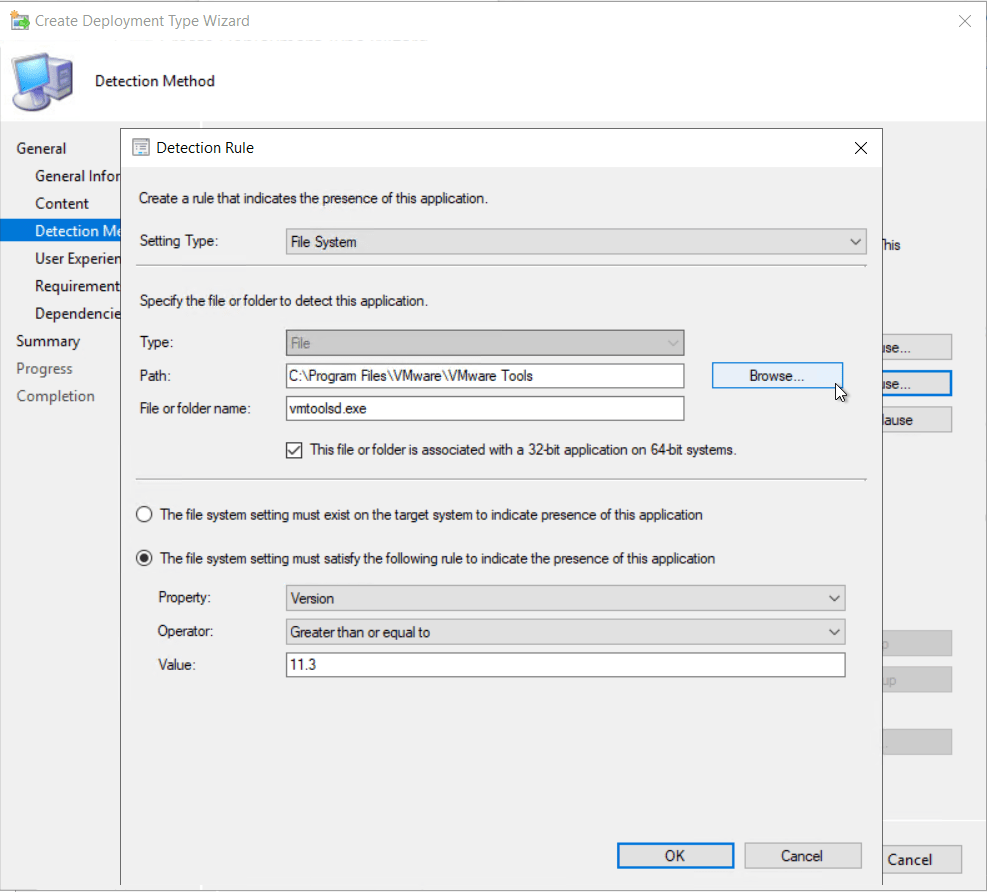
below is what the detection clause should look like.
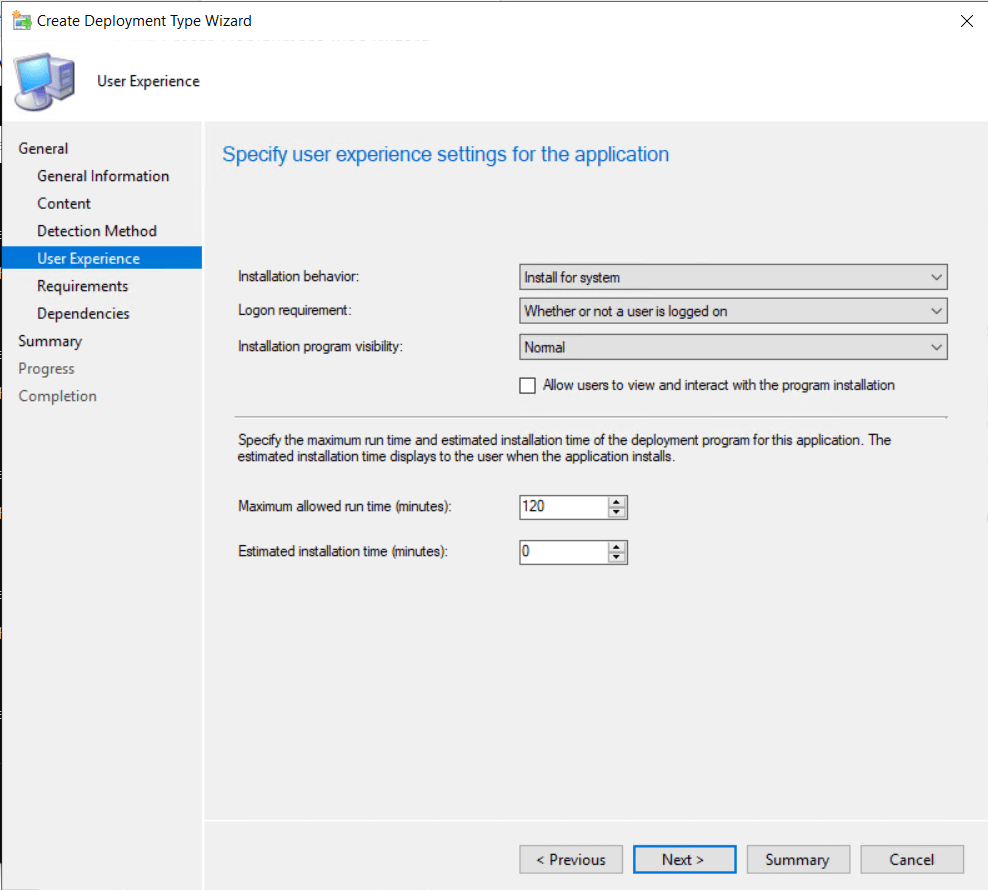
Set the install behavior to Install for system and logon requirement to Whether or not a user is logged on.
I didn’t set any requirements or dependencies. Review the summary page and then complete the application wizard.
Once completed the wizard will go back to the create application wizard.
Follow the wizard and complete.
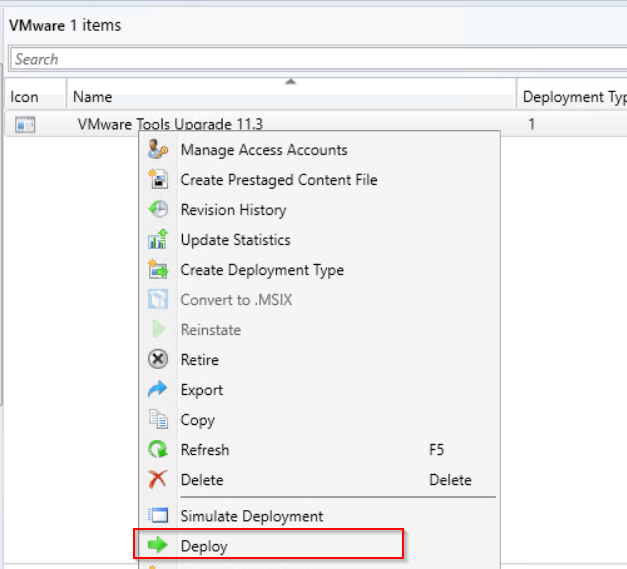
Now that the application is create we can deploy out to the required VM’s.
Right click and go to deploy.
Select the device collection that will be used to put VMs that will have there tools upgraded.

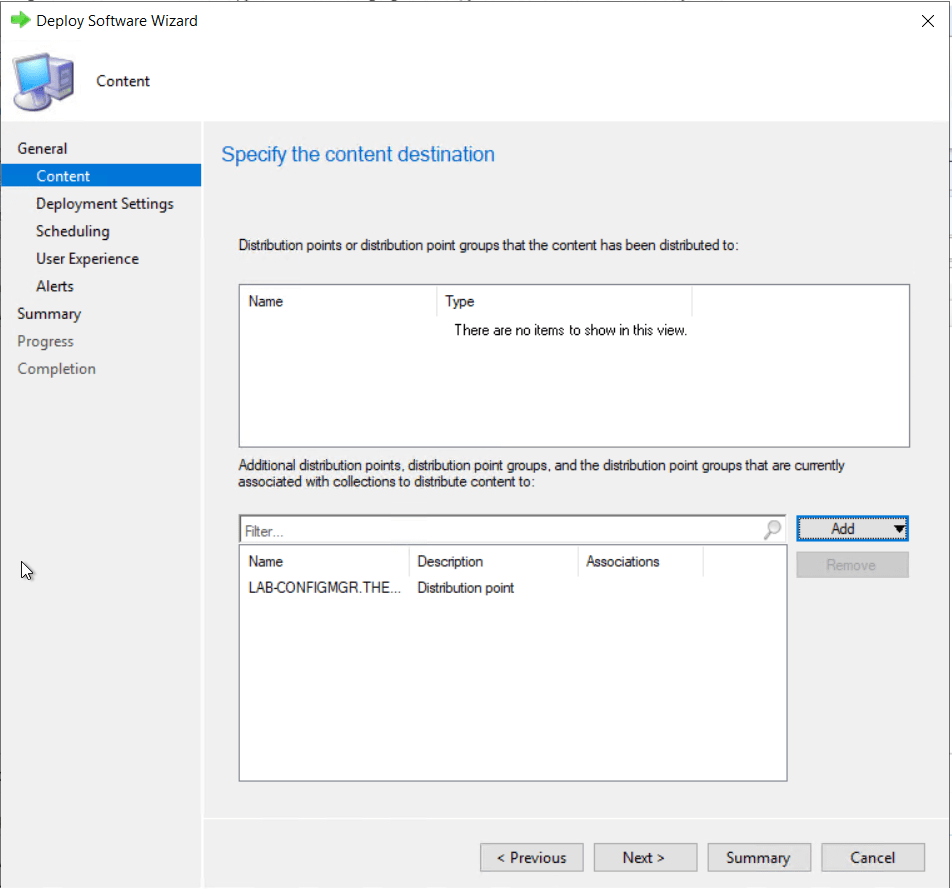
Add the application to the required distribution points so that content is transferred.
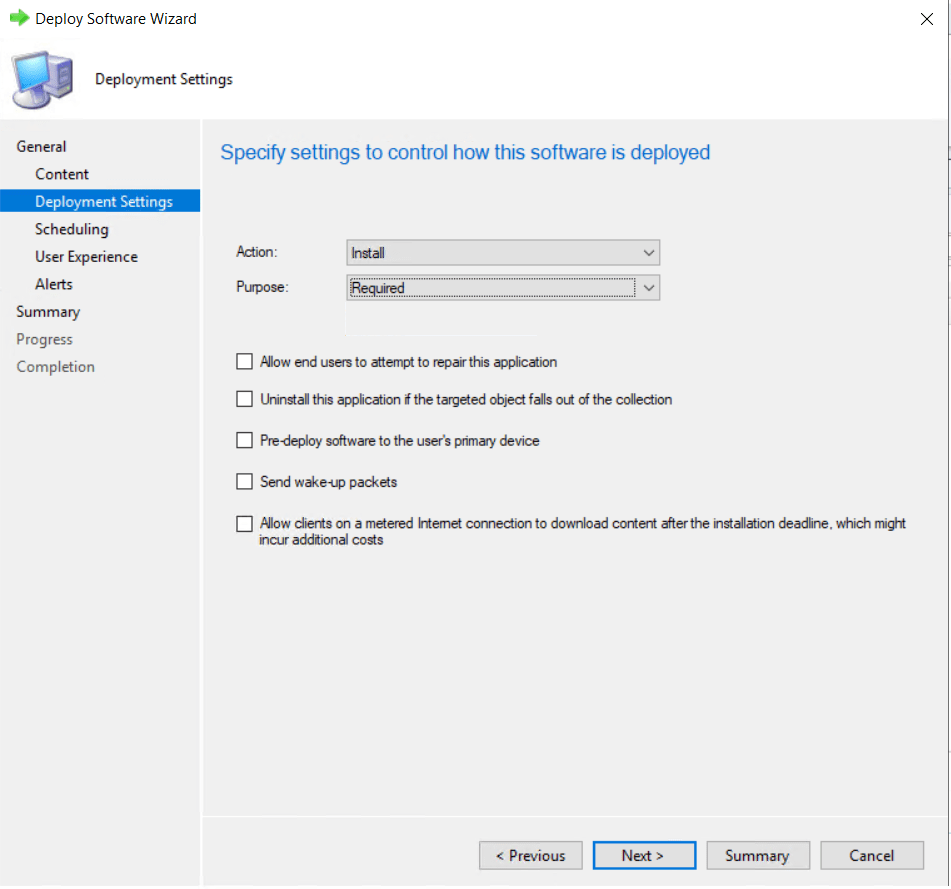
There are two install type available or required. To force the install use required.
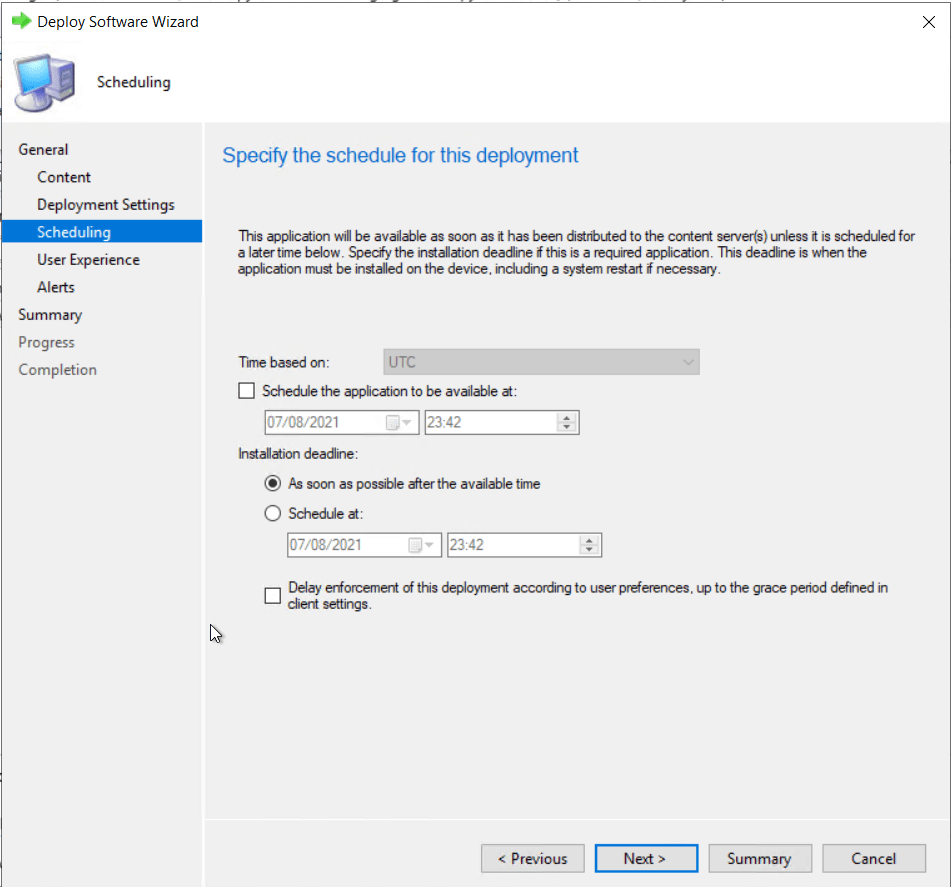
For scheduling I setup as soon as possible but this can be set to what ever time the application should start to install.
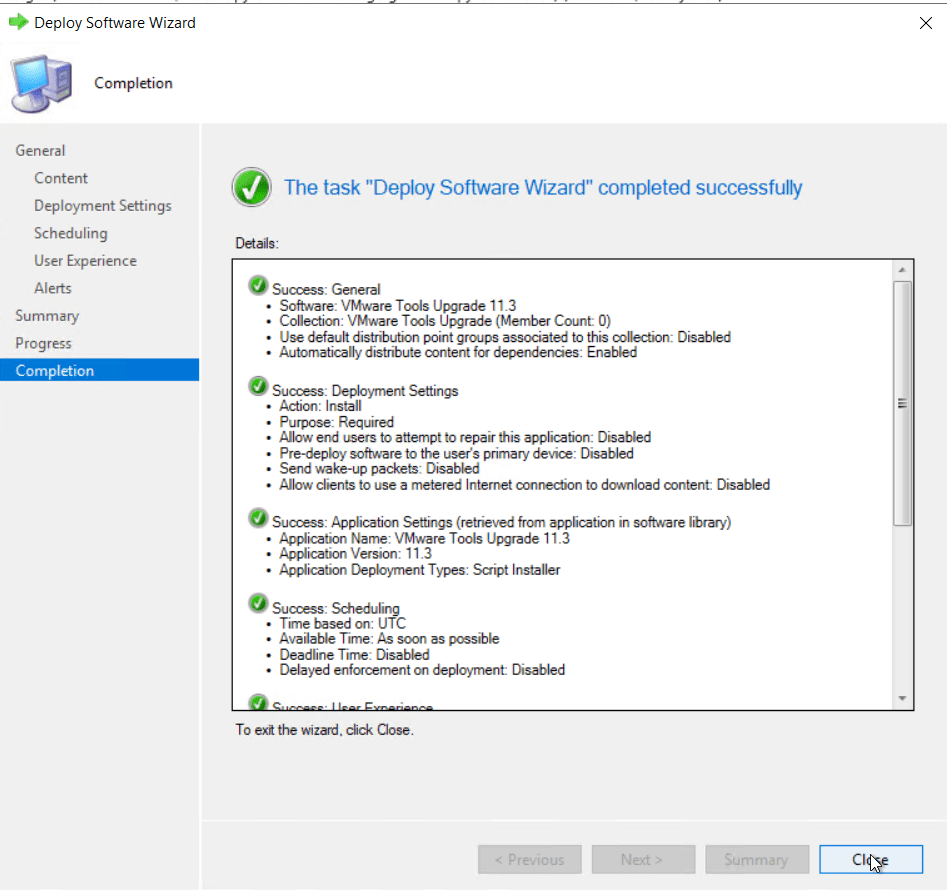
I left user experience and alerts as default and completed the deployment wizard.
Once the application deployment has been assigned to the client the app should now show in software center on the client and start the upgrade.
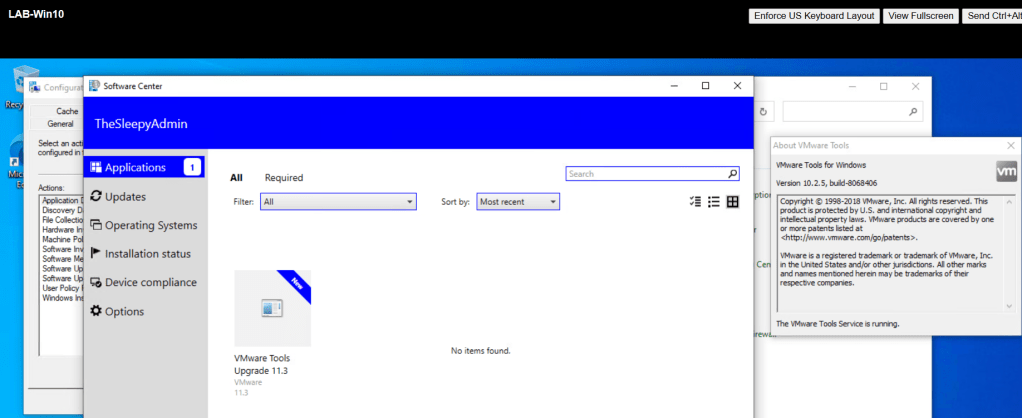
After the upgrade completes the version of VMware tools should be 11.3 and will prompt for reboot if required.

These are the main way I manage VM tools upgrades, I usually try to use VM options for most severs as it works well and requires the least manual intervention to keep VMware tools up to date.
