In this post we will be going through using the Microsoft PowerShell AZ Module to manage resources in Azure.
Using PowerShell to managed Azure resources can have advantages over using the Azure portal as it can be easier to do tasks and export configuration data.
I use the Az module learn pages below to find the commands I need.
If you already have the Az module installed it a good idea to update as new command and fixes can be added to the module over time.
Update-Module -Name Az -Force
Once we have the module installed we can connect to start managing resources.
Use Connect-AzAccount command to connect and put the Azure account with permission to connect.
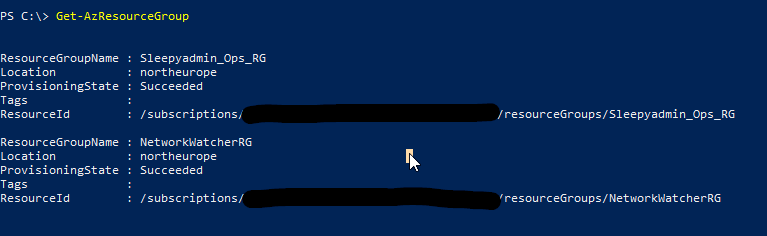
If you connect and there are multiple subscriptions, you can use the below command to check what subscription are available and the select the correct subscription to use.
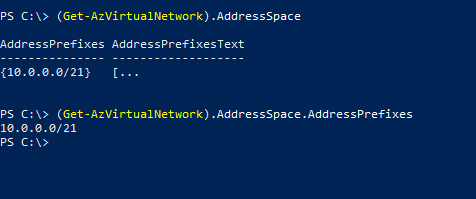
To select specify properties we can use select-object, to get sub properties like address space and subnets we can use hash tables to format the properties like below.
In this post we will be going through the process of using PowerShell to deploy VM’s using the Az module. We will then use a csv file to create multiple VMs.
To start we will need an existing resource group, vnet and subnet that will be use for the VM to be built in and connect the nic.
Next we need to have the Az PowerShell module installed this can be done by using
Install-Module -Name Az -Repository PSGallery -Force
if the module is already installed it a good idea to check if there is any updates we can use the below command to update the module.
Update-Module -Name Az -Force
Once we have the module and pre-req resources in Azure we can start to create the command that will be used to build the VM.
I use the New-AzVM learn page to check on what parameters I wanted to use to create the VM .
Once we have the parameters set we can then call them using
New-AzVm @vmproperties
We can run get-azvm to check the vm is created and running.
To deploy multiple VM’s using a csv file we can use the same splatting we will just be updating to using a foreach loop and import csv.
First we need to create the csv below is the heading that I used.
Next we need to update the parameters splatting to use the variable that will be used in the foreach loop in my case its $vm.
Below is the updated parameters.
Save the script and we will connect to Azure again and run.
The csv and splatting can be updated to add or remove additional parameters.
The only issue I have found is that there is no way to stop a new NSG being create unless you specify an existing NSG. For each VM I deployed it create a new NSG.
I had to manually go in and delete these NSG’s as I am using a NSG on the subnet and don’t want them on the VMs nics.
It looks like in a future release of the Az module you will be allowed to specify no NSG.
This can be an useful alterative for deployments of VM’s if you aren’t that familiar with Arm or bicep templates and more comfortable using PowerShell.
In this post we will be going through using the different KQL operators
First we will use the search operator to return all data in the log workspace, this can be useful when trying to find a the table we want to query or see specific event type.
search *
If we want to return specific number for of rows but not in specific order we can use take 10
Table
|take  10
To return a list of unique values in a column we can use distinct.
Table
| distinct AppDisplayName
To select multiple rows we can use the or operator
Table
| where colume_name contains "value" or colume_name  contains "value" Signup Portal"
| project  value1, value2
To order the data we can use order by
Table
| where colume_name contains "value" or colume_name  contains "value" Signup Portal"
| order by type
| project  value1, value2
To return the first set to rows we can use top
Table
| top 10 by colume_name
| project value1
To return data between a specific date and time we can use the between operator
Table
| where TimeGenerated between (datetime(2023-08-14T19:12:00) .. datetime(2023-08-15T19:12:00))
In the next post we will go through Query and Structure Data, as well as creating data in visualizing data in charts using the render operator.
In this post we will be going through the process of migrating a VM in to an availability zone.
Azure availability zones are designed to help with availability for business-critical workloads. Using availability zone allow VMs to be replicated to different datacenter within the same Azure region.
There is not currently an easy process to move a VM in to an availability zone as this needs to be configured when the VM is originally deployed.
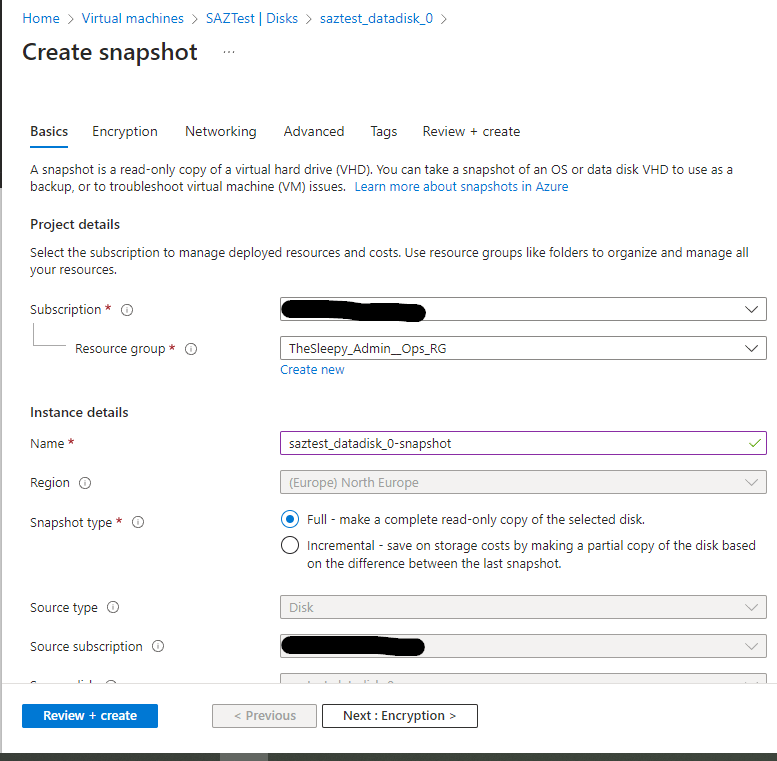
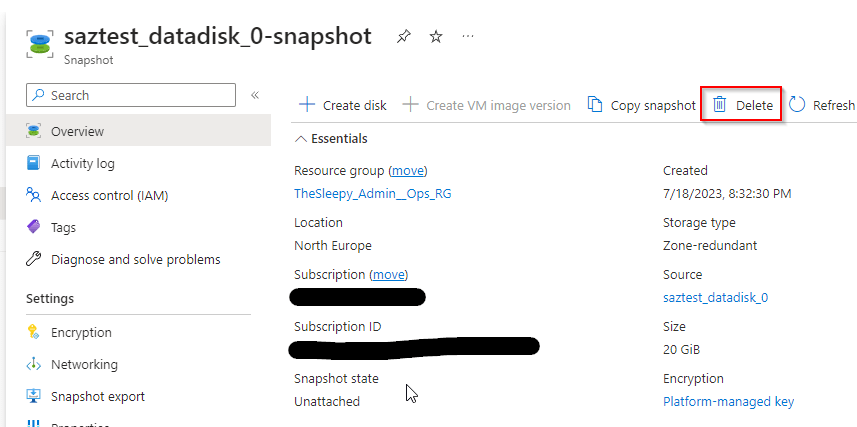
The process to migrate does required down time for the VM as we will need to snapshot the VM, create new disks from the snapshot and deploy in to an availability zone.
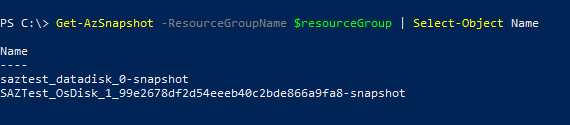
We will be using PowerShell to create a snapshot of the existing VM disks , create the new disks from the snapshots and create a new VM using the existing VM config.
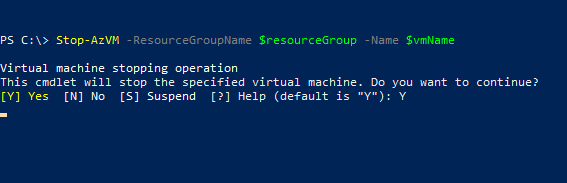
I will be doing this on test VM with no live data but for an live server make sure to have a full backup as we will be deleting the VM and use the existing configuration to recreate the VM with disk in the availability zone.
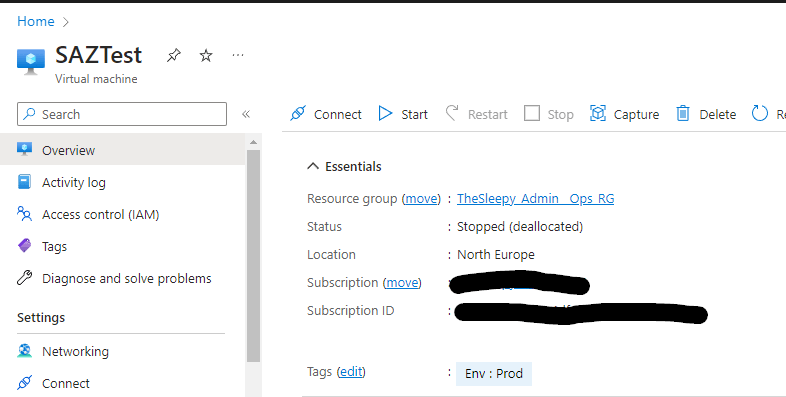
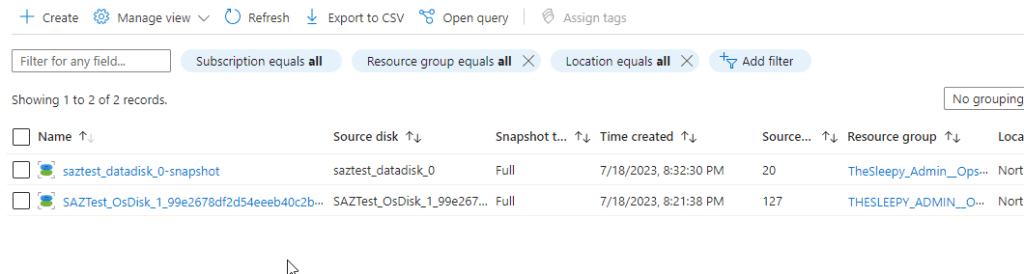
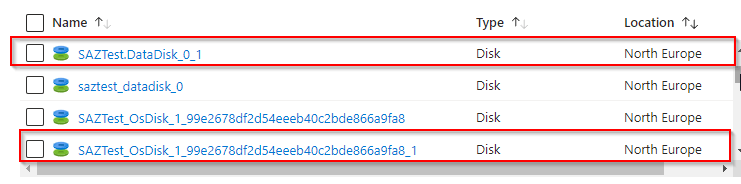
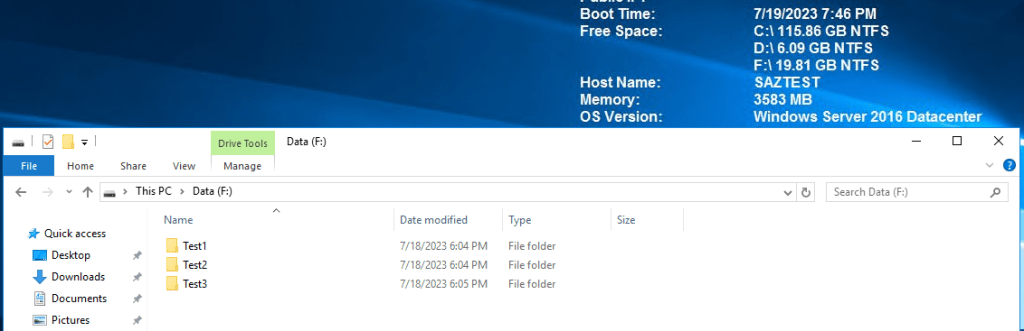
I created a test VM call SAZTest with one data disk, that is not in an availability zone.
First we need to connect to AZ PowerShell and select the correct subscription if there are multiple.
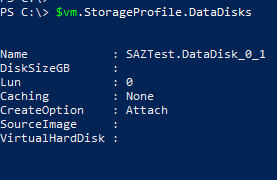
Next we get the VM that we will create a snapshot of the disk. We will be using the $vm variable to get the disk and for recreating the VM later to keep the existing configuration.
Next we set the VM boot diagnostic if this is not set the VM will default to create a storage account to use for boot.
Set-AzVMBootDiagnostic -VM $createvm -Enable
We can also change this after by going to boot diagnostics on the VM and changing to enabled with managed storage account.
Last step is to create the new VM. If you have Azure Hybrid Benefit licensing you can enabled this on the by adding the -LicenseType Windows_Server (I don’t so I wont be on this example).
Kusto Query Language (KQL), is a query language developed by Microsoft for querying and analyzing data. KQL is specifically designed for working with structured, semi-structured, and unstructured data, and it offers a simple and intuitive syntax for expressing complex queries.
KQL is used in log analytics, security monitoring, and business intelligence. It allows users to extract insights from vast amounts of data by using a combination of filtering, aggregating, and transforming operations. With its rich set of operators, functions, and control flow statements, KQL enables users to perform advanced analytics and create sophisticated queries.
In the next few blog post’s we will be going through how to send data to a log workspace and creating KQL queries to show how we can visualize and gather data.
I have wanted to do more with KQL and I am using this series to improve my own KQL and hopefully it will be of use to other if you are just starting out.
First step is we need to create a Azure Log workspace.
Go to Log Analytics workspace blade in Azure and click create.
Select a subscription
Create or select and existing resource group
Give the workspace a name
Set the region
Select tags if needed, review and create.
It will take a few minutes to finish deploying.
Once we have the log workspace created we can start to send data that we can then query.
First we will be sending storage account diagnostic data.
To enabled to go the storage account and select diagnostic settings.
Enabled the diagnostic for the required storage type, I am going to enable for blob and file.
Click on the storage type and click add diagnostic settings.
Select the logs to send and the log analytics workspace.
After enabling for both file and blob the diagnostic status should now show as enabled.
We will can generate some data by creating and delete some blob and azure file share.
Once we have some data can start to write our KQL query. First we can run against the full table by using StorageBlobLogs. I used the Azure monitor reference to find the correct table to use.
If we want to select specify rows and filter the data that is returned we can use the where operator. In below example I am select only the storage write results.
StorageBlobLogs
| where Category == 'StorageWrite'
In the next post we will go through using different operators like project, summarize, rendering…
Azure Key Vault is a cloud-based service provided by Microsoft Azure that allows users to securely store and manage keys, secrets, and certificates used in their applications and services.
It acts as a repository for sensitive information and provides a secure way to access and manage sensitive data. Key Vault offers features such as key and secret rotation, access policies, and auditing capabilities, ensuring that sensitive data remains protected at all times.
It integrates with other Azure services and provides encryption and access control, making it a reliable solution for safeguarding critical data.
In this post we will be going through configuring Azure Key Vault, adding some secrets and calling these secrets using PowerShell.
Before using Azure Key Vault, there are a few prerequisites that need to be in place:
Azure Subscription: You will need an active Azure subscription to create and manage Azure Key Vaults.
Resource Group: Create a resource group in Azure
Access Control: Ensure that you have the necessary permissions and role-based access control (RBAC) rights to create and manage Azure Key Vaults. The required roles typically include Owner, Contributor, or Key Vault Contributor.
Network Configuration: Configure your virtual network and firewall rules to allow access to the Azure Key Vault. You can limit access to specific IP addresses or Azure services based on your security requirements.
I will be using a pre-existing resource group and VNET and we wont be covering those in this post.
Azure Key Vault and secrets can be created either using AZ CLI, AZ PowerShell and the Azure portal. In this post we will be using the Azure portal and will create a new secret using AZ PowerShell.
First step is to create a new key vault in the Azure admin portal search for key vault and open the blade.
Click create
Select the resource group
give the vault a name
set the region
set the pricing tier
set soft delete
Set the permission model and resource access.
I will be leaving public access open but in production I would limit this and create a private endpoint.
Review the setting and create the key vault.
The deployment will take a minute to complete.
Before we can being using the key vault we need to give permission.
Go to the key vault, select IAM and click add.
Next select the role to assign. In this case I am using Key Vault Administator.
Select the member, I am using a group, this could also be a managed Identity incase we need to allow Azure function or automation account to connect.
Review and assign the permissions.
Now that we have the key vault and permission set we can add some secrets.
Go to objects and secrets. Click on generate/import
Give the secret a name and a value, we can also set activation / expiration dates and tags.
Click create to add the secret.
Now we should see the secret in the secrets blade.
We can view the value directly in the Azure console be clicking on the secret and view the secret value.
The last step is to test that we can call the value using PowerShell. To run these command we first have to install the AZ PowerShell module.
Connect using AZ PowerShell
Connect-AzAccount
If there are multiple subscriptions we need to set using Set-AzContext
Set-AzContext -Subscription "Subscription name"
Use the Get-AzKeyVaultSecret command to to view the secret
$setsecretvalue = ConvertTo-SecureString "This is another secret value" -AsPlainText

Set-AzKeyVaultSecret -VaultName "vault name" -Name "secret name" -SecretValue $setsecretvalue
Now we can call the secret to view that the value has been set.
This was quick run through of calling secrets using Azure Key Vault and PowerShell, this can be use full when a scripts that need to authenticate and can be used to remove any hard coded passwords or strings from scripts.
Azure Automation with Managed Identity enables you to automate and orchestrate various tasks and processes within Azure environments. With the added benefit of Managed Identity, it eliminates the need for using credentials and simplifies authentication and authorization process.
By leveraging Azure Automation, you can create and schedule runbooks, which are sets of instructions or scripts, to perform routine or complex operations such as provisioning resources, managing virtual machines, or deploying applications. These runbooks can be executed on a schedule or triggered by specific events.
In this post we will go through setting in an Azure Automation account, runbook and use a managed identity to authentication.
To create a automation account.
Go to the Automation Account blade and click create.
Set the subscription, resource group, name and region.
Set the managed identities, we will be using system assigned the below link to Microsoft document outlines the differences between system / User.
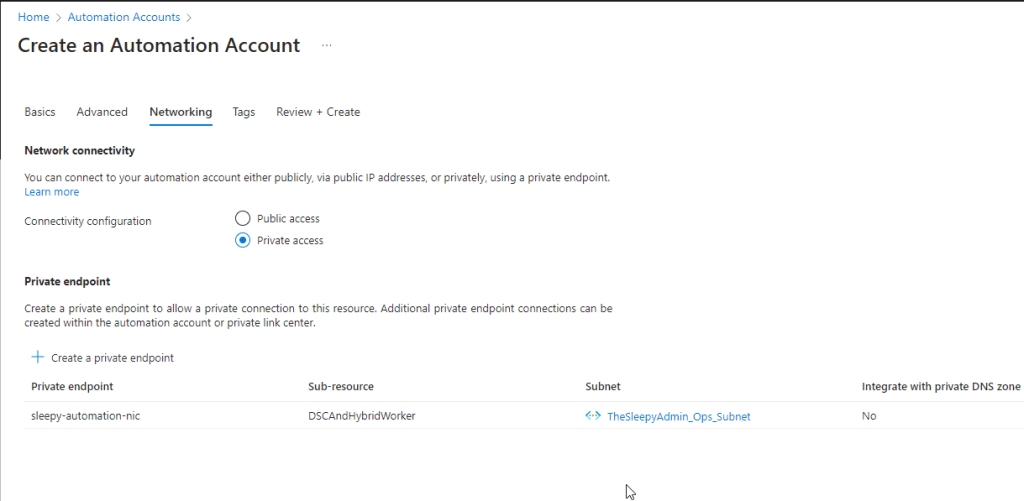
We will be setting connectivity configuration to private access and create a private endpoint to assign a NIC with a private IP.
Next set tags if required.
Review the details and deploy.
It will take a minute or so for the deployment to complete.
We can now check and confirm that the service principal for the automation account has been created.
We can check by going to to Azure AD > Enterprise Application and search with the objectID
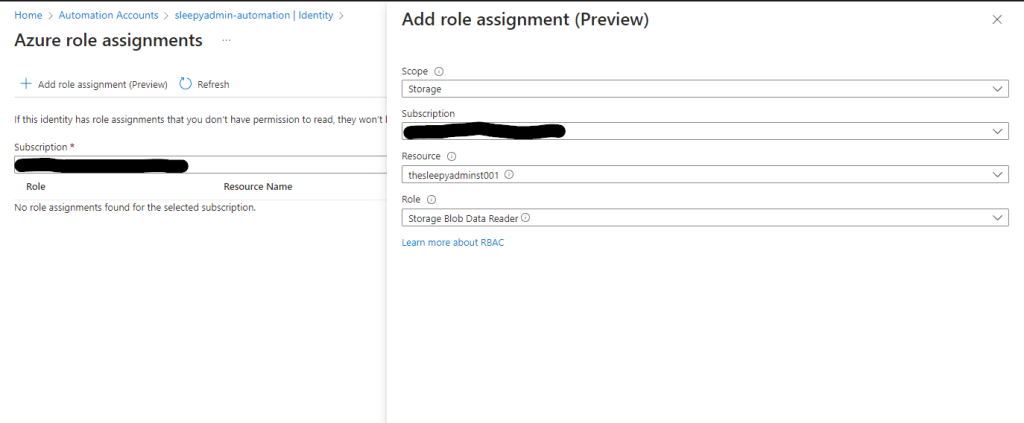
Next we need to assign the required permission. To assign go to Identity and select Azure role assignments.
The permission can be scoped to subscription, resource group, key vault, storage account. I will be setting scope to storage and assigned the storage blob data reader to one of my storage accounts.
Save and the role should apply.
Next we will create a runbook to run a set of task using the managed identity of the automation account.
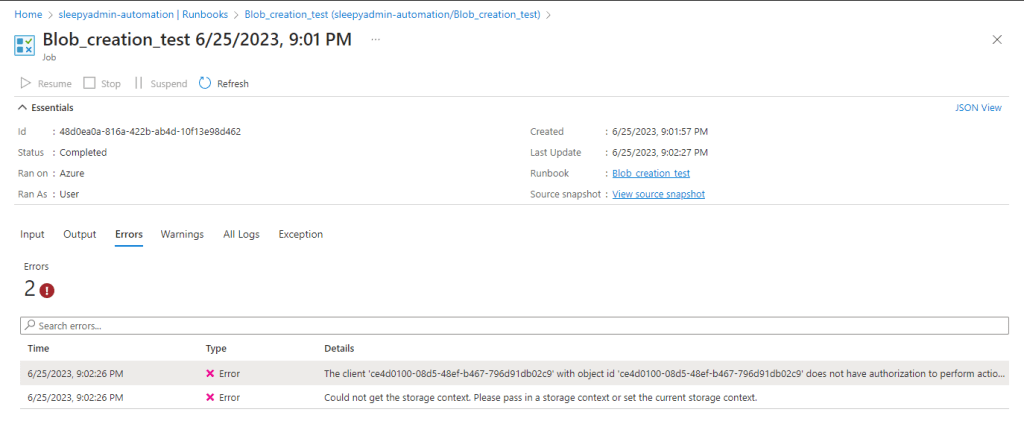
Add in the PowerShell script to be run. I am going to try create a blob container but this should fail as I have only give read access. Click publish to allow the runbook to be run.
Click start to run the runbook.
Once competed we can view the errors from the run.
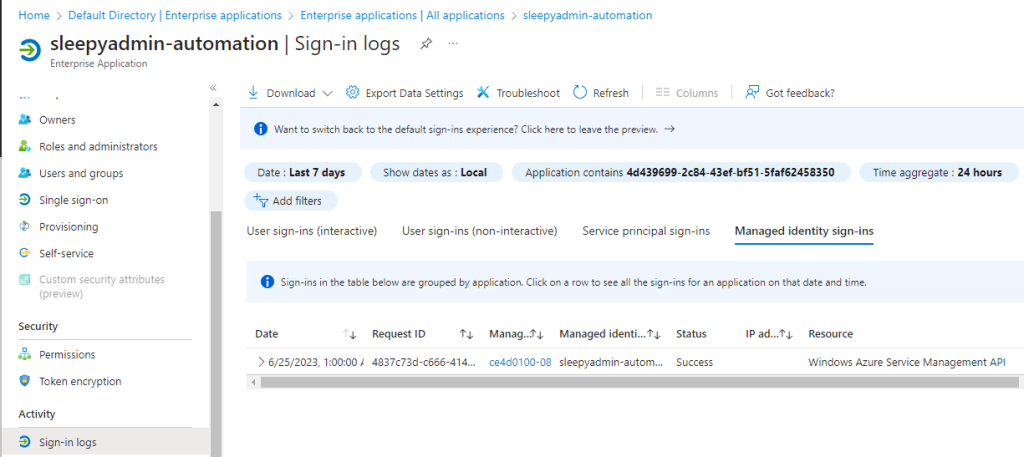
We can also check the enterprise app for the automation account and see the sign-in was successful.
This was just a quick example Azure Automation with Managed identify, this can be a very useful tool for setting up task that need to be run on a scheduled in Azure.
Azure Application Gateway is a service provided by Microsoft Azure that allows you to build a scalable and secure web traffic routing solution. It acts as a reverse proxy service, providing features like load balancing, SSL termination, URL-based routing, session affinity, and application-level security.
Designed to optimize web application delivery, Azure Application Gateway enhances the performance, availability, and security of your web applications. It plays a crucial role in managing and distributing traffic to backend servers, ensuring high availability and seamless user experience.
In this post we will be going through deploying and configuring an Azure Application Gateway and present an internal website.
Prerequisites for Deploying Azure Application Gateway:
Azure Subscription: You need an active Azure subscription to create and deploy Azure Application Gateway.
Resource Group: A resource group .
Virtual Network: Set up a virtual network (VNET) where you’ll deploy the Azure Application Gateway. The VNET should have at least one subnet for the gateway and will be dedicated for the gateway.
Backend Servers: Prepare the backend servers or resources that will handle the web traffic forwarded by the Application Gateway.
SSL Certificate: If you want to enable SSL termination, obtain an SSL certificate and private key for your domain.
Public IP Address: Public IP address for the Azure Application Gateway. If you want to expose your application to the internet, a public IP is required.
DNS Configuration: If you plan to use a custom domain name, set up the DNS records to point to the public IP address of the Application Gateway.
Application Gateway SKU: Choose the appropriate Application Gateway SKU based on your performance and scalability requirements.
Once all prerequisites are met we can start to deploy the Application gateway.
To start the deployment go to the load balancing blade or search for application gateway and click create.
Select the resource group
set the name, region and tier, instance count, if using WAF2 create a firewall policy and set the VNET to be used(this is recommend to be a /24 subnet mask).
Set frontend IP.
Set the backend target (this can be through IP /FQDN, VM or App Services). I used VM
We need to add a routing rule listener and backend targets.
Set tags and then review configuration and deploy.
The Application Gateway will take a little while to deploy. Once the deployment has finished the gateway should now be showing.
Once deployed we can check to see if the site is contactable by using the public IP for the Application Gateway.
Next we will enable the application gateway logs to send to a log workspace.
Go to Application Gateway and select the diagnostic settings and add diagnostic settings.
Enabled all logs and select log workspace.
We can also add rules to the WAF policy to restrict access to the site. I will be adding a rule to only allow access from my public IP.
To add the rule go the Web Application Firewall policies (WAF) blade and select the policy we created earlier.
Go to custom rules and select add custom rule.
Give the rule a name, enabled, set priority and set the conditions.
Once the rule is added, click save to apply.
We can test accessing the site from the allowed IP and then from a different IP to check the block is working.
We can confirm using the log workspace we configure in the diagnostic setting earlier using a KQL query .
I used the below query.
AzureDiagnostics
| where ResourceProvider == "MICROSOFT.NETWORK" and Category == "ApplicationGatewayFirewallLog"
|
project TimeGenerated, clientIp_s, hostname_s, ruleSetType_s, ruleId_s, action_s
This was a quick run through of deploying and configuring an Application Gateway.
In this post we will be going through setting up and configuring Azure Site Recovery (ASR) using zone to zone replication.
The zone to zone replication feature of Azure Site Recovery allows the replicate data and resources within the same region but across different zones. This is particularly useful for high availability of applications and services in the event of a zone outage.
Zone to Zone Replication in Azure ASR offers several advantages. It provides low recovery point objectives (RPOs) and recovery time objectives (RTOs) by continuously replicating changes. This ensures minimal data loss and enables quick failover in case of a disruption.
When configuring zone to zone replication there are a few pre-req, one is that the VM’s that are going to be replicated needs to be in an availability zone if not you wont be able to select it.
For existing VM’ the only way to move to an availability zone is through a CLI to copy and re deploy the VM.
Setting the availablity zone can be done when building the VM through the portal or using bicep /arm templates.
The second pre-req is that there is enough free IP on the subnet.
To keep the same IP address as the source VM it needs to be configured to use a static address on the network adapter settings.
To start using ASR we need to create a new recovery services vault.
To create a new ASR go to Recovery Services vaults blade in the Azure portal and click on create.
Select the subscription that the vault will be deployed, resource group, give the vault a name and set the region.
Add tags if in use and then review and create.
The deployment of the vault can take a few minutes complete.
Select the vault, go to replicated items and select Azure virtual machines.
Select the region, resource group and select the availability zone that the VM was deployed too.
Select the VM to be replicated, if the VM doesn’t show check to make sure it was deployed to an availability zone.
Next either create a new target resource group or use an existing one and select failover network.
Select availability options to specify the target zone.
Select the default or create a replication policy. I set to update extension to allow ASR to manage (this will create an Azure Automation Account).
Review setting to confirm everything is correct and enable.
If we check the site recovery jobs we should see the replication be create.
We can also see the status of the replication under replicated items.
It will take a little while for the synchronization to complete. Once completed there will be a warning, this is just alerting that the failover hasn’t been tested.
Last step will be to test failover.
If we click on the three dots beside the replicated item we then have the option to failover or test failover.
select the recover point and virtual network (for a test failover this can’t be the same as the production VNET.)
To check the status of the failover job, go to Monitoring > Site Recovery Jobs and select the failover job.
Once the job completed there should be a VM running with -test at the end of the name in the recovery resource group.
The VM will have a different IP address than the production VM, once where finished testing the last step is to clean up the failover test.
Go back to the replicated items and select cleanup test failover.
We can add in a note if we want, tick testing complete and then click ok to remove the test VM.
The cleanup job will run this will take a few minutes to complete and the test VM should now be gone.
To do the full failover is the same process just using failover.