Getting Started with Microsoft AZ PowerShell

In this post we will be going through using the Microsoft PowerShell AZ Module to manage resources in Azure.

Using PowerShell to managed Azure resources can have advantages over using the Azure portal as it can be easier to do tasks and export configuration data.

I use the Az module learn pages below to find the commands I need.

https://learn.microsoft.com/en-us/powershell/module/?view=azps-10.3.0

First step is to install the Az module

Install-Module -Name Az

If you already have the Az module installed it a good idea to update as new command and fixes can be added to the module over time.

Update-Module -Name Az -Force

Once we have the module installed we can connect to start managing resources.

Use Connect-AzAccount command to connect and put the Azure account with permission to connect.

If you connect and there are multiple subscriptions, you can use the below command to check what subscription are available and the select the correct subscription to use.

Get-AzSubscription

Set-AzContext -SubscriptionName SubName

To find a command we can use the Get-Command and wildcards to return the list of commands with a specify name below I am looking for network commands

Get-Command Get-Az*Network*

To list all resource groups we can use

Get-AzResourceGroup

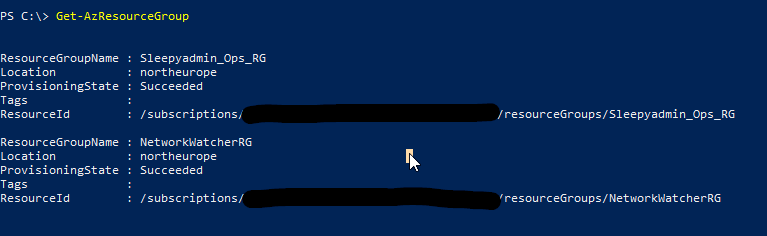
To select a specify resource group use

Get-AzResourceGroup -ResourceGroupName Sleepyadmin_Ops_RG

To get a list of virtual network we can use

Get-AzVirtualNetwork

When running commands like Get-AzVirtualNetwork, they will sometimes only return a few properties.

To return the full set of properties we can use format-list

Get-AzVirtualNetwork | Format-List

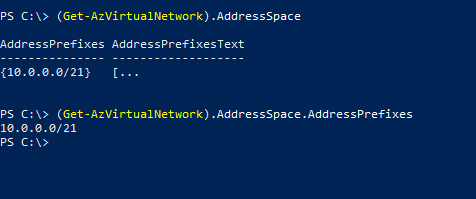
We can select specify properties by using Parentheses and the properties name. Below we are select the virtual network address space.

(Get-AzVirtualNetwork).AddressSpace.AddressPrefixes

To select specify properties we can use select-object, to get sub properties like address space and subnets we can use hash tables to format the properties like below.

Get-AzVirtualNetwork | Select-Object ResourceGroupName,Name, @{N='AddressSpace';E={$_.AddressSpace.AddressPrefixes}}, @{N='SubnetName';E={$_.Subnets.Name}}

We can use the above method with other command like with Network security groups to export firewall rules.

Get-AzNetworkSecurityGroup -Name NSG_Name | Select-Object Name,@{N="RuleName";E={$_.SecurityRules.Name}},ResourceGroupName,@{N="DestinationPortRange";E={$_.SecurityRules.DestinationPortRange}}

This has been a quick overview of getting start with Az PowerShell.

Deploying Azure VM using PowerShell and CSV

In this post we will be going through the process of using PowerShell to deploy VM’s using the Az module. We will then use a csv file to create multiple VMs.

To start we will need an existing resource group, vnet and subnet that will be use for the VM to be built in and connect the nic.

Next we need to have the Az PowerShell module installed this can be done by using

Install-Module -Name Az -Repository PSGallery -Force

if the module is already installed it a good idea to check if there is any updates we can use the below command to update the module.

Update-Module -Name Az -Force

Once we have the module and pre-req resources in Azure we can start to create the command that will be used to build the VM.

I use the New-AzVM learn page to check on what parameters I wanted to use to create the VM .

We will need to chose a sku size and image to deploy. These can be checked using PowerShell.

For the below exam I will be using a Standard_d2ds image sku to search, we can also search based on cores or memory either.

Get-AzVMSize -Location northeurope | Where-Object {$_.Name -like "Standard_D2ds*"}

Next we need a image for this I will be using Windows server 2022.

Get-AzVMImageSku -Location "northeurope" -PublisherName "MicrosoftWindowsServer" -Offer "WindowsServer" | Where-Object {$_.Skus -like "*2022*"}

The image value is made by joining three rows together:

PublisherName:Offer:Skus

for 2022 Azure edition it will be the below.

Now that we have the sku and image we can start to create the command to build the VM.

I will be using splatting as it easier to read when using a lot of parameters.

$vmla = "AzureUser"
$vmlapass = ConvertTo-SecureString "password" -AsPlainText -Force

$vmproperties = @{
    ResourceGroupName = "RG Name"
    Name = "VM Name"
    Location = "AZ Region"
    VirtualNetworkName = "vnet"
    SubnetName = "subnet"
    Size = "sku size"
    Image = "Image"
    Zone = "1"
    Credential =  New-Object System.Management.Automation.PSCredential ($vmla, $vmlapass);
}

Once we have the parameters set we can then call them using

New-AzVm @vmproperties

We can run get-azvm to check the vm is created and running.

To deploy multiple VM’s using a csv file we can use the same splatting we will just be updating to using a foreach loop and import csv.

First we need to create the csv below is the heading that I used.

Next we need to update the parameters splatting to use the variable that will be used in the foreach loop in my case its $vm.

Below is the updated parameters.

Save the script and we will connect to Azure again and run.

The csv and splatting can be updated to add or remove additional parameters.

The only issue I have found is that there is no way to stop a new NSG being create unless you specify an existing NSG. For each VM I deployed it create a new NSG.

I had to manually go in and delete these NSG’s as I am using a NSG on the subnet and don’t want them on the VMs nics.

It looks like in a future release of the Az module you will be allowed to specify no NSG.

https://github.com/Azure/azure-powershell/issues/16890

This can be an useful alterative for deployments of VM’s if you aren’t that familiar with Arm or bicep templates and more comfortable using PowerShell.