Using Managed Identities with Azure Automation Runbooks

Azure Automation with Managed Identity enables you to automate and orchestrate various tasks and processes within Azure environments. With the added benefit of Managed Identity, it eliminates the need for using credentials and simplifies authentication and authorization process.

By leveraging Azure Automation, you can create and schedule runbooks, which are sets of instructions or scripts, to perform routine or complex operations such as provisioning resources, managing virtual machines, or deploying applications. These runbooks can be executed on a schedule or triggered by specific events.

In this post we will go through setting in an Azure Automation account, runbook and use a managed identity to authentication.

To create a automation account.

Go to the Automation Account blade and click create.

Set the subscription, resource group, name and region.

Set the managed identities, we will be using system assigned the below link to Microsoft document outlines the differences between system / User.

https://learn.microsoft.com/en-us/azure/active-directory/managed-identities-azure-resources/overview#managed-identity-types

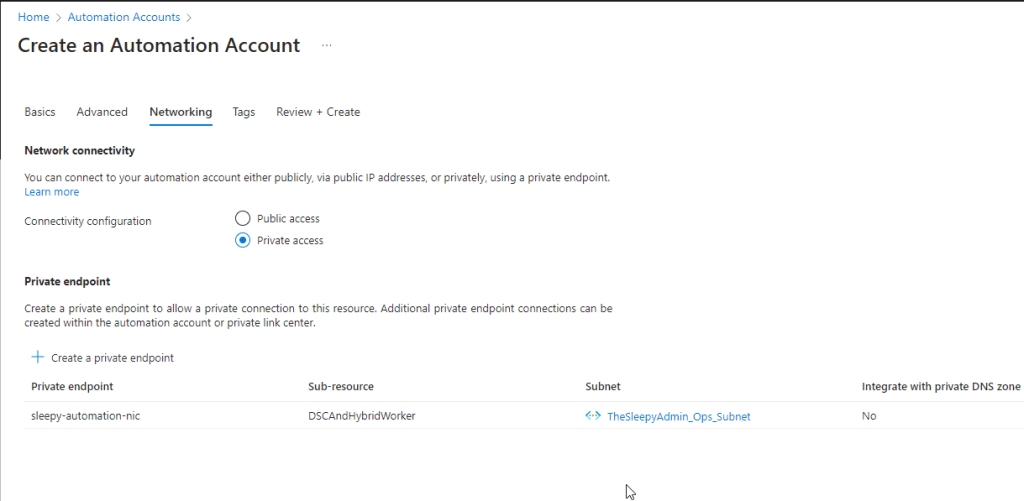
We will be setting connectivity configuration to private access and create a private endpoint to assign a NIC with a private IP.

Next set tags if required.

Review the details and deploy.

It will take a minute or so for the deployment to complete.

We can now check and confirm that the service principal for the automation account has been created.

We can check by going to to Azure AD > Enterprise Application and search with the objectID

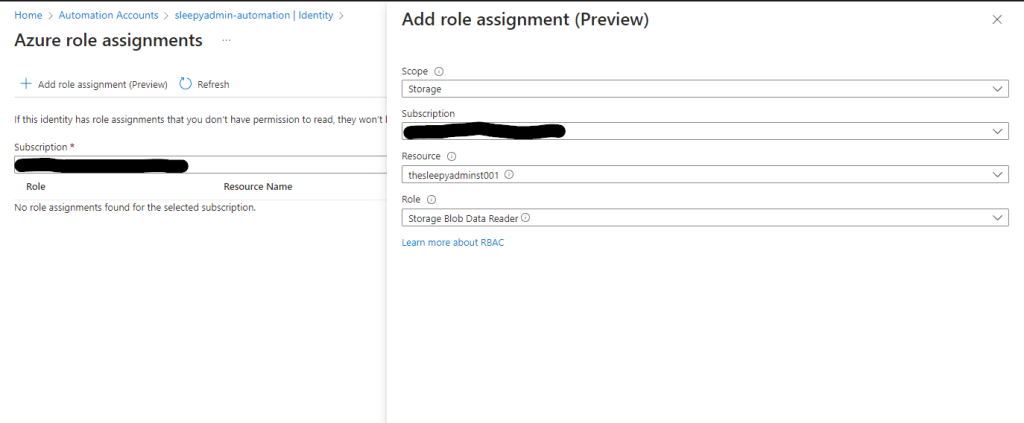
Next we need to assign the required permission. To assign go to Identity and select Azure role assignments.

The permission can be scoped to subscription, resource group, key vault, storage account. I will be setting scope to storage and assigned the storage blob data reader to one of my storage accounts.

Save and the role should apply.

Next we will create a runbook to run a set of task using the managed identity of the automation account.

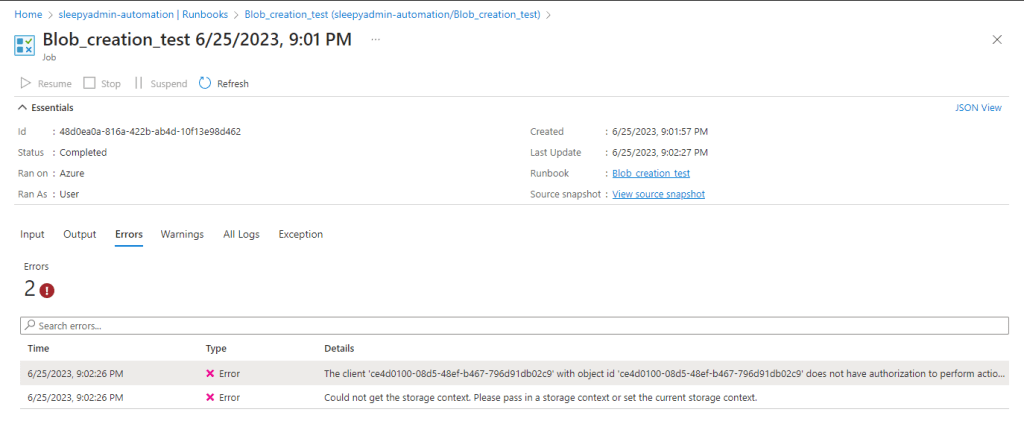
Add in the PowerShell script to be run. I am going to try create a blob container but this should fail as I have only give read access. Click publish to allow the runbook to be run.

Click start to run the runbook.

Once competed we can view the errors from the run.

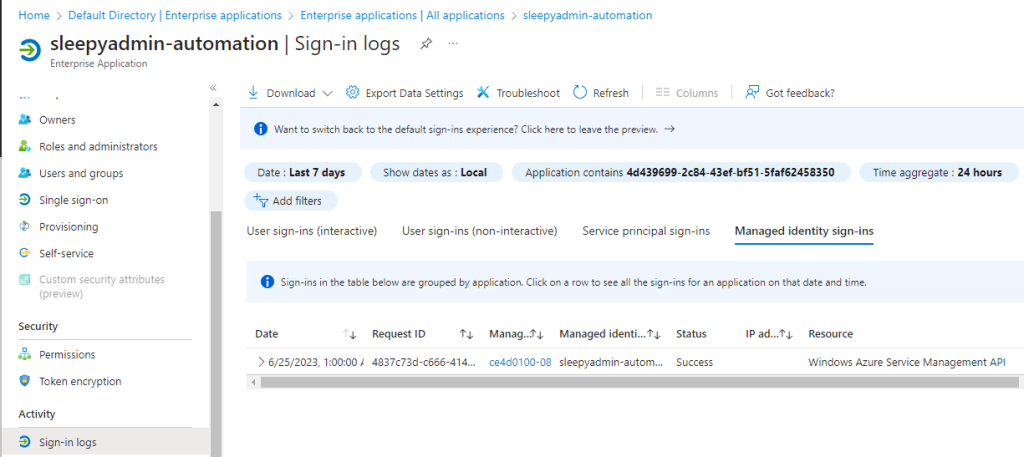
We can also check the enterprise app for the automation account and see the sign-in was successful.

This was just a quick example Azure Automation with Managed identify, this can be a very useful tool for setting up task that need to be run on a scheduled in Azure.

Deploy and Configure Azure Application Gateway

Azure Application Gateway is a service provided by Microsoft Azure that allows you to build a scalable and secure web traffic routing solution. It acts as a reverse proxy service, providing features like load balancing, SSL termination, URL-based routing, session affinity, and application-level security.

Designed to optimize web application delivery, Azure Application Gateway enhances the performance, availability, and security of your web applications. It plays a crucial role in managing and distributing traffic to backend servers, ensuring high availability and seamless user experience.

In this post we will be going through deploying and configuring an Azure Application Gateway and present an internal website.

Prerequisites for Deploying Azure Application Gateway:

  • Azure Subscription: You need an active Azure subscription to create and deploy Azure Application Gateway.
  • Resource Group: A resource group .
  • Virtual Network: Set up a virtual network (VNET) where you’ll deploy the Azure Application Gateway. The VNET should have at least one subnet for the gateway and will be dedicated for the gateway.
  • Backend Servers: Prepare the backend servers or resources that will handle the web traffic forwarded by the Application Gateway.
  • SSL Certificate: If you want to enable SSL termination, obtain an SSL certificate and private key for your domain.
  • Public IP Address: Public IP address for the Azure Application Gateway. If you want to expose your application to the internet, a public IP is required.
  • DNS Configuration: If you plan to use a custom domain name, set up the DNS records to point to the public IP address of the Application Gateway.
  • Application Gateway SKU: Choose the appropriate Application Gateway SKU based on your performance and scalability requirements.

Once all prerequisites are met we can start to deploy the Application gateway.

To start the deployment go to the load balancing blade or search for application gateway and click create.

Select the resource group

set the name, region and tier, instance count, if using WAF2 create a firewall policy and set the VNET to be used(this is recommend to be a /24 subnet mask).

Set frontend IP.

Set the backend target (this can be through IP /FQDN, VM or App Services). I used VM

We need to add a routing rule listener and backend targets.

Set tags and then review configuration and deploy.

The Application Gateway will take a little while to deploy. Once the deployment has finished the gateway should now be showing.

Once deployed we can check to see if the site is contactable by using the public IP for the Application Gateway.

Next we will enable the application gateway logs to send to a log workspace.

Go to Application Gateway and select the diagnostic settings and add diagnostic settings.

Enabled all logs and select log workspace.

We can also add rules to the WAF policy to restrict access to the site. I will be adding a rule to only allow access from my public IP.

To add the rule go the Web Application Firewall policies (WAF) blade and select the policy we created earlier.

Go to custom rules and select add custom rule.

Give the rule a name, enabled, set priority and set the conditions.

Once the rule is added, click save to apply.

We can test accessing the site from the allowed IP and then from a different IP to check the block is working.

We can confirm using the log workspace we configure in the diagnostic setting earlier using a KQL query .

I used the below query.

AzureDiagnostics 
| where ResourceProvider == "MICROSOFT.NETWORK" and Category == "ApplicationGatewayFirewallLog" 
| 
project TimeGenerated, clientIp_s, hostname_s, ruleSetType_s, ruleId_s, action_s

This was a quick run through of deploying and configuring an Application Gateway.